พักนี้ช่วยเพื่อนดู cloud ของ google กับ amazon
เพราะย้ายบริการระหว่าง cloud ทั้ง 2 ตัว ให้ทำงานกับ wordpress
แล้วพบปัญหาบางอย่างจาก google cloud เกี่ยวกับ
การรองรับ static file หลายร้อย gigabyte กับฐานข้อมูล 20 กว่า gigabyte
และ plug-in ของ wp โหด ๆ อีก 2 – 3 ตัว มีการรายงานพบปัญหา 502 ตลอด
http://aws.amazon.com และ http://cloud.google.com
เหตุที่บันทึกเรื่องราวไว้ เผื่อว่าเพื่อนกลับมาถามอีก จะได้ดำเนินการอีกครั้ง
มีประเด็นแบ่งปัน ดังนี้
1. มีปัญหาเรื่องการ redirect ไปหน้าอื่นของ wordpress ไม่ได้เลย
ต้องเข้าไปแก้ nginx.conf ในบรรทัดที่กำหนดว่า
try_files $uri $uri/ /index.html;
เป็น try_files $uri $uri/ /index.php?$args;
2. ส่วนการเข้า shell ในแต่ละ cloud ก็ต่างกันไป
สำหรับ google cloud ผมจะเข้า control panel แล้วคลิ๊ก ssh
ก็จะเข้า secure shell ได้เลย
แต่กับ amazon cloud เพื่อนจะส่งแฟ้ม .ppk ซึ่งเป็น private key file for authentication
แล้วแจ้ง user name กับ ip ให้ใช้โปรแกรม putty เข้า port 22 ไปจัดการระบบ
เข้าไปก็ใช้ sudo su เป็น root ได้เลย เรื่องนี้เป็นการเริ่มต้นใน cloud แต่ละตัวของผม
http://www.chiark.greenend.org.uk/~sgtatham/putty/download.html
http://www.select2web.com/webservice/amazon-elastic-computer-clound-ec2-part-6-putty-login.html
3. จากนั้นก็ config ให้ ftp เข้าไปแล้วส่งแฟ้มผ่าน user ชื่อ bitnami ได้เลย
ซึ่ง google cloud มีเรื่องต้องกำหนดเกี่ยวกับ permission หลายจุด
แต่ที่เหมือนกันกับ amazon cloud คือ การทำ link มายัง home ของ user
ผมจะเข้าห้อง /home/bitnami
แล้วใช้คำสั่งว่า /home/bitnami# ln -s /opt/bitnami/nginx/html
พอเพื่อน ftp เข้ามาก็เห็นห้อง html แล้วโยนไฟล์เข้าไปใน html directory ได้เลย
4. เพื่อนอยากใช้ memcached ไม่ใช่ memcache บน wordpress
ก็ย้าย host มาหลายตัว จาก dreamhost.com เป็น google cloud และมาเป็น amazon cloud
ก็ได้ help ของ bitnami ช่วยไว้ เพราะ package ที่เลือกไว้ก็ใช้ bitnami
https://wiki.bitnami.com/Components/PHP?highlight=install+memcached#How_to_install_Memcached_module_using_libmemcached_library.3f
5. การ config ให้ใช้งาน php บน nginx ของแต่ละ server ก็ไม่เหมือนกัน
ของ amazon cloud ผลใช้ config ด้านล่างนี้
location ~ \.php$ {
root html;
fastcgi_read_timeout 300;
fastcgi_pass unix:/opt/bitnami/php/var/run/www.sock;
fastcgi_index index.php;
fastcgi_param SCRIPT_FILENAME $request_filename;
include fastcgi_params;
}
6. รหัสผ่านของ root บน MySQL server แต่ละตัวก็จะไม่เหมือนกัน
ก็พบคำแนะนำว่าใช้รหัสผ่านคือ bitnami สำหรับกรณีแรก กรณีอื่นก็ตามรายละเอียดข้างล่าง
https://wiki.bitnami.com/Components/MySQL#How_to_connect_to_the_MySQL_database.3f
The default password for MySQL root user in Virtual Appliances and AMIs is “bitnami”
The default password for MySQL root user in BitNami Cloud Hosting is the same that you set in the administration panel.
The default password for MySQL root user in a BitNami Magento stack is “bitnami1”
7. ใช้ amazon cloud ระบบกำหนดให้เปิดบริการ apache เป็น default
แต่ถ้าจะเปิด nginx เป็น port 80 ด้วยก็ได้ แต่ต้อง config กันหน่อย
เข้าไป config แบบ manual ดูจาก https://wiki.bitnami.com/Components/Nginx
แล้วเข้าไปแก้แฟ้ม config เปลี่ยน port กันทีละแฟ้ม
/opt/bitnami/apache2/conf/httpd.conf จาก 80 เป็น 8088
/opt/bitnami/nginx/conf/nginx.conf จาก 8088 เป็น 80
/opt/bitnami/nginx/conf/nginx.conf จาก 1234 เป็น 80
แล้วสั่ง #service bitnami restart เท่านี้ nginx ก็ตื่นมาบริการผ่าน port 80 แล้ว
8. การ import ข้อมูลขนาดใหญ่หลาย GB เข้า mysql
ที่มองไว้มี 2 วิธี
วิธีที่ 1. ใช้ ftp ส่งแฟ้ม .txt เข้าไปใน server
แล้วใช้คำสั่ง mysqlimport แต่เหมาะกับ csv
http://www.thegeekstuff.com/2008/10/import-and-upload-data-to-mysql-tables-using-mysqlimport/
วิธีที่ 2. หลัง upload .sql ก็ใช้คำสั่งข้างล่างนี้
#mysql -u root -ppassword databasename < filename.sql
เป็นการประมวลผลฝั่ง server
ไม่ใช่ประมวลผลระหว่าง server กับ client
ด้วยการยิงเข้าไปทีละระเบียน เน็ตหลุดก็แย่เลย

อีกเรื่องที่น่าสนใจ
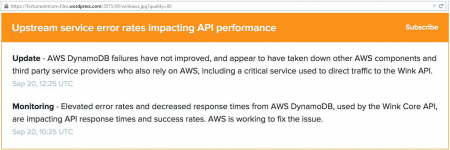
ระบบฐานข้อมูล DynamoDB ของ Amazon ล่มเมื่อเช้าวันอาทิตย์ที่ 20 ก.ย.58
ทำให้ Netflix.com เว็บบริการดูหนัง และอีกหลายเว็บไซต์มีปัญหา
โดยเฉพาะ US-East data center complex in Ashburn, Virgina.
http://fortune.com/2015/09/20/amazon-cloud-snafu/
