#เล่าสู่กันฟัง 63-052 เปิดใช้บัญชี line bot

จำได้ว่าลูกศิษย์ชื่อ หนึ่ง CS-NTU
ทำ linebot ส่งข้อมูลรถบรรทุกเข้าออก
ให้บริษัทด้านลอจิสติกที่ลำพูนตอนฝึกงาน
กับพี่แท็กและพี่กอล์ฟ มีพี่ดูแลใกล้ชิด

วันนี้บ่าย ๆ จึงเข้าไปสมัครใช้บริการไลน์
และสร้างบัญชีสำหรับทำ linebot
และใช้บริการของ heroku.com
ที่บริการ php กับ https พอดี
เพราะเครื่องของผมไม่บริการ https

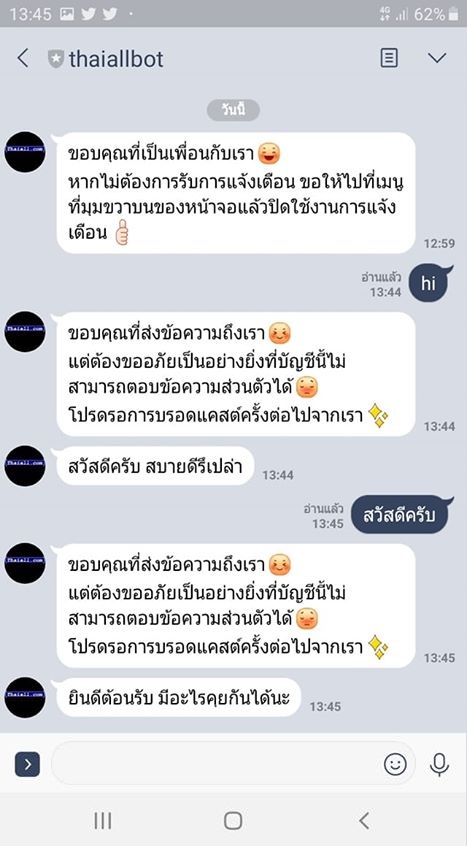
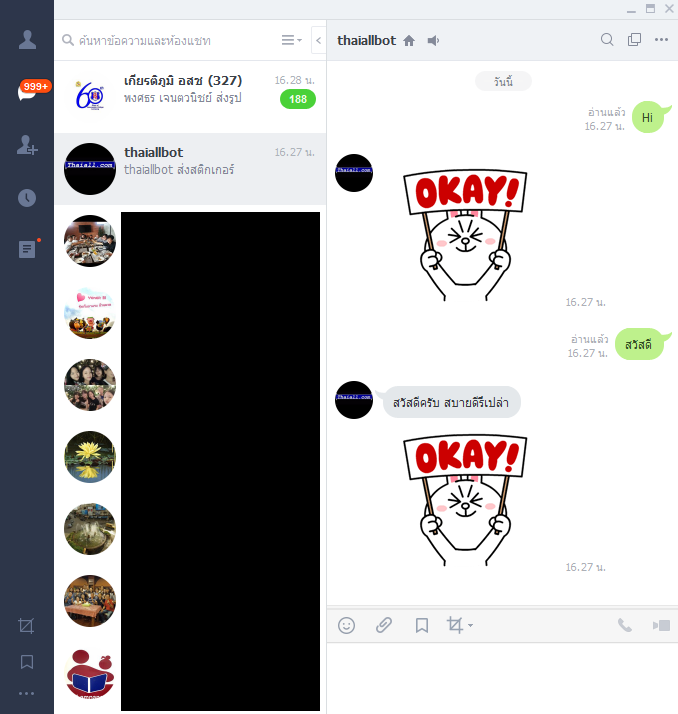
สรุปว่าใช้บริการ reply ผ่านด้วยดี
แต่ push ต้องมาแกะตัวอย่างนิดนึง
เพราะส่งข้อความถึงแต่ละคนเป็นรายไป
เพื่อให้ code เช็คไอดีได้ในอนาคต
และยกเลิกข้อความทักทายอัตโนมัติ

ข้อความที่เตรียมตอบกลับ ก็มี hi กับ สวัสดี ตอบเป็น sticker กับ text เท่านั้น และยังไม่ได้เสียตังให้เค้าครับ ใช้ฟรีอยู่

ขอเข้า line bot ได้ครับ

มี url เพื่อ add friend จาก QR ดังนี้
https://line.me/R/ti/p/%40362lmjyg

#เล่าสู่กันฟัง 63-044 สร้าง php app ผ่าน heroku.com

มีนิสิตวิทย์คอมชื่อ วชิรศักดิ์ สายสูงธนาศักดิ์ “ฟลุ๊ค” ปี 3
ชวนมองแอพของเพื่อนที่ มช. ด้าน CPE
ที่ใช้ react บน heroku.com
แต่ผมสนใจ php จึงเข้าไปส่องในระบบ
แล้วสมัครใช้งานแบบไม่จ่ายตัง
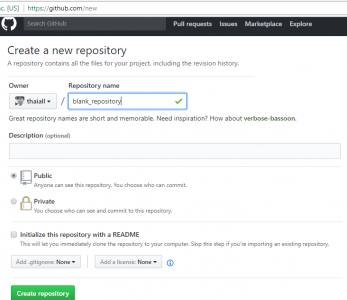
สร้าง repository ว่าง ๆ ขึ้นมา
ในใจนึกถึง github.com เพราะระบบเค้าพูดถึง git

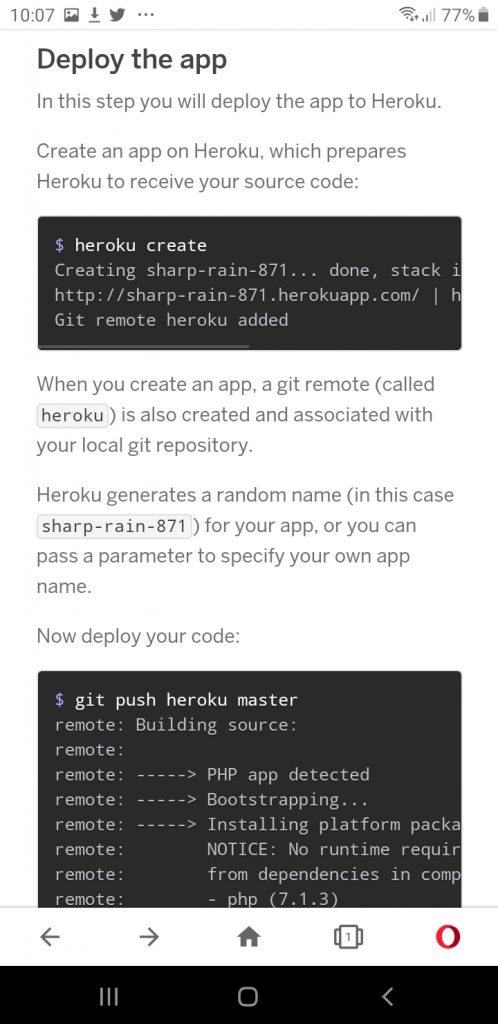
พบ guide ก็ทำตาม พบว่าใช้ git เป็นหลัก
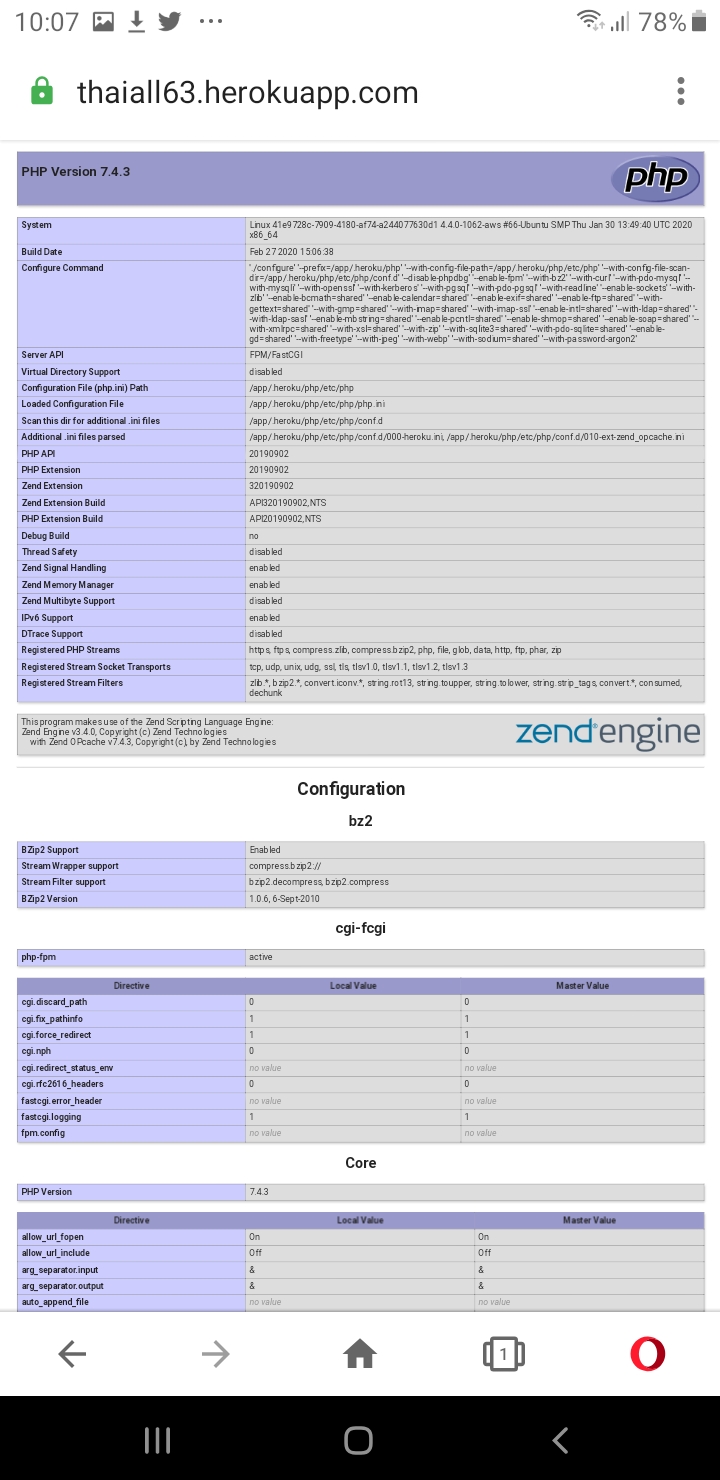
จากการทดสอบ เขียน phpinfo ง่าย ๆ
พบใช้หลักการของ git
1. clone เข้า localhost
2. แก้ไข code
3. แล้ว push ขึ้นไป
4. ใช้ heroku create และ open repository ได้

https://thaiall63.herokuapp.com/

สรุปว่าใน php ถ้าใช้ composer
จะสะดวกมาก ๆ ในการติดตั้ง
ลองติดตั้ง monolog กับ wordpress
ก็ใช้งานใน localhost ได้ปกติ

https://devcenter.heroku.com/articles/getting-started-with-php#deploy-the-app

http://www.thaiall.com/git

การใช้ git กับ heroku.com พบว่าเว็บไซต์ heroku.com บริการ platform as a service ทำให้เราพัฒนาแอพด้วยภาษาที่ได้รับความนิยม แล้วส่งแอพพลิเคชั่นขึ้นไปเผยแพร่ มีภาษาที่รองรับมากมาย การ push โปรแกรมต่าง ๆ ทำได้ผ่าน git ซึ่งเรื่องเว็บไซต์นี้ มีนิสิตชื่อฟลุ๊ค ปี 3 ชวนดูโปรเจคของเพื่อน CPE ที่ มช. ที่ใช้ react แต่ผมสนใจ php จึงเขียน code ง่าย ๆ พิมพ์ 1 – 10 ส่งไปเผยแพร่ หากติดตั้งโปรแกรมต่าง ๆ แล้ว ก็พิมพ์ตามนี้ได้ แต่ต้องมี repository ของตนเอง เช่น safe-hamlet-06492 (ชื่อนี้เคยใช้ heroku create แล้วถูกสร้างแบบสุ่มมาให้ใช้)

บทเรียนที่ 3 ชวนลูกทีมมือสมัครเล่นมารายงานตัวเป็น collaborators ผ่านแฟ้ม html ใช้ git สั่ง pull + push เข้า github.com

ตามหัวข้อเลย ผมมีลูกทีมเป็นมือสมัครเล่นกันหลายคน
มีเป้าหมาย คือ ให้พวกเค้าไปสมัครใช้บริการ github.com
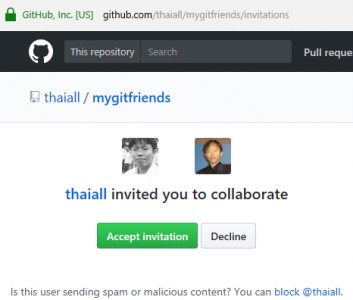
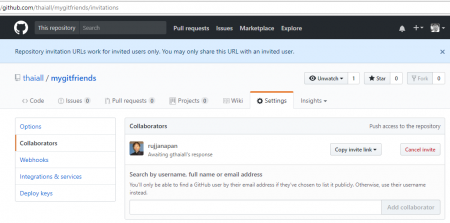
แล้วส่ง email ให้ผม เพื่อ invite พวกเค้ามาเป็น collaborators (สำหรับ push)
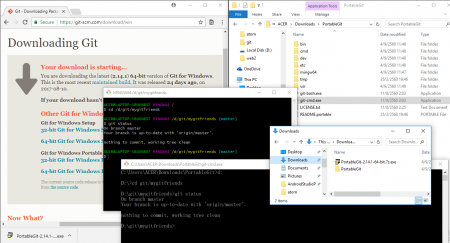
จากนั้นก็ให้ทุกคนไป download : Git for windows แบบ Portable
เพราะแต่ละคนอาจใช้ git กันในหลายรูปแบบ แนะนำแบบชั่วคราว แต่ใช้แบบใดก็ได้
แต่แบบ portable คือ ใช้ชั่วคราว หากไม่สะดวกเพราะไม่ได้ใช้กกับเครื่องของตนเอง
มี Interface ทั้งแบบ bash และ cmd จาก https://git-scm.com/download/win
คือ git-cmd.exe (cd d:/git/mygitfriends1)
และ git-bash.exe (cd /d/git/mygitfriends1)

แต่ถ้าใครอยากใช้ git กันนาน ๆ ก็เลือกแบบ install ได้
จากนั้นก็สร้างห้อง เช่น d:\git\mygitfriends1
แล้วให้ pull ดึง repository ของผมลงมา (เป็น public สามารถ pull ได้เลย)
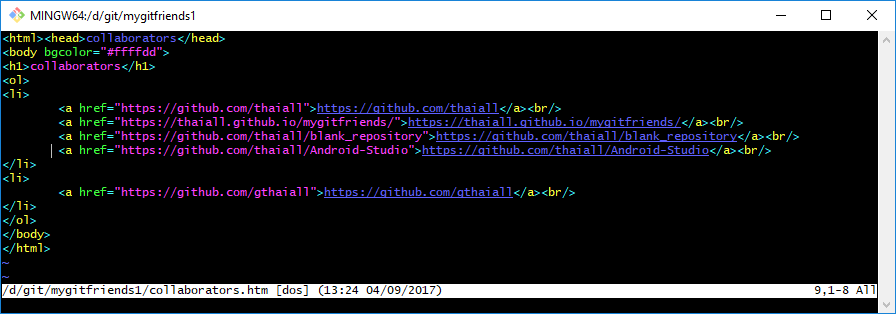
แล้วแก้ไข tag LI ใส่ url ที่เป็น repository ของตนเอง เพื่อแชร์ให้ผมทราบ
ติ้งต่างว่า .. ผมเป็นหัวหน้าทีมของลูกทีมมือสมัครเล่น

มีขั้นตอน 9 ข้อ ดังนี้
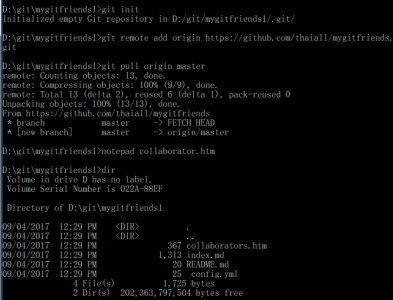
1. DOS> git init
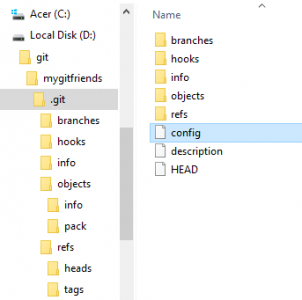
จะสร้างห้อง .git แบบ hidden สำหรับการเริ่มต้นงาน repository
ในห้องนี้มีแฟ้มสำคัญคือ config ที่เปิดมาการตั้งค่าได้

2. DOS> git config –global user.email “you@example.com”
อย่าลืมเปลี่ยนเป็น e-mail ของตนเองนะครับ

3. DOS> git config –global user.name “Your Name”
อย่าลืมเปลี่ยนเป็น ชื่อของตนเองนะครับ

4. DOS> git remote add origin https://github.com/thaiall/mygitfriends.git
ต้องกำหนด email กับ name ให้เรียบร้อยก่อน
แล้วสั่งกำหนดว่า remote คือที่ไหน ที่ origin เชื่อมโยงด้วย

5. DOS> git pull origin master
ดึงข้อมูลจาก repository ใน master บน github.com
ลงมาเป็น origin ใน localhost หลังแก้ไขจะได้ push ขึ้นไป

6. DOS> notepad collaborators.htm หรือจะใช้ vi ก็ได้ ถ้าถนัดนะครับ
เปิดแฟ้ม html มาแก้ไขเพิ่มเติมข้อมูลตาม TAG LI
ให้เพิ่ม link ของ repository ที่ตนเองเป็นเจ้าของ
หลังสมัคร github.com ด้วย email ของตน และสร้าง repository ไว้

<html><head>collaborators</head>
<body>
 <h1>collaborators</h1>
 <ol>
 <li>
 <a href=""></a><br/>
 </li>
 </ol>
</body>
</html>

7. DOS> git add collaborators.htm
หลังแก้ไขก็สั่ง add เพื่อบอกว่าแฟ้มนี้ คือ แฟ้มที่ปรับปรุง

8. DOS> git commit -m “i am gthaiall”
การสั่ง commit คือ การตรวจสอบว่ามีแฟ้มอะไรบ้างที่ต้องดำเนินการ และตีทะเบียนรุ่นให้ใหม่

9. DOS> git push -u origin master
ทำส่งรายละเอียด และการแก้ไขผ่าน push เปรียบเทียบระหว่าง master กับ origin
ขึ้นไปยังเครื่องบริการ github.com ที่เป็นสื่อกลางระหว่างนักพัฒนาทุกคน

สรุปว่า
ผมนั่งดูใน github.com พบว่า นักพัฒนา ทำอะไรกับแฟ้ม collaborators.htm เมื่อใด
ที่พบมี รหัส commit [7864d75] ใหม่ พบว่า เพิ่ม 3 บรรทัด และลบ 2 บรรทัด

หลังจบการ push
ผมเข้าไปลบทุกอย่างในห้อง d:\git\mygitfriends1
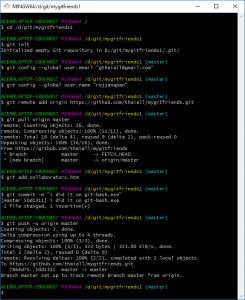
รวมทั้ง .git ด้วย แล้วใช้ git-bash.exe ทำตามขั้นตอน 9 ข้อใหม่
หลังแก้ไขได้ รหัส commit [50d1311] ใหม่ พบว่า เพิ่ม 1 บรรทัด

หากมีคำถาม
เรื่อง git อยากชวนไปดูคลิ๊ปสั้น ๆ ของ SIPA เรื่อง แนะนำ และติดตั้ง Git
ที่ Minato Namikazerak ร่วมแบ่งปัน
ตอนเข้าไปแชร์ในกลุ่ม ไทย PHP เรื่องที่ผม push เข้า github.com

บทเรียนที่ 2 : การใช้ Git ตามคำแนะนำของ Github.com บน Bash on Ubuntu on Windows


เริ่มต้นกันเลย กับการสมัครใช้บริการพื้นที่ฟรี สำหรับเก็บ code ของ Github.com แล้วพบว่าหน้าแรกของ code ตอนที่ยังไม่มีแฟ้มใดเลย เค้าแนะนำคำสั่งมา 6 บรรทัดว่าจะสร้าง README.md อย่างไร ก็ลองพิมพ์ตามนั้นดูสักหน่อย เพราะ Nimit Suwannagate แนะนำคำสั่ง git ไว้ใน กลุ่ม ไทย PHP ที่เป็นการทำ backup_master เข้ามาเกี่ยวข้อง  มีคำสั่งน่าสนใจหลายคำสั่ง แต่ถ้าเริ่มต้นต้องคำสั่งบน Github.com นี่หละ สำหรับผมใช้ระบบปฏิบัติการ Windows 10 และมี Bash on Ubuntu on Windows ก็ถือโอกาสใช้ git บน Linux ที่อยู่ใน Windows

ขั้นตอนการใช้ git ตามที่ github.com แนะนำ ดังนี้

1. สร้าง folder ชื่อ git ที่ drive d
และสร้าง folder ชื่อ mygitfriends ใน git
จะได้ folder d:/git/mygitfriends เตรียมพื้นที่ไว้ทำงาน และอ้างอิงง่าย ๆ หน่อย
ที่ตั้งชื่อว่า mygitfriends จะลองชวนเพื่อนที่สนใจ
มาเข้ากลุ่ม collaborators ของ repository จึงตั้ง folder เป็นชื่อนี้

2. เข้า bash on ubuntu on windows
แล้วติดตั้ง git เพื่อทำงานใน ubuntu on windows

$sudo apt-get install git

3. นั่งมองคำสั่งที่ github.com แนะนำแป๊ปนึง มีความหมายทุกบรรทัด

echo "# mygitfriends" >> README.md
git init
git add README.md
git commit -m "first commit"
git remote add origin git@github.com:thaiall/mygitfriends.git
git push -u origin master

4. ใน bash on ubuntu on windows
ทำตามขั้นตอนดังนี้
4.1 $cd /mnt/d/git/mygitfriends

4.2 $echo “# Hello world! v.1” >> README.md

4.3 $git init จะสร้าง folder .git แล้วแฟ้มอีกเพียบขึ้นมาให้

4.4 $git add README.md

4.5 $git commit -m “first commit” ได้รับแจ้งว่าต้อง config email กับ name ก่อนสั่งงาน ก็ต้องสั่ง 2 บรรทัดนี้ก่อน
– git config –global user.email “you@example.com”
– git config –global user.name “Your Name”
หลัง config ก็สั่งใหม่ ก็เรียบร้อยด้วยดี
[master (root-commit) 2ff254f] first commit
1 file changed, 1 insertion(+)
create mode 100644 README.md

4.6 $git remote add origin https://github.com/thaiall/mygitfriends.git
หลังจากสั่ง $git remote ทำให้แฟ้ม config เพิ่มมา 3 บรรทัด
[remote “origin”]
url = https://github.com/thaiall/mygitfriends.git
fetch = +refs/heads/*:refs/remotes/origin/*

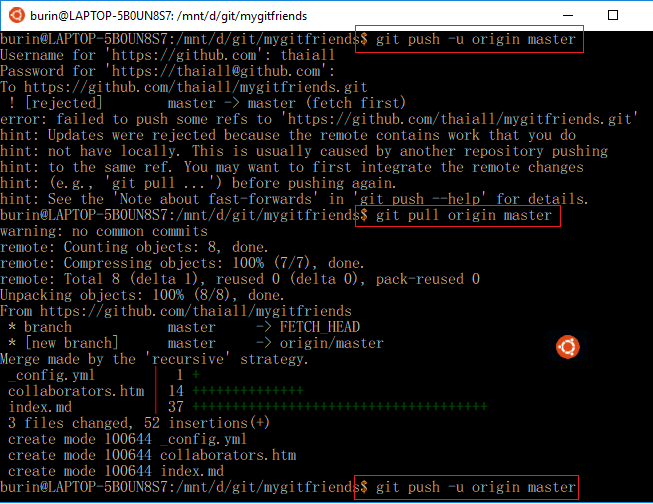
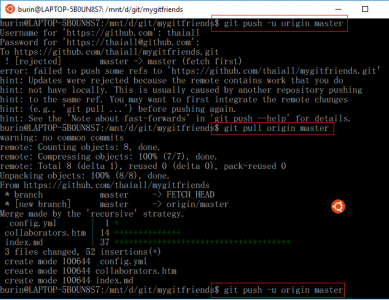
4.7 $git push -u origin master
เค้าแนะนำว่าให้ git pull ก่อน แล้วค่อย pushing again
! [rejected] master -> master (fetch first)
error: failed to push some refs to ‘https://github.com/thaiall/mygitfriends.git’
hint: Updates were rejected because the remote contains work that you do
hint: not have locally. This is usually caused by another repository pushing
hint: to the same ref. You may want to first integrate the remote changes
hint: (e.g., ‘git pull …’) before pushing again.
hint: See the ‘Note about fast-forwards’ in ‘git push –help’ for details.

4.8 $git pull origin master
warning: no common commits
remote: Counting objects: 8, done.
remote: Compressing objects: 100% (7/7), done.
remote: Total 8 (delta 1), reused 0 (delta 0), pack-reused 0
Unpacking objects: 100% (8/8), done.
From https://github.com/thaiall/mygitfriends
* branch master -> FETCH_HEAD
* [new branch] master -> origin/master
Merge made by the ‘recursive’ strategy.
_config.yml | 1 +
collaborators.htm | 14 ++++++++++++++
index.md | 37 +++++++++++++++++++++++++++++++++++++
3 files changed, 52 insertions(+)
create mode 100644 _config.yml
create mode 100644 collaborators.htm
create mode 100644 index.md
จากนั้นก็เปิดแฟ้ม .git/MERGE_MSG มาให้แก้ไข ก็ไม่ได้แก้ไขครับกด Ctrl+X ออกไป

4.9 $git push -u origin master

Counting objects: 6, done.
Delta compression using up to 4 threads.
Compressing objects: 100% (3/3), done.
Writing objects: 100% (5/5), 503 bytes | 0 bytes/s, done.
Total 5 (delta 1), reused 0 (delta 0)
remote: Resolving deltas: 100% (1/1), completed with 1 local object.
To https://github.com/thaiall/mygitfriends.git
5f749af..353f84d master -> master

5. ตรวจสอบผลงานตามขั้นตอนข้างต้น
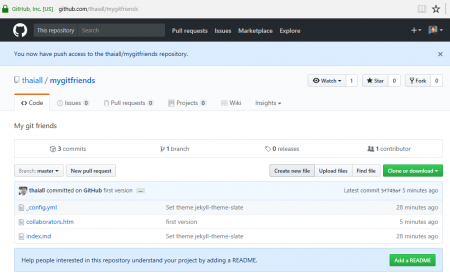
หลังจากสั่ง $git push .. พบแฟ้ม README.md เข้าไปอยู่ใน github.com
มีเพียงแฟ้มเดียวที่วันที่เปลี่ยนอย่างถูกต้อง แฟ้มที่เหลือยังอยู่กันตามปกติ

5.1 ถ้า pull ใหม่ เค้าบอกว่า up-to-date แล้ว
From https://github.com/thaiall/mygitfriends
* branch master -> FETCH_HEAD
Already up-to-date.

5.2 ถ้า push ใหม่ เค้าบอกว่า up-to-date แล้วเช่นกัน
Username for ‘https://github.com’: [yourusername]
Password for ‘https://[yourusername]@github.com’:
Everything up-to-date

5.3 สรุปว่า ถ้า push หรือ pull โดยไม่เปลี่ยนแปลงแฟ้มใน origin
ก็จะไม่ส่งผลถืง master ที่อยู่ใน github.com เช่นกัน เพราะ git จะตรวจสอบก่อน

ลอง Push project จาก ATOM เข้า Repository ใน Github.com ทับของเดิมเกลี้ยงเลย

วันนี้วันดี .. ได้ลองใช้ ATOM editor มาครับ อยากลองว่า push ใน editor กับ script file หนึ่ง เข้าไปใน Github.com จะให้ผลเป็นอย่างไร ผล คือ เข้าแทนที่ Repository ทั้งหมด เพราะตั้งเป็น Master ไม่เป็น Branch ใหม่อย่างที่ควร การเข้าไปแทนที่แบบนี้ นึกถึงตอนทดสอบใช้ Firebase ส่งเข้าไปทั้งก้อนเลยเหมือนกัน
สรุปว่า
ได้ Clone แล้ว Download ออกมาเก็บไว้ก่อน
พอ unzip แล้ว push กลับเข้าไป ทุกอย่างก็ยังอยู่เหมือนเดิม
ยกเว้น วันที่ของแฟ้ม เปลี่ยนเป็นปัจจุบันหมดครับ
 

เล่าเรื่องการใช้โปรแกรม editor ที่ชื่อ ATOM
วันนี้ 3 กันยายน 2560 ได้รุ่น 1.19.5 มา
มีขั้นตอนที่จะเล่าสู่กันฟัง ดังนี้


1. ก่อน หรือหลังติดตั้ง ATOM editor
ก็ควรไปสมัครใช้บริการของ Github.com หากคิดจะใช้งานร่วมกัน
เพื่อจะได้เชื่อมระหว่าง ATOM editor กับ Github
เพราะใน ATOM ไม่ได้เชื่อมเข้า Github ในทันที
มีขั้นตอนอีกเยอะกว่าจะสั่งอะไรใน Github ได้

2. Install package ใน ATOM
เข้า Menu bar, Help, Welcome Guide, Install a Package, Open Installer
หรือ Menu bar, File, Settings, Install
หรือ Ctrl+Shift+P เพื่อ Search Package สำหรับ Install
พิมพ์ git ณ วันที่ 3 กันยายน 2560
package : git-plus 7.9.3 download 1737185 ของ akonwi
package : git-time-machine 1.5.9 download 265062 ของ Littlebee
package : git-control 0.9.0 download 157686 ของ Jacogr
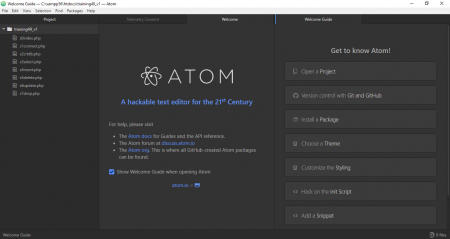
3. เลือก install git-plus (ผมลงตัวเดียว)
หลังติดตั้งเสร็จก็เลือก Setting, Uninstall หรือ Disable ได้
เข้าไปดูใน Setting พบ Commands จำนวน 22 รายการ
คำสั่งไหนใช้บ่อยมี Hot-key ให้ใช้ด้วย
จะสั่งงานกด Ctrl+Shift+H
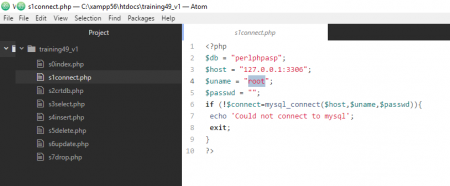
4. หลังติดตั้ง git-plus แล้วเรียก Git-Plus Palette
เลือกสั่ง add ก็ฟ้องขึ้นมาว่า
‘git’ is not recognized as an internal or external command,
operable program or batch file.
ก็มีเหตุที่ทำให้ใช้คำสั่งนี้ไม่ได้ ต้องทำข้อต่อ ๆ ไปก่อน
ปล.1 ไปสำรวจพบว่าใน Palette พบคำสั่งมากกว่า 22 รายการ ให้เลือกใช้
ปล.2 คำสั่ง add นี้คือการย้าย แฟ้มที่มีการแก้ไขเข้าไปอยู่ใน Staged changes
หากมีการ commit แล้ว push ก็จะรู้ว่าแฟ้มไหนเปลี่ยนแปลงบ้าง

5. Menu bar, View, Toggle GitHub Tab หรือ Ctrl+Shift+8
พบ This repository does not have any remotes hosted at GitHub.com
แสดงว่า ยังไม่ได้เชื่อม Repository หรือ Project เข้ากับ Github.com
เมื่อเข้าไปอ่านที่ https://atom.io/packages/git-plus
ในส่วนของ IMPORTANT พบคำแนะนำสำหรับผู้ใช้ SSH ว่าต้อง login อย่างไร
ส่วนผู้ใช้ Windows ก็เข้าไปอ่านใน [thread] ได้
พบว่า damianpirchio เค้าใช้งานได้หลังมีการ Update version ใหม่
บางปัญหา พอมี version ใหม่มา ปัญหาเหล่านั้นก็หายไป
https://github.com/akonwi/git-plus/issues/335
ปล. ปัญหานี้น่าจะเกิดจากการเชื่อมกับ repository ไม่เรียบร้อย
หากเชื่อมเรียบร้อย จะแสดงปุ่ม login เท่านั้น ตอนนี้ผมก็ยังไม่ได้ login ครับ
เวลา push ก็กรอก signin เป็นครั้งไป

6. Generating a new SSH key
บน Win10 มี Bash on Ubuntu on Windows

$ssh-keygen -t rsa -b 4096 -C "your_email@example.com"

Generating public/private rsa key pair = [github] ตามชอบ
Enter passpharase = [blank] ไม่ได้ใส่อะไร
file (/home/burin/.ssh/id_rsa) = [github] ตามชอบ
ดังนั้นใน C:\Users\ACER\AppData\Local\lxss\home\burin
จึงพบแฟ้ม github กับ github.pub

7. Adding your SSH key to the ssh-agent
ทดสอบว่า ssh-agent ทำงานอยู่ด้วย

$eval $(ssh-agent -s)

พบตัวเลข PID และคำสั่งนี้ทำบน Bash on Ubuntu on Windows

แล้วสั่ง $ssh-add ~/.ssh/id_rsa
แต่ผมสั่งว่า $ssh-add ~/github

พบ Identity added: /home/burin/github (/home/burin/github)
เพราะกำหนด file ว่า github บน Windows ตอนที่ Generate

8. ไปแก้ config ใน git ของ Project
ตามคำแนะนำของ damianpirchio
https://github.com/akonwi/git-plus/issues/335
มีตัวอย่างที่ https://github.com/damianpirchio/inmobiliaria

เดิม
 [core]
 repositoryformatversion = 0
 filemode = false
 bare = false
 logallrefupdates = true
 symlinks = false
 ignorecase = true
เป็น
 [core]
 repositoryformatversion = 0
 filemode = false
 bare = false
 logallrefupdates = true
 symlinks = false
 ignorecase = true
 [remote "origin"]
 url = https://github.com/thaiall/programming-page.git
 fetch = +refs/heads/*:refs/remotes/origin/*
 [branch "master"]
 remote = origin
 merge = refs/heads/master

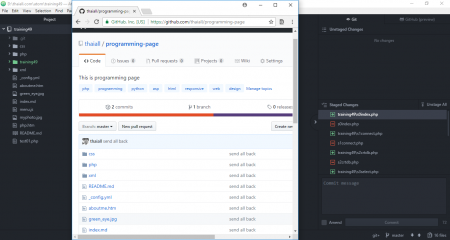
ที่ github ผมมี https://github.com/thaiall/programming-page ครับ

9. ตอนสั่ง add พบการใช้ git
อ่านจาก https://stackoverflow.com/.. /internal-or-external-command
ก็พบปัญหาเหมือนกัน คือ
‘git’ is not recognized as an internal or external command,
operable program or batch file.
มีขั้นตอนแก้ไขบน Windows 10 ดังนี้
9.1 หา Git ให้พบว่าอยู่ตรงไหน
ของผมอยู่ใน C:\Users\[ACER ชื่อเครื่อง]\AppData\Local\atom\app-1.19.5\resources\app\node_modules\dugite\git\cmd\
เพราะมากับ ATOM รุ่น 1.19.5 อัพเดทไปเมื่อวาน ตอนลงเป็น 1.18 ครับ
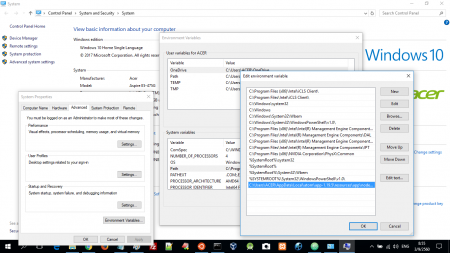
9.2 กดปุ่ม Window+Pause เพื่อเข้า System
แล้ว Advance system setting
แล้ว Environment Variables ใต้ Advanced Tab
9.3 ในหัวข้อ System variables มองหา Path แล้ว Edit
แล้ว New
แล้วกรอกไปว่า C:\Users\[ตามที่พบข้างบนยาว ๆ]\git\cmd\
9.4 ทดสอบด้วยการเข้า DOS แล้วพิมพ์ git
แล้วสั่งอะไรไม่ค่อยจะได้นะครับ ต้องไปทำงานใน ATOM
10. พบปัญหา หลังกด push รอบแรก จาก task bar
เพราะ push คือ การ upload project ส่วน pull คือ download project
ส่วน commit คือ การให้รายละเอียดก่อน push

พบ
 Note: No remote detected for branch master.
 Cannot push because there is no remote named "origin"
 for which to create a remote tracking branch
 หรือ
 fatal: Invalid refspec '+refs/heads/:refs/remotes/origin/'

พอเปลี่ยนใน config ของ git เป็นตาม code ด้านล่างนี้ ปัญหาก็หายไป

[remote "origin"]
 url = https://github.com/thaiall/programming-page.git
 fetch = +refs/heads/*:refs/remotes/origin/*


11. พบปัญหา หลังกด push รอบ 2

พบ
 error: src refspec master does not match any.
 error: failed to push some refs to 'https://github.com/thaiall/programming-page.git'

วิธีแก้ไข
กดปุ่ม commit ก่อนกดปุ่ม push

12. กดปุ่ม commit พบปัญหาอีกแล้ว

พบ
 Run
 git config --global user.email "you@example.com"
 git config --global user.name "Your Name"
 to set your account's default identity.
 Omit --global to set the identity only in this repository.
 fatal: unable to auto-detect email address (got 'ACER@LAPTOP-xxxxx.(none)')

วิธีแก้ไข
ต้องเข้าไปเพิ่มใน config ของ git
[user]
name = [you@example.com]
email = [Your Name]
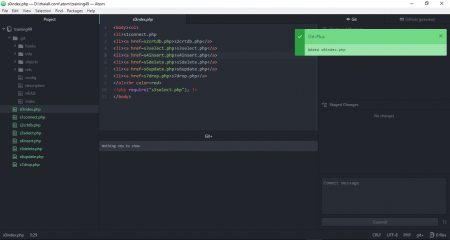
13. ไม่มีอะไรใน Staged Changes แต่น่าจะเคย add เข้าไปแล้ว
กด Push 2 รอบ
พบ Please enter your credentials for https://github.com
และ remote: Invalid username or password.
fatal: Authentication failed for ‘https://github.com/thaiall/programming-page.git/’
สงสัยจะใช่ username กับ password ผิดจริง ๆ ไม่มีอะไรมากครับ
ตกใจไว้ก่อน

14. ใส่รหัสถูกต้อง พบปัญหาอีกแล้ว
พบ
The tip of your current branch is behind its remote counterpart.
Try pulling before pushing again. Or, to force push, hold cmd or ctrl while clicking.
วิธีแก้ไข
เค้าว่า ถ้าผมไม่มีแฟ้มที่ github.com ให้กดปุ่ม ctrl ค้างไว้ขณะคลิ๊ปปุ่ม push
มีหน้าต่างถาม Force Push ขึ้นมาครับ กดเลย
แล้วก็ถาม signin อีกครั้ง ดีครับ ไม่ต้องจำรหัสค้างไว้
เค้าก็เตือนให้ pull ก่อนแล้วนะ แต่ผมไม่ได้ทำ

15. หลัง push สำเร็จ พบว่าใน repository บน github.com หายเกลี้ยง
เหลือแต่ s6update.php แฟ้มเดียว (โปรแกรมหนึ่งที่ทดสอบจะ push เข้าไป)
นึกขึ้นได้ว่า Download repository เป็น .zip ออกมาก่อนหน้านี้
unzip แล้วส่งกลับเข้าไปก็พบว่าทุกอย่างอยู่ครบ
รวมทั้ง https://thaiall.github.io/programming-page/
ทุกอย่างกลับมาเหมือนเดิม

16. ขั้นตอนการ push
1. ตรวจสอบใน Staged changes ว่ามีอะไรเปลี่ยนแปลงไหม ค่อย Push
2. กรอกข้อมูลใน Commit แล้วกดปุ่ม Commit
3. กด Push 2 ครั้ง เค้าถามมาทีละครั้ง
4. ใส่ user and password แล้ว signin
5. ไปดูผลการ push ที่ repository ใน github.com
แนะนำเว็บไซต์
https://technologyand.me/2016/08/29/git-with-atom/
https://vwannabe.com/2016/05/26/how-to-use-github-and-atom/
http://www.thaiall.com/atom/