บทเรียนที่ 3 ชวนลูกทีมมือสมัครเล่นมารายงานตัวเป็น collaborators ผ่านแฟ้ม html ใช้ git สั่ง pull + push เข้า github.com

ตามหัวข้อเลย ผมมีลูกทีมเป็นมือสมัครเล่นกันหลายคน
มีเป้าหมาย คือ ให้พวกเค้าไปสมัครใช้บริการ github.com
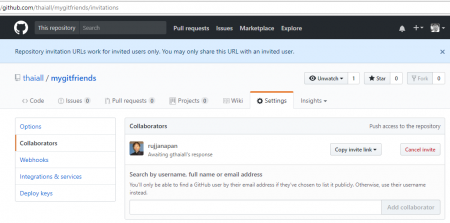
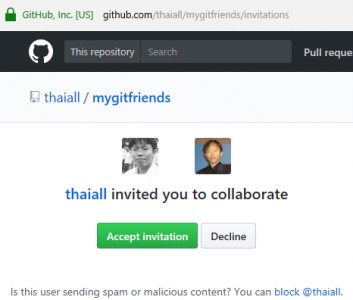
แล้วส่ง email ให้ผม เพื่อ invite พวกเค้ามาเป็น collaborators (สำหรับ push)
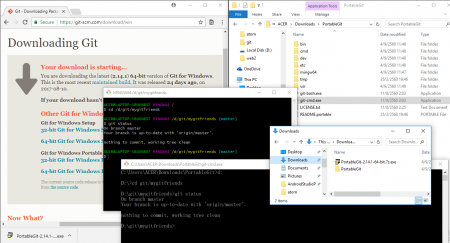
จากนั้นก็ให้ทุกคนไป download : Git for windows แบบ Portable
เพราะแต่ละคนอาจใช้ git กันในหลายรูปแบบ แนะนำแบบชั่วคราว แต่ใช้แบบใดก็ได้
แต่แบบ portable คือ ใช้ชั่วคราว หากไม่สะดวกเพราะไม่ได้ใช้กกับเครื่องของตนเอง
มี Interface ทั้งแบบ bash และ cmd จาก https://git-scm.com/download/win
คือ git-cmd.exe (cd d:/git/mygitfriends1)
และ git-bash.exe (cd /d/git/mygitfriends1)

แต่ถ้าใครอยากใช้ git กันนาน ๆ ก็เลือกแบบ install ได้
จากนั้นก็สร้างห้อง เช่น d:\git\mygitfriends1
แล้วให้ pull ดึง repository ของผมลงมา (เป็น public สามารถ pull ได้เลย)
แล้วแก้ไข tag LI ใส่ url ที่เป็น repository ของตนเอง เพื่อแชร์ให้ผมทราบ
ติ้งต่างว่า .. ผมเป็นหัวหน้าทีมของลูกทีมมือสมัครเล่น

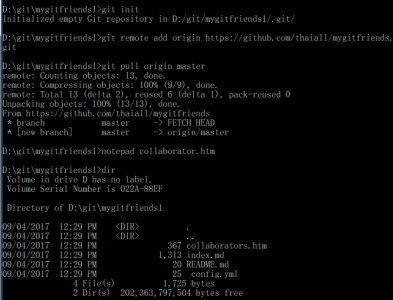
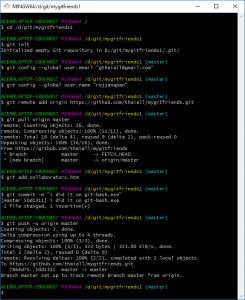
มีขั้นตอน 9 ข้อ ดังนี้
1. DOS> git init
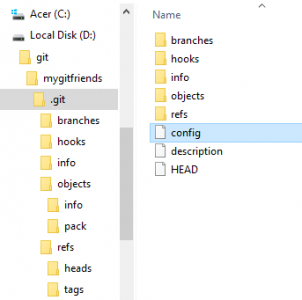
จะสร้างห้อง .git แบบ hidden สำหรับการเริ่มต้นงาน repository
ในห้องนี้มีแฟ้มสำคัญคือ config ที่เปิดมาการตั้งค่าได้

2. DOS> git config –global user.email “you@example.com”
อย่าลืมเปลี่ยนเป็น e-mail ของตนเองนะครับ

3. DOS> git config –global user.name “Your Name”
อย่าลืมเปลี่ยนเป็น ชื่อของตนเองนะครับ

4. DOS> git remote add origin https://github.com/thaiall/mygitfriends.git
ต้องกำหนด email กับ name ให้เรียบร้อยก่อน
แล้วสั่งกำหนดว่า remote คือที่ไหน ที่ origin เชื่อมโยงด้วย

5. DOS> git pull origin master
ดึงข้อมูลจาก repository ใน master บน github.com
ลงมาเป็น origin ใน localhost หลังแก้ไขจะได้ push ขึ้นไป

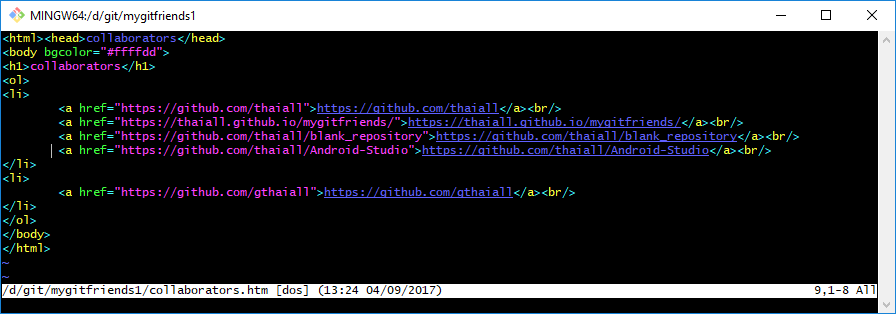
6. DOS> notepad collaborators.htm หรือจะใช้ vi ก็ได้ ถ้าถนัดนะครับ
เปิดแฟ้ม html มาแก้ไขเพิ่มเติมข้อมูลตาม TAG LI
ให้เพิ่ม link ของ repository ที่ตนเองเป็นเจ้าของ
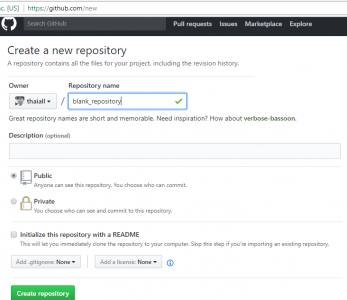
หลังสมัคร github.com ด้วย email ของตน และสร้าง repository ไว้

<html><head>collaborators</head>
<body>
 <h1>collaborators</h1>
 <ol>
 <li>
 <a href=""></a><br/>
 </li>
 </ol>
</body>
</html>

7. DOS> git add collaborators.htm
หลังแก้ไขก็สั่ง add เพื่อบอกว่าแฟ้มนี้ คือ แฟ้มที่ปรับปรุง

8. DOS> git commit -m “i am gthaiall”
การสั่ง commit คือ การตรวจสอบว่ามีแฟ้มอะไรบ้างที่ต้องดำเนินการ และตีทะเบียนรุ่นให้ใหม่

9. DOS> git push -u origin master
ทำส่งรายละเอียด และการแก้ไขผ่าน push เปรียบเทียบระหว่าง master กับ origin
ขึ้นไปยังเครื่องบริการ github.com ที่เป็นสื่อกลางระหว่างนักพัฒนาทุกคน

สรุปว่า
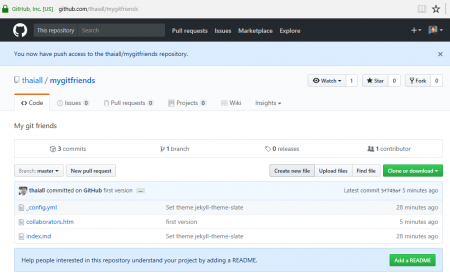
ผมนั่งดูใน github.com พบว่า นักพัฒนา ทำอะไรกับแฟ้ม collaborators.htm เมื่อใด
ที่พบมี รหัส commit [7864d75] ใหม่ พบว่า เพิ่ม 3 บรรทัด และลบ 2 บรรทัด

หลังจบการ push
ผมเข้าไปลบทุกอย่างในห้อง d:\git\mygitfriends1
รวมทั้ง .git ด้วย แล้วใช้ git-bash.exe ทำตามขั้นตอน 9 ข้อใหม่
หลังแก้ไขได้ รหัส commit [50d1311] ใหม่ พบว่า เพิ่ม 1 บรรทัด

หากมีคำถาม
เรื่อง git อยากชวนไปดูคลิ๊ปสั้น ๆ ของ SIPA เรื่อง แนะนำ และติดตั้ง Git
ที่ Minato Namikazerak ร่วมแบ่งปัน
ตอนเข้าไปแชร์ในกลุ่ม ไทย PHP เรื่องที่ผม push เข้า github.com

บทเรียนที่ 2 : การใช้ Git ตามคำแนะนำของ Github.com บน Bash on Ubuntu on Windows


เริ่มต้นกันเลย กับการสมัครใช้บริการพื้นที่ฟรี สำหรับเก็บ code ของ Github.com แล้วพบว่าหน้าแรกของ code ตอนที่ยังไม่มีแฟ้มใดเลย เค้าแนะนำคำสั่งมา 6 บรรทัดว่าจะสร้าง README.md อย่างไร ก็ลองพิมพ์ตามนั้นดูสักหน่อย เพราะ Nimit Suwannagate แนะนำคำสั่ง git ไว้ใน กลุ่ม ไทย PHP ที่เป็นการทำ backup_master เข้ามาเกี่ยวข้อง  มีคำสั่งน่าสนใจหลายคำสั่ง แต่ถ้าเริ่มต้นต้องคำสั่งบน Github.com นี่หละ สำหรับผมใช้ระบบปฏิบัติการ Windows 10 และมี Bash on Ubuntu on Windows ก็ถือโอกาสใช้ git บน Linux ที่อยู่ใน Windows

ขั้นตอนการใช้ git ตามที่ github.com แนะนำ ดังนี้

1. สร้าง folder ชื่อ git ที่ drive d
และสร้าง folder ชื่อ mygitfriends ใน git
จะได้ folder d:/git/mygitfriends เตรียมพื้นที่ไว้ทำงาน และอ้างอิงง่าย ๆ หน่อย
ที่ตั้งชื่อว่า mygitfriends จะลองชวนเพื่อนที่สนใจ
มาเข้ากลุ่ม collaborators ของ repository จึงตั้ง folder เป็นชื่อนี้

2. เข้า bash on ubuntu on windows
แล้วติดตั้ง git เพื่อทำงานใน ubuntu on windows

$sudo apt-get install git

3. นั่งมองคำสั่งที่ github.com แนะนำแป๊ปนึง มีความหมายทุกบรรทัด

echo "# mygitfriends" >> README.md
git init
git add README.md
git commit -m "first commit"
git remote add origin git@github.com:thaiall/mygitfriends.git
git push -u origin master

4. ใน bash on ubuntu on windows
ทำตามขั้นตอนดังนี้
4.1 $cd /mnt/d/git/mygitfriends

4.2 $echo “# Hello world! v.1” >> README.md

4.3 $git init จะสร้าง folder .git แล้วแฟ้มอีกเพียบขึ้นมาให้

4.4 $git add README.md

4.5 $git commit -m “first commit” ได้รับแจ้งว่าต้อง config email กับ name ก่อนสั่งงาน ก็ต้องสั่ง 2 บรรทัดนี้ก่อน
– git config –global user.email “you@example.com”
– git config –global user.name “Your Name”
หลัง config ก็สั่งใหม่ ก็เรียบร้อยด้วยดี
[master (root-commit) 2ff254f] first commit
1 file changed, 1 insertion(+)
create mode 100644 README.md

4.6 $git remote add origin https://github.com/thaiall/mygitfriends.git
หลังจากสั่ง $git remote ทำให้แฟ้ม config เพิ่มมา 3 บรรทัด
[remote “origin”]
url = https://github.com/thaiall/mygitfriends.git
fetch = +refs/heads/*:refs/remotes/origin/*

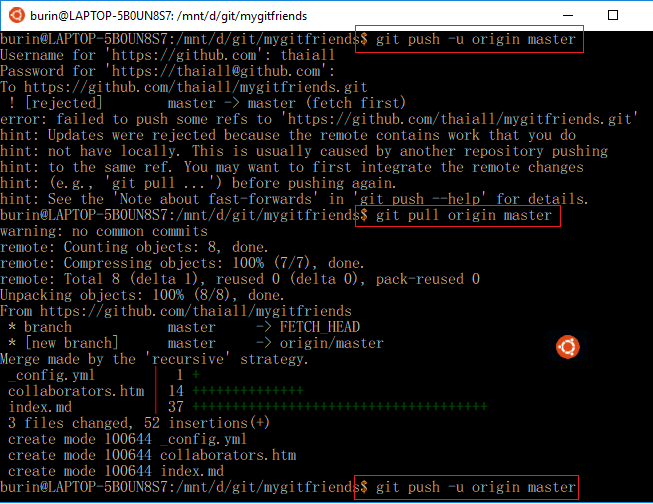
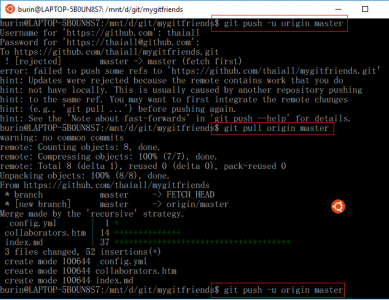
4.7 $git push -u origin master
เค้าแนะนำว่าให้ git pull ก่อน แล้วค่อย pushing again
! [rejected] master -> master (fetch first)
error: failed to push some refs to ‘https://github.com/thaiall/mygitfriends.git’
hint: Updates were rejected because the remote contains work that you do
hint: not have locally. This is usually caused by another repository pushing
hint: to the same ref. You may want to first integrate the remote changes
hint: (e.g., ‘git pull …’) before pushing again.
hint: See the ‘Note about fast-forwards’ in ‘git push –help’ for details.

4.8 $git pull origin master
warning: no common commits
remote: Counting objects: 8, done.
remote: Compressing objects: 100% (7/7), done.
remote: Total 8 (delta 1), reused 0 (delta 0), pack-reused 0
Unpacking objects: 100% (8/8), done.
From https://github.com/thaiall/mygitfriends
* branch master -> FETCH_HEAD
* [new branch] master -> origin/master
Merge made by the ‘recursive’ strategy.
_config.yml | 1 +
collaborators.htm | 14 ++++++++++++++
index.md | 37 +++++++++++++++++++++++++++++++++++++
3 files changed, 52 insertions(+)
create mode 100644 _config.yml
create mode 100644 collaborators.htm
create mode 100644 index.md
จากนั้นก็เปิดแฟ้ม .git/MERGE_MSG มาให้แก้ไข ก็ไม่ได้แก้ไขครับกด Ctrl+X ออกไป

4.9 $git push -u origin master

Counting objects: 6, done.
Delta compression using up to 4 threads.
Compressing objects: 100% (3/3), done.
Writing objects: 100% (5/5), 503 bytes | 0 bytes/s, done.
Total 5 (delta 1), reused 0 (delta 0)
remote: Resolving deltas: 100% (1/1), completed with 1 local object.
To https://github.com/thaiall/mygitfriends.git
5f749af..353f84d master -> master

5. ตรวจสอบผลงานตามขั้นตอนข้างต้น
หลังจากสั่ง $git push .. พบแฟ้ม README.md เข้าไปอยู่ใน github.com
มีเพียงแฟ้มเดียวที่วันที่เปลี่ยนอย่างถูกต้อง แฟ้มที่เหลือยังอยู่กันตามปกติ

5.1 ถ้า pull ใหม่ เค้าบอกว่า up-to-date แล้ว
From https://github.com/thaiall/mygitfriends
* branch master -> FETCH_HEAD
Already up-to-date.

5.2 ถ้า push ใหม่ เค้าบอกว่า up-to-date แล้วเช่นกัน
Username for ‘https://github.com’: [yourusername]
Password for ‘https://[yourusername]@github.com’:
Everything up-to-date

5.3 สรุปว่า ถ้า push หรือ pull โดยไม่เปลี่ยนแปลงแฟ้มใน origin
ก็จะไม่ส่งผลถืง master ที่อยู่ใน github.com เช่นกัน เพราะ git จะตรวจสอบก่อน

ลอง Push project จาก ATOM เข้า Repository ใน Github.com ทับของเดิมเกลี้ยงเลย

วันนี้วันดี .. ได้ลองใช้ ATOM editor มาครับ อยากลองว่า push ใน editor กับ script file หนึ่ง เข้าไปใน Github.com จะให้ผลเป็นอย่างไร ผล คือ เข้าแทนที่ Repository ทั้งหมด เพราะตั้งเป็น Master ไม่เป็น Branch ใหม่อย่างที่ควร การเข้าไปแทนที่แบบนี้ นึกถึงตอนทดสอบใช้ Firebase ส่งเข้าไปทั้งก้อนเลยเหมือนกัน
สรุปว่า
ได้ Clone แล้ว Download ออกมาเก็บไว้ก่อน
พอ unzip แล้ว push กลับเข้าไป ทุกอย่างก็ยังอยู่เหมือนเดิม
ยกเว้น วันที่ของแฟ้ม เปลี่ยนเป็นปัจจุบันหมดครับ


เล่าเรื่องการใช้โปรแกรม editor ที่ชื่อ ATOM
วันนี้ 3 กันยายน 2560 ได้รุ่น 1.19.5 มา
มีขั้นตอนที่จะเล่าสู่กันฟัง ดังนี้


1. ก่อน หรือหลังติดตั้ง ATOM editor
ก็ควรไปสมัครใช้บริการของ Github.com หากคิดจะใช้งานร่วมกัน
เพื่อจะได้เชื่อมระหว่าง ATOM editor กับ Github
เพราะใน ATOM ไม่ได้เชื่อมเข้า Github ในทันที
มีขั้นตอนอีกเยอะกว่าจะสั่งอะไรใน Github ได้

2. Install package ใน ATOM
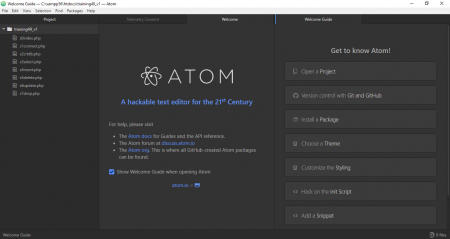
เข้า Menu bar, Help, Welcome Guide, Install a Package, Open Installer
หรือ Menu bar, File, Settings, Install
หรือ Ctrl+Shift+P เพื่อ Search Package สำหรับ Install
พิมพ์ git ณ วันที่ 3 กันยายน 2560
package : git-plus 7.9.3 download 1737185 ของ akonwi
package : git-time-machine 1.5.9 download 265062 ของ Littlebee
package : git-control 0.9.0 download 157686 ของ Jacogr

3. เลือก install git-plus (ผมลงตัวเดียว)
หลังติดตั้งเสร็จก็เลือก Setting, Uninstall หรือ Disable ได้
เข้าไปดูใน Setting พบ Commands จำนวน 22 รายการ
คำสั่งไหนใช้บ่อยมี Hot-key ให้ใช้ด้วย
จะสั่งงานกด Ctrl+Shift+H

4. หลังติดตั้ง git-plus แล้วเรียก Git-Plus Palette
เลือกสั่ง add ก็ฟ้องขึ้นมาว่า
‘git’ is not recognized as an internal or external command,
operable program or batch file.
ก็มีเหตุที่ทำให้ใช้คำสั่งนี้ไม่ได้ ต้องทำข้อต่อ ๆ ไปก่อน
ปล.1 ไปสำรวจพบว่าใน Palette พบคำสั่งมากกว่า 22 รายการ ให้เลือกใช้
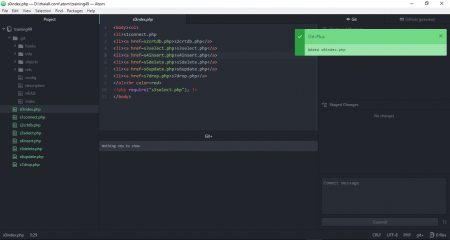
ปล.2 คำสั่ง add นี้คือการย้าย แฟ้มที่มีการแก้ไขเข้าไปอยู่ใน Staged changes
หากมีการ commit แล้ว push ก็จะรู้ว่าแฟ้มไหนเปลี่ยนแปลงบ้าง

5. Menu bar, View, Toggle GitHub Tab หรือ Ctrl+Shift+8
พบ This repository does not have any remotes hosted at GitHub.com
แสดงว่า ยังไม่ได้เชื่อม Repository หรือ Project เข้ากับ Github.com
เมื่อเข้าไปอ่านที่ https://atom.io/packages/git-plus
ในส่วนของ IMPORTANT พบคำแนะนำสำหรับผู้ใช้ SSH ว่าต้อง login อย่างไร
ส่วนผู้ใช้ Windows ก็เข้าไปอ่านใน [thread] ได้
พบว่า damianpirchio เค้าใช้งานได้หลังมีการ Update version ใหม่
บางปัญหา พอมี version ใหม่มา ปัญหาเหล่านั้นก็หายไป
https://github.com/akonwi/git-plus/issues/335
ปล. ปัญหานี้น่าจะเกิดจากการเชื่อมกับ repository ไม่เรียบร้อย
หากเชื่อมเรียบร้อย จะแสดงปุ่ม login เท่านั้น ตอนนี้ผมก็ยังไม่ได้ login ครับ
เวลา push ก็กรอก signin เป็นครั้งไป

6. Generating a new SSH key
บน Win10 มี Bash on Ubuntu on Windows

$ssh-keygen -t rsa -b 4096 -C "your_email@example.com"

Generating public/private rsa key pair = [github] ตามชอบ
Enter passpharase = [blank] ไม่ได้ใส่อะไร
file (/home/burin/.ssh/id_rsa) = [github] ตามชอบ
ดังนั้นใน C:\Users\ACER\AppData\Local\lxss\home\burin
จึงพบแฟ้ม github กับ github.pub

7. Adding your SSH key to the ssh-agent
ทดสอบว่า ssh-agent ทำงานอยู่ด้วย

$eval $(ssh-agent -s)

พบตัวเลข PID และคำสั่งนี้ทำบน Bash on Ubuntu on Windows

แล้วสั่ง $ssh-add ~/.ssh/id_rsa
แต่ผมสั่งว่า $ssh-add ~/github

พบ Identity added: /home/burin/github (/home/burin/github)
เพราะกำหนด file ว่า github บน Windows ตอนที่ Generate

8. ไปแก้ config ใน git ของ Project
ตามคำแนะนำของ damianpirchio
https://github.com/akonwi/git-plus/issues/335
มีตัวอย่างที่ https://github.com/damianpirchio/inmobiliaria

เดิม
 [core]
 repositoryformatversion = 0
 filemode = false
 bare = false
 logallrefupdates = true
 symlinks = false
 ignorecase = true
เป็น
 [core]
 repositoryformatversion = 0
 filemode = false
 bare = false
 logallrefupdates = true
 symlinks = false
 ignorecase = true
 [remote "origin"]
 url = https://github.com/thaiall/programming-page.git
 fetch = +refs/heads/*:refs/remotes/origin/*
 [branch "master"]
 remote = origin
 merge = refs/heads/master

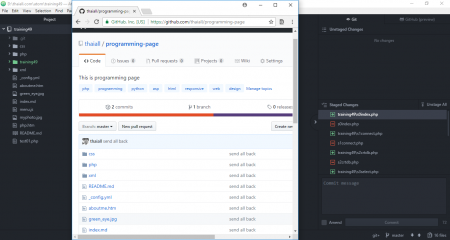
ที่ github ผมมี https://github.com/thaiall/programming-page ครับ

9. ตอนสั่ง add พบการใช้ git
อ่านจาก https://stackoverflow.com/.. /internal-or-external-command
ก็พบปัญหาเหมือนกัน คือ
‘git’ is not recognized as an internal or external command,
operable program or batch file.
มีขั้นตอนแก้ไขบน Windows 10 ดังนี้
9.1 หา Git ให้พบว่าอยู่ตรงไหน
ของผมอยู่ใน C:\Users\[ACER ชื่อเครื่อง]\AppData\Local\atom\app-1.19.5\resources\app\node_modules\dugite\git\cmd\
เพราะมากับ ATOM รุ่น 1.19.5 อัพเดทไปเมื่อวาน ตอนลงเป็น 1.18 ครับ
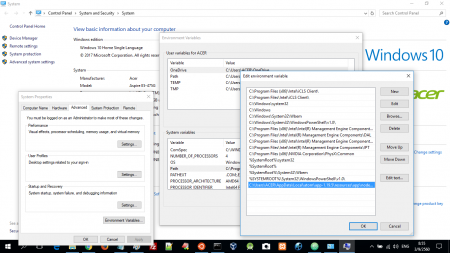
9.2 กดปุ่ม Window+Pause เพื่อเข้า System
แล้ว Advance system setting
แล้ว Environment Variables ใต้ Advanced Tab
9.3 ในหัวข้อ System variables มองหา Path แล้ว Edit
แล้ว New
แล้วกรอกไปว่า C:\Users\[ตามที่พบข้างบนยาว ๆ]\git\cmd\
9.4 ทดสอบด้วยการเข้า DOS แล้วพิมพ์ git
แล้วสั่งอะไรไม่ค่อยจะได้นะครับ ต้องไปทำงานใน ATOM

10. พบปัญหา หลังกด push รอบแรก จาก task bar
เพราะ push คือ การ upload project ส่วน pull คือ download project
ส่วน commit คือ การให้รายละเอียดก่อน push

พบ
 Note: No remote detected for branch master.
 Cannot push because there is no remote named "origin"
 for which to create a remote tracking branch
 หรือ
 fatal: Invalid refspec '+refs/heads/:refs/remotes/origin/'

พอเปลี่ยนใน config ของ git เป็นตาม code ด้านล่างนี้ ปัญหาก็หายไป

[remote "origin"]
 url = https://github.com/thaiall/programming-page.git
 fetch = +refs/heads/*:refs/remotes/origin/*


11. พบปัญหา หลังกด push รอบ 2

พบ
 error: src refspec master does not match any.
 error: failed to push some refs to 'https://github.com/thaiall/programming-page.git'

วิธีแก้ไข
กดปุ่ม commit ก่อนกดปุ่ม push

12. กดปุ่ม commit พบปัญหาอีกแล้ว

พบ
 Run
 git config --global user.email "you@example.com"
 git config --global user.name "Your Name"
 to set your account's default identity.
 Omit --global to set the identity only in this repository.
 fatal: unable to auto-detect email address (got 'ACER@LAPTOP-xxxxx.(none)')

วิธีแก้ไข
ต้องเข้าไปเพิ่มใน config ของ git
[user]
name = [you@example.com]
email = [Your Name]

13. ไม่มีอะไรใน Staged Changes แต่น่าจะเคย add เข้าไปแล้ว
กด Push 2 รอบ
พบ Please enter your credentials for https://github.com
และ remote: Invalid username or password.
fatal: Authentication failed for ‘https://github.com/thaiall/programming-page.git/’
สงสัยจะใช่ username กับ password ผิดจริง ๆ ไม่มีอะไรมากครับ
ตกใจไว้ก่อน

14. ใส่รหัสถูกต้อง พบปัญหาอีกแล้ว
พบ
The tip of your current branch is behind its remote counterpart.
Try pulling before pushing again. Or, to force push, hold cmd or ctrl while clicking.
วิธีแก้ไข
เค้าว่า ถ้าผมไม่มีแฟ้มที่ github.com ให้กดปุ่ม ctrl ค้างไว้ขณะคลิ๊ปปุ่ม push
มีหน้าต่างถาม Force Push ขึ้นมาครับ กดเลย
แล้วก็ถาม signin อีกครั้ง ดีครับ ไม่ต้องจำรหัสค้างไว้
เค้าก็เตือนให้ pull ก่อนแล้วนะ แต่ผมไม่ได้ทำ

15. หลัง push สำเร็จ พบว่าใน repository บน github.com หายเกลี้ยง
เหลือแต่ s6update.php แฟ้มเดียว (โปรแกรมหนึ่งที่ทดสอบจะ push เข้าไป)
นึกขึ้นได้ว่า Download repository เป็น .zip ออกมาก่อนหน้านี้
unzip แล้วส่งกลับเข้าไปก็พบว่าทุกอย่างอยู่ครบ
รวมทั้ง https://thaiall.github.io/programming-page/
ทุกอย่างกลับมาเหมือนเดิม

16. ขั้นตอนการ push
1. ตรวจสอบใน Staged changes ว่ามีอะไรเปลี่ยนแปลงไหม ค่อย Push
2. กรอกข้อมูลใน Commit แล้วกดปุ่ม Commit
3. กด Push 2 ครั้ง เค้าถามมาทีละครั้ง
4. ใส่ user and password แล้ว signin
5. ไปดูผลการ push ที่ repository ใน github.com

แนะนำเว็บไซต์
https://technologyand.me/2016/08/29/git-with-atom/
https://vwannabe.com/2016/05/26/how-to-use-github-and-atom/
http://www.thaiall.com/atom/

หลัง Update Windows 10 ต้นกันยายน 60 พบสิ่งที่รอคอย 3 เรื่อง

ปกติแล้วการ Update Windows ก็ไม่ได้รอคอยอะไรมากนัก
แต่พักนี้เจอปัญหาหลายอย่าง ใช้ไปสักพัก
ก็รู้สึกว่าอยากให้ Windows แก้ปัญหาที่ค้างใจอยู่
วันนี้ 1 กันยายน 2560 ได้ update Windows 10
ใช้เวลานานนิดหน่อย แล้วก็พบสิ่งที่รอคอย ดังนี้

1. แก้ Bug ใน MS Edge ให้มีการส่งค่ากลับ (return)
จากการใช้ XMLHttpRequest() ใน Javascript
เพื่อเชื่อม XML กับ XSL แล้วต้องการให้มีการคืนค่า
มากับ transformToFragment ที่ผ่าน XSLTProcessor
ปรากฎว่าคืนมาเป็น null ไม่เหมือน Browser อื่นที่คืนค่าปกติ
เขียนปัญหาไว้ที่ http://www.thaiall.com/blog/burin/8841/
แต่ปัญหานี้หายไปแล้วหลัง Update
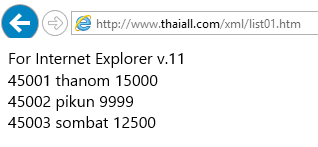
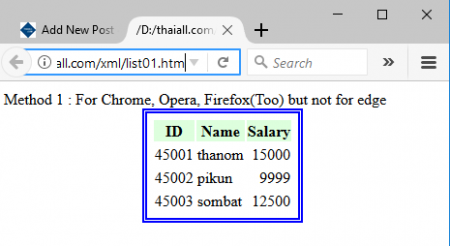
ทดสอบที่ http://www.thaiall.com/xml/list01.htm
โปรแกรม Edge เป็นส่วนหนึ่งของ Win10 ไม่สามารถ Download มาติดตั้งได้
จะปรับรุ่นต่อเมื่อมีการ Update Windows

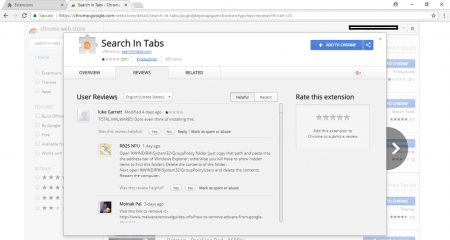
2. Chrome ของผม ติด Malware ชื่อ Search in Tabs
ก็ไม่ได้ติดตั้ง แต่เข้ามาทางไหนก็ไม่แน่ใจนัก
หลัง Update Windows เข้าไปก็ไม่พบอีก
แต่ยังเห็น Search in Tabs เป็นรายการ Extensions
ของ Google ที่ให้ Download กันอยู่ อ่าน Review ดูได้ครับ
แล้วอย่างไป Download นะครับ
ตอนนี้ในเครื่องมี Windows Defender ช่วยจัดการไวรัส และ malware
ที่กิน Resource เยอะมากอยู่แล้ว ไม่จำเป็นก้ไม่ต้องไปลงของค่ายอื่นนะครับ

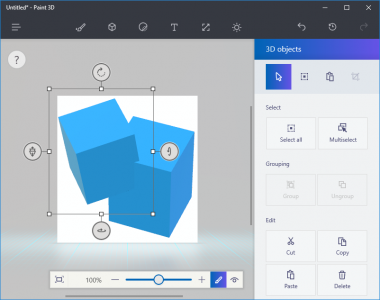
3. ใน Paint มีปุ่ม Open Paint 3D
เป็นเครื่องมือที่น่าสนใจ ลองสร้างวัตถุ 3 มิติได้เลย
สามารถ Export แบบ 3D เป็น .3mf
ถ้าเป็น 2D ก็ได้หลายนามสกุล เช่น PNG เป็นต้น

วิธีอัพเดทวินโดว์ (Update Windows)
1. คลิ๊กปุ่ม Windows, Setting
2. ลงมาข้างล่างสุด คลิ๊ก Update & security
3. พบ Windows Update เป็นรายการแรก ก็คลิ๊กเลย
4. เข้าไปพบปุ่ม Check for updates
หากไม่มีอะไรต้อง update ก็ใช้เวลาไม่นาน
ขณะนี้ผมได้ Windows 10 Version 1703

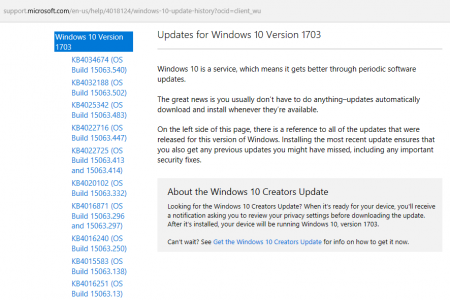
ข้อมูลเกี่ยวกับ Windows 10 version 1703
https://support.microsoft.com/en-us/help/4018124/windows-10-update-history
พบว่ามีการ Update Microsoft Edge หลายรายการ อาทิ KB4020102 (OS Build 15063.332)
หลัง Update ได้
– Microsoft Edge 40.15063.0.0
– Microsoft EdgeHTML 15.15063
โดยมีรายการ Update เพื่อ Improvements and fixes ผ่านโปรแกรมแก้ไข ดังนี้

KB4034674 (OS Build 15063.540)
KB4032188 (OS Build 15063.502)
KB4025342 (OS Build 15063.483)
KB4022716 (OS Build 15063.447)
KB4022725 (OS Build 15063.413 and 15063.414)
KB4020102 (OS Build 15063.332)
KB4016871 (OS Build 15063.296 and 15063.297)
KB4016240 (OS Build 15063.250)
KB4015583 (OS Build 15063.138)
KB4016251 (OS Build 15063.13)


พบว่า MS Edge มี Bug เกี่ยวกับการ xml + xslt + javascript แล้ว return null

internet explorer 11

พบการรายงาน Bug เรื่อง ใช้ javascript และ XSLTProcessor
ที่ MS Edge ไม่ Return value กลับมาอย่างถูกต้อง
ที่พบ คือ “Created fragment is null” จากการ run test
โพสต์ปํญหาโดย Martin Honnen เมื่อ 18 พฤศจิกายน 2558
ที่ https://connect.microsoft.com/IE/feedback/details/2030537
แล้ว MS ก็ย้าย Bug Report ไปยังกลุ่มที่ถูกต้อง
ที่ https://developer.microsoft.com/../issues/5552211/
มีตัวอย่างแฟ้มที่ https://developer.microsoft.com/../issues/9484576/
ทดสอบที่ http://encinematheque.fr/js7/_testHtml.htm
ดูผลการทดสอบใน _testHtml.htm
พบว่า

Test failed. Created fragment is: null.

แล้ว Microsoft Edge ที่ผมใช้อยู่รุ่น 38.14393.1066.0
แต่รุ่นล่าสุดคือ 40.15063 Desktop April 11,2017
ไปอ่าน ถาม-ตอบ ในเว็บของ Microsoft.com
เค้าว่าถ้า update MS Windows ก็จะ update MS Edge ให้โดยอัตโนมัติ
ก็รอลุ้นว่ารุ่นใหม่จะแก้ bug ตัวนี้หรือไม่ เพราะ browser ตัวอื่นผ่านหมด
https://en.wikipedia.org/wiki/Microsoft_Edge

firefox local
firefox local

สรุปว่าตอนนี้ เขียน Script ไว้ที่ http://www.thaiall.com/xml/list01.htm
เพื่ออ่านแฟ้ม XML ส่งเข้าปรับรูปแบบด้วย XSLT แล้วแสดงผลเป็น HTML
ได้ทดสอบกับ Firefox, IE, Opera, Chrome ก็ใช้งานได้แล้ว
ก็ใช้หลายวิธี ให้เหมาะสมกับแต่ละ Browser
เหลือแต่ MS Edge นี่หละครับ ค้างใจอยู่


ทดสอบ Free web hosting ที่บริการ PHP กับ MySQL มาหนึ่งโหล

อันที่จริงชีวิตคนไอทีเช่นผม ก็เริ่มต้นจากการใช้บริการ Free web hosting นี่หละ
เริ่มแรกเลยก็ geocities.com จากนั้นก็ขยับขึ้นไปบน Server
ที่บริการ Server-Side Script ไม่ใช่ Static web page อีกต่อไป
ไปใช้ บริการ Database Server บริการ PHP บ้าง ASP บ้าง
แล้วแต่อารมณ์จะพาไปหาในแต่ละช่วงชีวิต
ขอสารภาพเลยว่า ตัวหนึ่งที่เช่าใช้อยู่ทุกวันนี้ ก็เริ่มต้นจากการใช้ของเขาฟรี
แล้วติดใจ จึงยอมจ่ายตังมาจนถึงทุกวันนี้

เข้าเรื่องเลย เหตุเกิดว่าผมต้องคุยกับ น.ศ. เรื่องการเขียน Server-Side Script
พอยกกรณีศึกษา หรือ Sample code ก็ต้องหาที่ให้เค้าลอง
ต้องบริการ PHP + MySQL + Free + No Domain
จะให้ใช้ XAMPP่, Appserv, Thaiabc หรือ Localhost อยู่บ้าน นั่นต้องทำอยู่แล้ว
แต่ให้ดีต้อง Online
ครั้งจะ Upload ไป Run ที่เครื่องของผมที่เปิดรอท่า ก็ดูกะไรอยู่
จึงให้ไปสมัครใช้ฟรีกับเหล่า Free web hosting ผมตั้งเงื่อนไขให้เค้าสมัครใช้คนละ 2 ตัว

ปีนี้ 2017 หากจะให้เล่าถึง Server สมัยผม ก็คงล้มหายตายจากกันไปหมดแล้ว
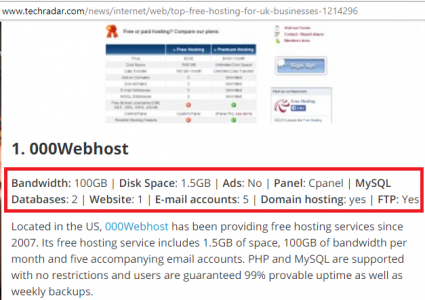
ไปค้นเน็ตเจอที่ Desire Athow เขียนเมื่อ June 18, 2017
ว่ามี Free hosting สำหรับ Business ที่เป็น Best ถึง 10 sites
ผมก็ไม่รอช้า มี Reference แล้วก็หยิบมาเลย ทดสอบเรียงตัวเลย
http://www.techradar.com/…/top-free-hosting-for-businesses

ตัวแรก ueuo.com
ตัวนี้ไม่ได้อยู่ใน 10 Best นะครับ
แต่เป็นตัวที่ผมวาง Sample code เมื่อหลายปีก่อน และ Active อยู่
กลับไปทดสอบสมัคร เพราะผมใช้อยู่ก็จะแนะนำให้ น.ศ. ไปสมัครด้วย
ที่หน้าสมัครพบประกาศว่า
บริการ php 5.4 และ mysql 5.5 สำหรับ All free account
ใน ueuo.com หากจะ create an account
ต้องเข้าไปที่ freewebhostingarea.com
เข้าไปตาม Link เค้าก็ให้สมัคร
ไปจนถึงสร้าง account แบบ Free subdomain Hosting
เช่น www.thaiabc.ueuo.com แล้วกด proceed ก็จบเลยครับ
จบตรงข้อความที่ว่า
Public registration was temporarily disabled!
If you need an account, please contact us using register@freewha.com
ต่อจากนี้ก็จะทดสอบ 10 sites ตามข้อมูลที่ Desire Athow แนะนำ

ของฟรี ของดี มีในโลกไซเบอร์

1) http://www.000webhost.com/
สรุปว่าสามารถสมัครได้ มีบัญชี คือ https://thaiabc.000webhostapp.com
เริ่มจากเข้าไปแล้วพบอะไรน่าคลิ๊กไปหมด
สมัครเสร็จก็ต้องไปรอ Email confirmation required
หลัง Verify email แล้วกดปุ่ม Manage website “thaiabc”
พบบริการ 6 รายการ 1) Build website 2) Set web address 3) File manager 4) Manage database 5) Manage emails 6) Settings
เริ่มต้นก็กด Build website
พบบริการ 3 รายการ 1) Build a website easily 2) build WordPress website 3) Upload Own Website
เนื่องจากผมมีแฟ้ม .php ที่เตรียมทำงานกับ mysql จึงเลือกข้อ 3) Upload Own Website
เข้าหน้า files ที่คล้ายกับ Windows Explorer ที่แสดง Folder ด้านซ้าย มีรายการแฟ้มด้านขวา
พบห้อง /public_html เลือก Upload files แล้วก็ upload แฟ้ม .php ที่เตรียมไว้
แต่ยังทดสอบไม่ได้ เพราะต้องกำหนดเรื่อง Database ในแฟ้ม .php ก่อน
กลับไปเข้า 4) Manage database พบว่าเค้าให้ได้สูงสุด 2 Database
มี Default database engine: InnoDB on MariaDB 10.1
เข้าจัดการผ่าน database.000webhost.com และใช้ localhost เป็น hostname
แล้วสั่ง New Database
กรอก Database name, Database username, Password
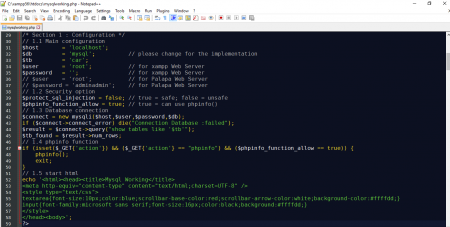
หลังจัดการ Database เสร็จก็นำข้อมูลไปกรอกในแฟ้ม .php
แล้ว upload แฟ้ม .php เข้าไปใหม่
ผลการทดสอบ Sample code ผ่านด้วยดี
หลังปรับแก้การเชื่อมต่อ MySQL แบบเดิม เป็น MySQLi
เพราะ Server บริการ PHP 7.1.7 และทุกตัวที่บริการก็ให้บริการ PHP 7 ขึ้นไปกันหมด

2) http://www.freehostia.com/
หน้าตาเรียบง่ายดี มุมบนขวาเห็นคำว่า SIGN UP NOW FOR FREE ???
ในขั้นตอนต่อไป จำเป็นต้องมี Domain Name ติดตัวไปสมัครด้วย ถ้าไม่มีก็ไม่ได้ไปต่อ
สรุปว่า ต้องมี Domain name จึงจะสมัครได้

3) http://www.5gbfree.com/hosting-plans/
คลิ๊ก Signup Now จากนั้นก็กรอกข้อมูล แล้วกด Create Accout
แล้วไปทำ Verification ผ่าน link ใน email
พบรหัสผ่านใน email และข้อมูลต่าง ๆ
สำหรับ email จากที่นี่ ถ้าไม่พบใน inbox อาจไปอยู่ใน spam ได้นะครับ
วิธีเข้า cPanel เช่น http://thaiabc.5gbfree.com:xxxx/
มองหา Database พบ MySQL Databases ก็คลิ๊กเข้าไป
จากนั้นกด New Database, Add New User
จากนั้นกด Add ในหัวข้อ Add User to Database
แล้ว Manage User Privileges เลือก ALL PRIVILEGES แล้ว Make Changes
กลับออกไป cPanel เข้า File Manger
เข้า public_html แล้วคลิ๊ก Upload ส่งแฟ้ม .php ที่กำหนด DB แล้วเข้าไป
ขณะทดสอบพบปัญหาการไม่บริการ iconv ก็ตรวจสอบ แล้วปรับ code ใหม่
ผลการทดสอบ Sample code ผ่านด้วยดี

4) http://www.freehosting.com/client/cart.php
เข้าไปก็เลือกแบบ Free Hosting กด Order Now
เค้าว่าจะได้พื้นที่ 10 GB กับ 1 MySQL database แต่พบปัญหา
สรุปว่า ต้องมี Domain name จึงจะสมัครได้

5) http://www.zymic.com/
วันนี้เข้าแล้ว too long to respond ครับ
มีข้อมูลล่าสุดใน archive.org เมื่อมกราคม 2017
https://web.archive.org/web/20170111154733/http://www.zymic.com/

6) http://byet.host/free-hosting
กดปุ่ม Sign up for a plan ที่อยู่ด้านล่าง
กรอกข้อมูลแล้วกด Register แล้วไปกด activate ใน email
ไปตรวจใน Spam box ก็จะพบอีเมลจากผู้ให้บริการ
หลัง activate ระบบจะสร้าง user เพื่อเข้า control panel, mysql, ftp
ใน Control Panel คลิ๊ก MySQL Database แล้วสร้าง Database
เค้าระบุ Hostname จะใช้ localhost ไม่ได้ และมี phpmyadmin ให้ใช้
ได้ข้อมูลเข้าไปปรับแฟ้ม .php
กลับมาเลือก Online File Manager แล้วเข้า htdocs
กดปุ่ม upload, choose file แล้วคลิ๊กที่เครื่องหมายถูก เพื่อ submit
ผลการทดสอบ Sample code ผ่านด้วยดี

7) https://www.awardspace.com/free-hosting/
เข้าไปก็กรอก e-mail และ password แล้วกด Join Awardspace
แล้วไป click link to confirmation ใน email
จากนั้นเข้า Dashboard มีทุกอย่างที่ต้องการ
คลิ๊ก Database Manager
กรอก Database name และ password แล้วกด Create database
ส่วน DB user name เค้าให้เป็นชื่อเดียวกกับ Database name
แล้วให้ Host name มาด้วย ต้องใช้ของเค้า
กลับไปที่ Dashboard ครั้งนี้คลิก Domain Manager
คลิ๊ก Create a Free Subdomain พิมพ์ thaiabc หน้า atwebpages.com
แล้วกด Create พอสร้างเสร็จก็กด Open Website
http://thaiabc.atwebpages.com/
กลับไปที่ Dashboard คลิ๊ก File Manager
ก่อนหน้านี้เข้าไปแล้วว่าง ตอนนี้เข้าไปพบ Folder : thaiabc.atwebpages.com
ไป double click เพื่อเข้าไป
กด Upload เลือกแฟ้ม .php แล้วกด Upload เป็นอันเรียบร้อย
ผลการทดสอบ Sample code ผ่านด้วยดี

8) http://www.freehostingeu.com/web-hosting-page.php
ใน column Free plan กด Sign up
พบ New signups are temporarily disabled
สรุปว่าปิดบริการสำหรับผู้ใช้บริการรายใหม่ชั่วคราว

9) http://www.uhostfull.com/free-hosting.php
มีปุ่ม Sign Up! อยู่ข้างล่าง คลิ๊กเลย
มีให้กรอกเพียบ นับได้ 13 ช่อง รวม captcha
แล้วก็เข้า email จะไปทำ Activation แต่ไม่พบอีเมล
ทำ Resend Activation Email ใน http://cpanel.uhostfull.com/profile
กดแล้วก็ยังไม่ได้รับอีเมล รอแล้วก็ยังไม่เห็นมาเลย

10) http://freehostingnoads.net/webhosting.php
มีปุ่ม Signup Now อยู่ข้างล่าง คลิ๊กเลย
แล้วคลิ๊กปุ่ม If you want free limited hosting, please click here…
ตอนกรอกข้อมูลหน้าตาเหมือน http://www.uhostfull.com
และปัญหาเหมือนกันเลยด้วย
คือเข้า email จะไปทำ Activation แต่ไม่พบอีเมล
ทำ Resend Activation Email
กดแล้วก็ยังไม่ได้รับอีเมล รอแล้วก็ยังไม่เห็นมาเลย

สรุปว่าผลการทดสอบสมัครใช้ host ฟรี ตามคำแนะนำ
ของ Desire Athow ใน techradar.com เรื่อง Best free hosting
ได้มาหลังทดสอบจำนวน 4 host ตามรายละเอียดด้านบน
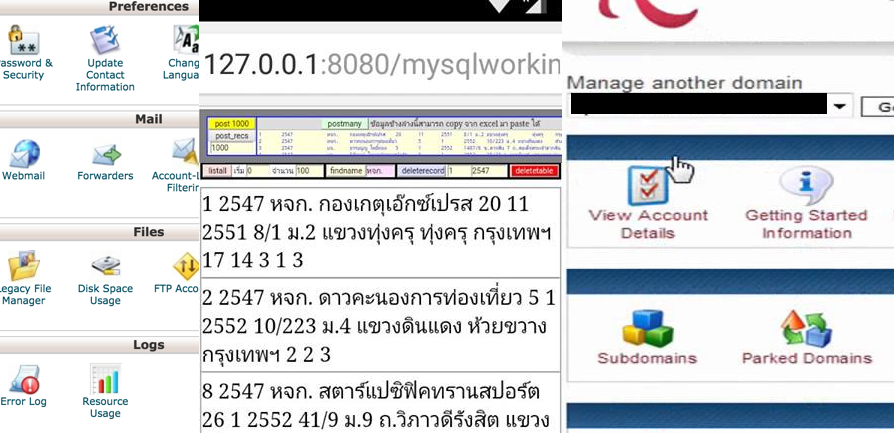
มองใกล้ตัวหน่อยก็เห็น Smart phone ของผมเป็น android
จึงติดตั้ง App: Palapa web server แล้ว Start service
จากนั้นก็ไปคัดลอก code จาก
http://www.thaiall.com/perlphpasp/source.pl?9116
วางไปบน App: DroidEdit Free แล้ว save as .php
เข้าห้อง /sdcard/pws/www
แล้วเรียกผ่าน chrome ว่า http://127.0.0.1:8080/hello.php
สรุปว่า Palapa web server เป็น host ตัวที่ 12 ที่ทดสอบครับ

ขอจบการเล่าเรื่อง 12 host แต่เพียงเท่านี้

#AndroidStudio ตอนที่ 11 แอพสำหรับ Tablet(Wide)/Smartphone(Narrow) มีตัวเลือกรายการด้านซ้าย รายละเอียดด้านขวา ถ้าจอกว้างพอ

#AndroidStudio ตอนที่ 11 แอพสำหรับ Tablet(Wide)/Smartphone(Narrow) มีตัวเลือกรายการด้านซ้าย รายละเอียดด้านขวา ถ้าจอกว้างพอ

<introduction>
อารัมภบท
การเขียน App สักตัว ที่ต้องการให้มี ซีกซ้าย (Left Pane) เป็นรายการตัวเลือก และซีกขวา (Right Pane) เป็นรายละเอียดหลังคลิ๊กไปที่รายการ ทาง Android เข้าใจเรา ได้เตรียม Template (อ่านได้จาก Add Code from a Template ) มาให้เราเลือก 12 แบบ พบว่า Main/Detail Flow เป็นแบบที่แบ่งจอภาพเป็น Two section สำหรับจอแบบ Wide screen แต่จะหดให้ทำงานกับ One section หากเป็น Narrow screen ซึ่งเค้ากำหนดว่า Wide screen คือ 900dp และผมใช้ Smartphone ก็จะไม่มีโอกาสได้เห็นแบบ 2 section แต่ใน code หากปรับชื่อ folder เป็น 600 dp ก็ทำให้ app รองรับการแสดงผลแบบ Main/Detail Flow บน Smartphone ได้

การเรียนรู้การทำงานของ Template นี้ ก็ต้องหา Activity เข้าไปใส่ แล้วค่อยแกะค่อยไซร้ไป ไม่งั้นจะให้พิมพ์ Hello world! กันทุก Project ก็คงจะจืดแยเลย จึงใส่ตัวเลือกเข้าไป 6 รายการ คือ API Level, Security_patch, width & height, IP Address, Date and Time และ Webview เมื่อต้องทำให้แต่ละกิจกรรมทำงานได้ พบปัญหาว่า บางกิจกรรมใช้ method ใน Dummycontent.java ไม่ได้ แก้ไขโดยไปใส่ใน Activity หลัก ซึ่งปัญหาที่พบบ่อยมี 2 สาเหตุ คือ 1) ฟังก์ชันนั้นต้องเรียกใช้ Context ของ Activity แต่ไม่มีให้ใช้ในคลาสนั้น 2) การเรียกใช้ฟังก์ชัน ไม่สามารถใช้ได้หากอยู่ใน method แบบ static จึงต้องย้ายงานไปทำใน Activity หลัก อาทิ MainActivity.java แล้วเก็บเป็นตัวแปรให้อ้างอิงได้ เมื่อ Dummy ต้องการใช้ ก็อ้างอิงเป็นวัตถุใน Dummy แล้วนึกไปใช้ได้ แต่ Project นี้มี Activity หลักอยู่ใน ItemListActivity.java

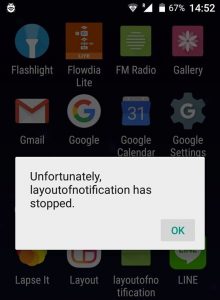
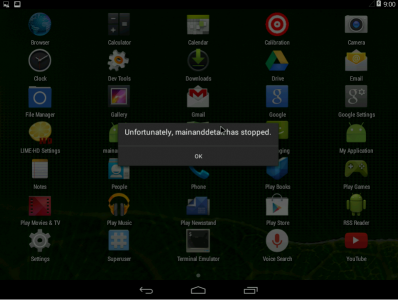
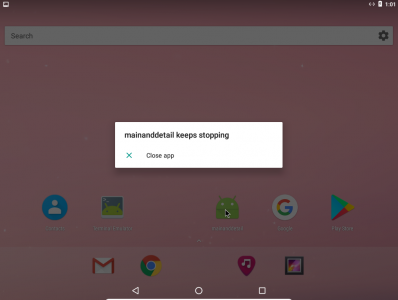
ระหว่างพัฒนา และทดสอบ ได้พบกับคำว่า Unfortunately บ่อยเลย เพราะการใช้ method ในที่ห้ามใช้ ระบบปฏิบัติการไม่อาจดำเนินการตามที่คาดไว้ แต่ Build APK ผ่าน ไม่มีปัญหานะครับ ปัญหาไปเกิดตอนประมวลผล ก็ต้องแก้ไขกันไป เพราะเงื่อนไขเยอะมาก หากันจนเจอ หรือหากันให้เจอ เมื่อต้องเจอปัญหาในแต่ละครั้ง

สรุปกระบวนการได้ 13 ขั้นตอน ประกอบด้วย 1) สร้าง Project เลือก Template แบบ Master/Detail Flow 2) ทำให้ item ใน list มีกิจกรรม 3) เพิ่มเกิจกรรมให้ตัวเลือกแต่ละตัว ใน DummyContent.java 4) การได้ ipaddress ต้องปรับ AndroidManifest.xml 5) สร้าง WebView ชื่อ aboutus.xml รับ HTML Tag 6) การเพิ่ม layout แบบ WebView แทน TextView จำนวน 1 ตัวเลือก 7) การหาขนาด Width และ Height ของจอภาพ 8) การหาค่า IP Address 9) การหาวันเวลาของเครื่อง 10) การหาเลขรุ่น API ของ Android ที่มีในโทรศัพท์แต่ละเครื่อง 11) การส่งค่าเข้าตัวแปรแบบตัวเลข และตัวอักษรใน string 12) การอ้างอิงชื่อ id, string, layout, drawable แบบอ้างอิงด้วยตัวแปร 13) การติดตั้ง Android 7.1 บน VirtualBox


ปล. แฟ้ม Project ผมบีบไว้ และแชร์ให้ Download ทั้ง .rar และ .apk ไปทดสอบกัน
ที่ http://www.thaiall.com/android (ผ่าน 4shared.com)

</introduction>
<definition>
นิยามศัพท์

  1. Template คือ แบบฟอร์มที่ยังไม่ได้ใส่เนื้อหา แต่มีเค้าโครง (Layout) หรือกิจกรรม (Activity) ที่จำเป็นมาให้แล้ว ซึ่ง Android มีให้เลือก 12 แบบ สามารถนำมาปรับแต่งเสมือนกับโครงงานที่สร้างขึ้นใหม่ แต่เทมเพลตจะช่วยล่นระยะเวลาในการพัฒนาระบบในระยะแรกให้สั้นลง แทนการเริ่มต้นจาก 0 หรือการนับ 1 ใหม่
  2. Unfortunately คือ ปัญหาที่ไม่คาดหวัง แต่มาปรากฎบนหน้าจออุปกรณ์ของเราได้ ในกรณีที่เกิดขึ้นจากการติดตั้งและใช้แอพที่ยังอยู่ในระหว่างพัฒนา ก็ลบแอพ (Uninstall) แล้วกลับไปไล่ดูเงือนไขของ command หรือ method หรือ class ที่เรียกใช้ อาจใช้บาง method ที่ใหม่เกินกว่า API ในเครื่องจะรองรับ หรือเก่าเกินไป หรือความไม่เข้ากับของการใช้คำสั่ง แต่ถ้าเป็น App ที่พัฒนา และใช้งานมาแล้วระยะหนึ่ง มีคำแนะนำให้ Clear cache and data หรือ ลบ App แล้วลงใหม่ หรือ Factory reset เป็นต้น

</definition>

กำลังเล่าเรื่อง การใช้โปรแกรม Android Studio สู่เพื่อนนักพัฒนา ผ่าน Blog

<process>
กระบวนการในการพัฒนา APP
เพื่อให้ได้แอพที่แสดงผล Main กับ Detail แยกกัน และแสดงผลต่างกันกับอุปกรณ์แบบ Wide screen และ Narrow screen
มีขั้นตอน ดังนี้

1. สร้าง Project เลือก Template แบบ Master/Detail Flow
ตั้งชื่อให้ project ว่า mainanddetail
เป็นตัวอย่างโครงงานที่น่าสนใจ สามารถนำมาปรับเป็นแอพที่ใช้งานจริงได้
หากใช้กับ Narrow screen จะมีเพียง one screen
หากใช้กับ Wide screen จะแบ่งการทำงานเป็น 2 Section
คือ ซีกซ้ายสำหรับรายการเมนู (Option List) และซีกขวาสำหรับรายละเอียดข้อมูล (Detail)
มีแฟ้มน่าสนใจ 9 แฟ้มที่จะเล่าสู่กันฟัง ดังนี้
https://inducesmile.com/android/android-fragment-masterdetail-flow-tutorial-in-android-studio/
1.1 สำรวจแฟ้ม AndroidManifest.xml
พบว่าใน <application> ได้กำหนด activity ไว้ 2 section
เพื่อเรียก .ItemListActivity และเรียก .ItemDetailActivity
โดย .ItemDetailActivity ที่มี parent คือ .ItemListActivity”
แสดงว่า 1) ItemListActivity.java คือ Activity หลัก
และทำงานคู่กับ 2) ItemDetailActivity.java อย่างที่เรียกว่าแยกกันไม่ออกทีเดียว
จะเห็นว่างานเริ่มจากการเรียก 2 Activity แต่จะแสดง Layout จากทั้ง 2 หรือไม่
ขึ้นกับว่าจอภาพที่ใช้เป็นแบบ Wide หรือ Narrow

1.2 สำรวจ Activity ที่ 1 แฟ้ม ItemListActivity.java
พบว่าใน oncreate ได้สั่ง setContentView(R.layout.activity_item_list);
ซึ่งจะไปเรียกให้ Layout แบบ CoordinatorLayout ที่มีอะไรหลายอย่างทำงานร่วมกัน
Activity นี้ควบคุมงานทางด้านซ้าย (Left Pane) คือ รายการตัวเลือก

1.3 สำรวจ Layout ที่ 1 แฟ้ม activity_item_list.xml
โครงร่างหลักสำหรับการวางวัตถุในด้านซ้าย (Left Pane)
มี Root Layout เป็น CoordinatorLayout
ที่ใช้ AppBarLayout กับ FloatingActionButton
ซึ่งพบได้ใน Template แบบ Basic Activity ที่อธิบายในตอนที่ 9 ข้อ 1
แล้วเรียก Layout อื่นให้ทำหน้าที่แสดงตัวเลือกผ่าน FrameLayout และ include
พบว่ามี Layout structure ดังนี้

<CoordinatorLayout>
 <AppBarLayout>
 <Toolbar />
 </AppBarLayout>
 <FrameLayout>
 <include layout="@layout/item_list" />
 </FrameLayout>
 <FloatingActionButton />
 </CoordinatorLayout>

1.4 สำรวจ Layout ที่ 2 แฟ้ม activity_item_detail.xml
โครงร่างหลักสำหรับการวางรายละเอียดในด้านขวา (Right Pane)
หรือเป็น Full Parent หากทำงานบน Narrow Screen
มี Root Layout เป็น CoordinatorLayout เช่นกัน
จะทำหน้าที่แสดงข้อมูลด้านขวาสำหรับจอภาพที่กว้างไม่น้อยกว่า 900 dp
แต่จะเป็น full screen แทน activity_item_list.xml หากน้อยกว่า 900 dp
– การแสดงเนื้อหามีทำงานกับ fragment แล้วนำไปรวมกันใน Layout
ซึ่งมีความสัมพันธ์ระหว่างแฟ้ม java จำนวน 3 แฟ้ม
– การแสดงข้อมูลมีกิจกรรมใน 1) ItemDetailActivity.java ทำหน้าที่รับอะไรจากใครเข้าไป
แล้วพบการเชื่อมกับ 2) ItemDetailFragment.java
ด้วยคำสั่ง arguments.putString(ItemDetailFragment.ARG_ITEM_ID, ..
และ .add(R.id.item_detail_container, fragment) ..
ซึ่ง item_detail_container อยู่ใน Layout activity_item_detail.xml
– หากเข้าไปดูใน ItemDetailFragment.java
พบว่า มีการเชื่อมกับ ARG_ITEM_ID กับ 3) DummyContent.java อีกทีหนึ่ง
มีรายละเอียดที่น่าสนใจอีกมากมายใน DummyContent.java

พบว่ามี Layout structure ดังนี้

<CoordinatorLayout>
 <AppBarLayout>
 <CollapsingToolbarLayout>
 <Toolbar />
 </CollapsingToolbarLayout>
 </AppBarLayout>
 <NestedScrollView android:id="@+id/item_detail_container" />
 <FloatingActionButton />
 </CoordinatorLayout>

1.5 สำรวจ Layout ที่ 3 แฟ้ม item_detail.xml
โครงร่างย่อยสำหรับแสดงเนื้อหาโดยตรง และรับข้อมูลแบบ TextView
ทำงานสำหรับด้านขวา (Right Pane) เท่านั้น
พบว่า TextView ถูกเชื่อมข้อมูลกับ DummyContent.java ผ่านคำสั่งใน ItemDetailFragment.java
คือ ((TextView) rootView.findViewById(R.id.item_detail)).setText(mItem.details)
เมื่อเห็นการทำงานของ Layout นี้ จึงนำไปปรับใช้เป็น WebView ในตอนท้ายของบทความนี้

พบว่ามี Layout structure ดังนี้

<TextView id="@+id/item_detail" /> (แฟ้มนี้มี Tag เดียว)

1.6 สำรวจ Layout ที่ 4 แฟ้ม item_list.xml
โครงร่างย่อยสำหรับรายการตัวเลือก ทำงานด้านซ้าย (Left Pane) เท่านั้น
พบว่า findViewById(R.id.item_list) ถูกเชื่อมเข้า View ใน ItemListActivity.java
แล้วเชื่อมโยงระหว่าง RecycleView กับ DummyContent ผ่าน .setAdapter()
หน้าที่ของ item_list คือ แสดงหน่วยข้อมูล (item) ให้เลือกแบบรายการ (List)
พบว่ามี Layout structure ดังนี้

<RecyclerView id="@+id/item_list" /> (แฟ้มนี้มี Tag เดียว)

1.7 สำรวจ Layout ที่ 5 แฟ้ม item_list.xml (w900dp)
คล้ายกับ 1.6 แต่หากจอภาพเป็นแบบ Wide Screen
รองรับการแสดง FrameLayout ที่กว้าง 900 dp ได้ ก็จะมี 2 Pane
มีการตรวจสอบ และกำหนดค่าให้กับ mTwopane = true
ซึ่งพบใน ItemListActivity.java
หากปรับขนาดจาก 900 dp เหลือ 600 dp ก็จะแสดงผลบน Smartphone ของผมได้
จึงลดขนาดด้วยการ rename folder เป็น layout-w600dp
ผ่านการ Right Click เลือก [Show in Explorer] แล้วก็ rename folder ได้เลย
http://www.appstoremarketresearch.com/articles/android-tutorial-master-detail-flow/

พบว่ามี Layout structure ดังนี้

<LinearLayout>
 <RecyclerView id="@+id/item_list" />
 <FrameLayout id="@+id/item_detail_container" />
</LinearLayout>

1.8 สำรวจ Layout ที่ 6 แฟ้ม item_list_content.xml
โครงร่างย่อยสำหรับแสดงรายการตัวเลือกแต่ละรายการ
ปกติจะมีลำดับตัวเลือก และชื่อตัวเลือก ก็จะเป็นตาม Layout นั้น
ส่วนแฟ้มที่กำหนดขนาด (Dimension) คือ dimens.xml
หากเปลี่ยน <dimen name=”text_margin”> ก็จะมีผลต่อ Layout
ที่อ้างอิงผ่าน layout_margin=”@dimen/text_margin”

พบว่ามี Layout structure ดังนี้

<LinearLayout android:orientation="horizontal">
 <TextView />
 <TextView />
</LinearLayout>
2. ทำให้ item ใน list มีกิจกรรม
พบว่าแฟ้ม DummyContent.java ควบคุมการแสดงรายการตัวเลือก
และกิจกรรมหลังเลือกตัวเลือก
หากจะปรับเปลี่ยนจำนวนตัวเลือก หรือเปลี่ยนชื่อตัวเลือก
จาก 25 รายการเป็น 10 รายการ ก็สามารถทำได้
สามารถเปลี่ยน for ใน static เป็นดังนี้

มองหา
 private static final int COUNT = 25;
 static {
 for (int i = 1; i <= COUNT; i++) {
 addItem(createDummyItem(i));
เปลี่ยนเป็น
 private static final int COUNT = 5;
 static {
 addItem(new DummyItem("1","API Level",makeDetails(1)));
 addItem(new DummyItem("2","SECURITY_PATCH",makeDetails(2)));

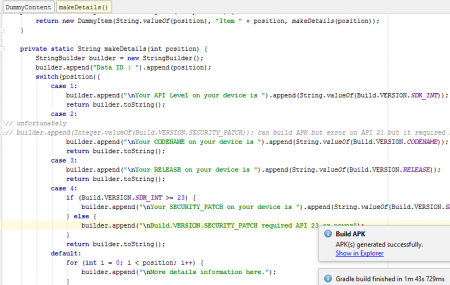
3. เพิ่มเกิจกรรมให้ตัวเลือกแต่ละตัว ใน DummyContent.java

มองหา
 builder.append("Details about Item: ").append(position);
 for (int i = 0; i < position; i++) { .. }
 return builder.toString();
เปลี่ยนเป็น
 builder.append("Data ID : ").append(position);
 switch(position){
 case 1:
 builder.append("\nAPI Level = ")
 builder.append(String.valueOf(Build.VERSION.SDK_INT)); // 21
 return builder.toString();
4. การได้ ipaddress ต้องปรับ AndroidManifest.xml
โดยเพิ่ม 2 tag นี้ ก่อนเปิด tag <application>

<uses-permission android:name="android.permission.INTERNET" />
<uses-permission android:name="android.permission.ACCESS_NETWORK_STATE" />

มีตัวอย่างคำสั่งในข้อ 8


5. สร้าง WebView ชื่อ aboutus.xml รับ HTML Tag
สร้าง Layout ใหม่ให้มีเพียง WebView คล้ายกับ item_detail.xml
แล้วปรับให้การคลิ๊ปปุ่มบน FloatingActionButton ไปเรียก aboutus.xml
เลือกการเปลี่ยน include ใน activity_item_list.xml
ใช้วิธีการกำหนด ViewFlipper เคยเล่าในตอนที่ 10 ข้อ 1

5.1 ปรับแฟ้ม activity_item_list.xml
เพื่อสลับกันไปมาระหว่างการกดปุ่ม FloatingActionButton
คือเลือกระหว่างแสดง item_list กับ aboutus
หาก include item_list ใน wide screen จะมา 2 section
หาก include aboutus ใน wide screen จะมาเฉพาะ WebView

มองหา
 <include layout="@layout/item_list" />
เปลี่ยนเป็น
 <ViewFlipper
 android:id="@+id/view_flipper"
 android:layout_width="fill_parent"
 android:layout_height="fill_parent">
 <include layout="@layout/item_list" />
 <include layout="@layout/aboutus" />
 </ViewFlipper>

https://developer.android.com/reference/android/webkit/WebView.html
https://www.mkyong.com/android/android-webview-example/

5.2 ปรับแฟ้ม ItemListActivity.java
ใน fab.setOnClickListener(new View.OnClickListener() { }
ซึ่งใช้ switch สนับกันสั่ง setDisplayedChild

เพิ่มคำสั่งต่อไปนี้

ViewFlipper vf = (ViewFlipper) findViewById(R.id.view_flipper);
 switch (vf.getDisplayedChild()) {
 case 0:
 vf.setDisplayedChild(1);
 WebView webView = (WebView) findViewById(R.id.webview);
 webView.getSettings().setJavaScriptEnabled(true);
 String mData = getString(R.string.mdata);
 //webView.loadData(mData, "text/html", null);
 webView.loadDataWithBaseURL("file:///android_res/drawable/",
 "<img src='test.jpg' />", "text/html", "utf-8", null);
 break;
 case 1: vf.setDisplayedChild(0); break; }

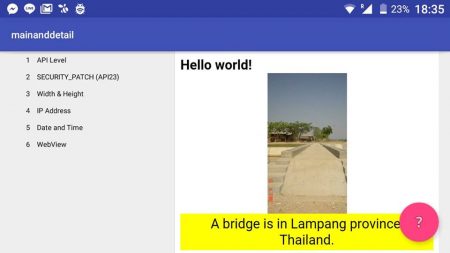
5.3 เปลี่ยนภาพปุ่ม
เลือก ic_menu_help ที่แสดงเครื่องหมาย ? บน FloatingActionButton
ด้วย app:srcCompat=”@android:drawable/ic_menu_help”

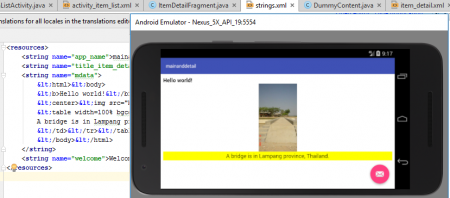
5.4 เขียน HTML แบบใช้ entity reference
คือการใช้ &lt; แทนเครื่องหมาย <

<string name="mdata">
 &lt;html>&lt;body>
 &lt;b>Hello world!&lt;/b>&lt;br/>
 &lt;center>&lt;img src="bridge.jpg" height=200 />&lt;/center>
 &lt;table width=100% bgcolor=yellow>&lt;tr>&lt;td>&lt;center>
 A bridge is in Lampang province, Thailand.
 &lt;/td>&lt;/tr>&lt;/table>
 &lt;/body>&lt;/html>
 </string>

6. การเพิ่ม layout แบบ WebView แทน TextView จำนวน 1 ตัวเลือก
พบว่า มีการส่ง R.layout.item_detail
เข้าไปใน rootView ใน ItemDetailFragment.java
ผ่านคำสั่ง rootView = inflater.inflate(R.layout.item_detail,..
ก็เพียงแต่เปลี่ยนจาก item_detail เป็น aboutus เท่านั้น
เปลี่ยนเป็น rootView = inflater.inflate(R.layout.aboutus,..
แล้วปรับแฟ้ม aboutus.xml ให้คล้าย item_detail.xml ที่มีเพียง Tag เดียว
เพื่อเข้าไปอยู่ใน rootView แล้วแสดงผลร่วมกับ appBarLayout ดังนี้

<WebView xmlns:android="http://schemas.android.com/apk/res/android"
 xmlns:tools="http://schemas.android.com/tools"
 android:id="@+id/webview"
 style="?android:attr/textAppearanceLarge"
 android:layout_width="match_parent"
 android:layout_height="match_parent"
 android:padding="16dp"
 android:textIsSelectable="true"
 tools:context="com.thaiall.www.mainanddetail.ItemDetailFragment" />

โดย rootView ใน ItemDetailFragment.java
จะถูกนำเข้า fragment แล้วรวมกับ container ใน ItemDetailActivity.java
ผ่านคำสั่ง getSupportFragmentManager().beginTransaction()
.add(R.id.item_detail_container, fragment)

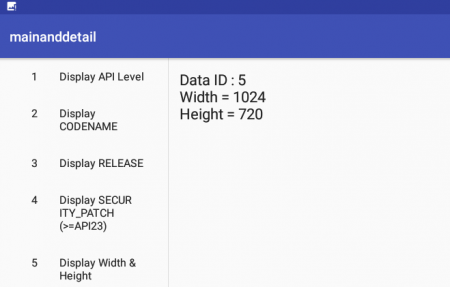
7. การหาขนาด Width และ Height ของจอภาพ
ทำใน Activity หลักที่มี Context
แล้วเรียกค่าไปใช้ใน Dummy project ได้

การเรียกใช้ใน Dummy project

import com.thaiall.www.mainanddetail.ItemListActivity;
private static ItemListActivity item = new ItemListActivity();
builder.append(item.screenWidth);

ประกาศตัวแปรไว้ใต้ Class แบบ static

public static int screenHeight = 0;
 public static int screenWidth = 0;

คำสั่งสำหรับหาค่า Width กับ Height ใช้ใน Activity หลัก

// Width=720pixel Height=1280pixel
// DisplayMetrics displayMetrics = getResources().getDisplayMetrics(); 
DisplayMetrics displayMetrics = new DisplayMetrics();
WindowManager wm = (WindowManager) getApplicationContext().getSystemService(Context.WINDOW_SERVICE); 
wm.getDefaultDisplay().getMetrics(displayMetrics);
screenHeight = displayMetrics.heightPixels;
screenWidth = displayMetrics.widthPixels;
8. การหาค่า IP Address

WifiManager wifiMan = (WifiManager) getApplicationContext().getSystemService(Context.WIFI_SERVICE);
 WifiInfo wifiInf = wifiMan.getConnectionInfo();
 int ipAddress = wifiInf.getIpAddress();
 ip = String.format("%d.%d.%d.%d", 
(ipAddress & 0xff),(ipAddress >> 8 & 0xff),
(ipAddress >> 16 & 0xff),(ipAddress >> 24 & 0xff));
9. การหาวันเวลาของเครื่อง

getDateTime = new SimpleDateFormat("yyyy-MM-dd HH:mm:ss").format(Calendar.getInstance().getTime());
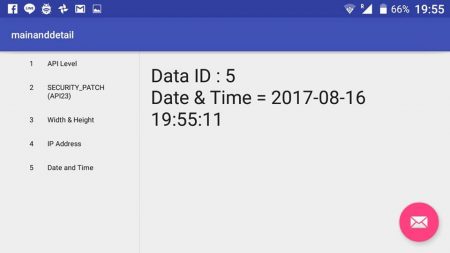
10. การหาเลขรุ่น API ของ Android ที่มีในโทรศัพท์แต่ละเครื่อง

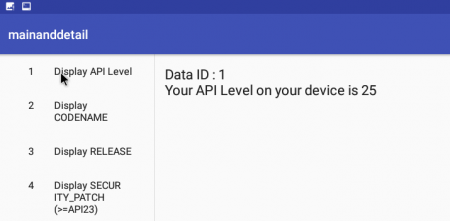
builder.append(String.valueOf(Build.VERSION.SDK_INT)); 
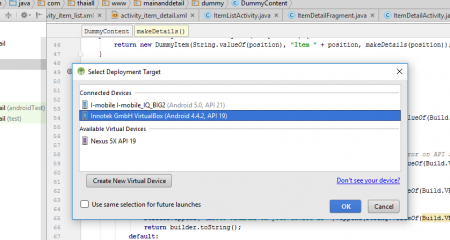
// I-Mobile IQ II 21
builder.append(String.valueOf(Build.VERSION.RELEASE)); 
// 5.0 (Lollipop) or 4.4.2 (Kitkat)
11. การส่งค่าเข้าตัวแปรแบบตัวเลข และตัวอักษรใน string
ตัวอย่างนี้ไม่ได้อยู่ใน project ที่ทดสอบนี้ แต่ค้นมาแล้วอยากเล่าเก็บไว้
จะรับข้อมูลจาก 3 ตัวแปร ที่ผสมระหว่างตัวเลข และตัวอักษร
จึงจะทำให้ข้อมูลสมบูรณ์ ตัวอย่างนี้ตัวแปรจะมีลำดับที่เริ่มจาก 1
ส่งเข้าไปผ่าน method getResources และ getString

<string name="x1">a= %1$d and b= %2$s and c= %3$d</string>
int a = 1024;
String b = "ASCII";
int c = 65536;
String y = getResources().getString(R.string.x1, a, b, c);

12. การอ้างอิงชื่อ id, string, layout, drawable แบบอ้างอิงด้วยตัวแปร
ตัวอย่างนี้ไม่ได้อยู่ใน project ที่ทดสอบนี้ แต่ค้นมาแล้วอยากเล่าเก็บไว้
บางครั้ง มีข้อมูลจำนวนมากใน string หรือ drawable
แล้วต้องการอ้างอิงแบบเขียน code ให้สั้น
ไม่ใช่มี 100 ภาพ ก็เขียน 100 บรรทัด ก็มีเทคนิค หรือ algorithm อยู่ครับ

int n = 1;
String tv ="R.id.x" + n;
int id = getResources().getIdentifier(tv, "id", getPackageName());
TextView v1 = (TextView) findViewById(id);
v1.setText("new value");
// R.layout.v1
// getResources().getIdentifier("v" + 1, "layout", getPackageName());
// R.string.v2
// getResources().getIdentifier("v" + 2, "string", getPackageName());
// R.drawable.v3
// getResources().getIdentifier("v" + 3, "drawable", getPackageName());

13. การติดตั้ง Android 7.1 บน VirtualBox
เริ่มต้นจากการ Download แฟ้ม .iso สำหรับติดตั้ง Android
http://www.android-x86.org/download

มีขั้นตอน ดังนี้

– Installation
– Create/Modify Partitions
แบบนี้เป็นปัญหา Other และ Other/Unknown
แบบนี้ผ่านด้วยดี Windows และ Windows 32 Bits
แบบนี้ผ่านด้วยดี Ubuntu และ Ubuntu 32 Bits
– use GPT = no
– in partition 1
– write in bootable and primary and Quit
– select SDA1 and format in ext4
– install GRUB and /system
– select [run Android-x86]
– Let’s go
– Setup as new
– Checking for update
– Get connected
– Don’t use any network for setup
– continue and Next
– name=android
– Google services > Next
– Anything else? > ALL SET
– Home screen
– chrome + accept policy
– no signin
– click O > Home screen
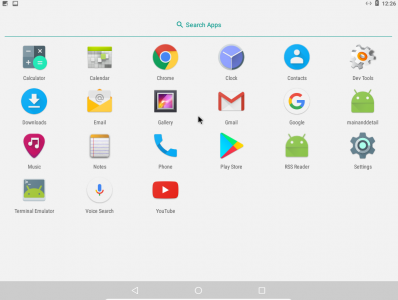
– click up arrow
– click Terminal emulator
– $ifconfig = ip address 192.168.1.2
</process>

<website_guide>
+ http://benzneststudios.com/../context-android-overview/
+ https://developer.android.com/../string-resource.html
+ https://stackoverflow.com/..using-getresources-in-non-activity-class
+ https://stackoverflow.com/..get-context-on-android
+ https://stackoverflow.com/..use-getsystemservice-in-a-non-activity
+ https://stackoverflow.com/..get-screen-dimensions-in-pixels
+ https://stackoverflow.com/..get-screen-width-and-height
+ https://stackoverflow.com/..getwindowmanager-by-another-java
+ https://www.youtube.com/watch?v=hjY06ZmYl8U
</website_guide>

หมายเหตุ 
ถ้าสนใจติดตามเนื้อหาในบล็อกนี้ สามารถ subscribe ด้วย email ที่อยู่ข้างขวา หรือ click here
#AndroidStudio ตอนที่ 10 สำรวจ Layout และ properties ที่น่าสนใจ 6 Layout

#AndroidStudio ตอนที่ 10 สำรวจ Layout และ properties ที่น่าสนใจ 6 Layout

<introduction>
อารัมภบท
เกิดข้อสงสัย จึงอยากชวนไปสำรวจ ว่ามี Layout อยู่เท่าไรที่เราทำเป็น Root layout เพราะ Theme: Basic Activity เตรียม CoordinatorLayout มาให้เราใช้ ส่วน Empty Activity เตรียม ConstraintLayout มาให้ เมื่อเข้า Layout Editor หรือ UI Builder เพื่อสร้าง UI แล้วเข้าส่วน Design มองใน Palatte หัวข้อ Layouts จะพบ 9 ตัวเลือก คือ ConstraintLayout, GridLayout, FrameLayout LinearLayout(horizontal), LinearLayout(vertical), RelativeLayout, TableLayout, TableRow, และ  อันที่จริงยังมี Layout มากกว่านี้ อาทิ CoordinatorLayout หรือ AppbarLayout เป็นต้น

ขณะสำรวจ และทดสอบในบทบาท ผู้ใช้โปรแกรม Android Studio ทำการสร้าง Layout ก็ย่อมมีปัญหา ไม่ได้อย่างใจหมายหลายครา ทำให้มีโอกาสสืบค้น และได้พบบทความเกี่ยวกับ Layout ที่ akexorcist.com และ devahoy.com พบว่านักเขียนเล่าอะไรหลายอย่างเกี่ยวกับ Android ทำให้เข้าใจขึ้นมาก ลองไปหาอ่านดูนะครับ

สรุปกระบวนการ ได้ 5 ขั้นตอน ประกอบด้วย 1) สร้าง Project แบบ Basic Activity ไว้เรียก Layout อื่น 2) การปรับ orientation ของ LinearLayout เป็น vertical กับ horizontal 3) การแสดงข้อมูล 3 column โดยใช้ TextView บน LinearLayout 4) การสร้าง relativelayout.xml 5) การทำภาพ overlay แบบ RelativeLayout 6) copy overlay.xml แล้ว paste constraintlayout.xml 7) การสร้าง gridlayout.xml 8) การสร้าง tablelayout.xml

ปล. แฟ้ม Project ผมบีบไว้ และแชร์ให้ Download ทั้ง .rar และ .apk ไปทดสอบกัน
ที่ http://www.thaiall.com/android (ผ่าน 4shared.com)

</introduction>

<definition>
นิยามศัพท์

  1. LinearLayout คือ เค้าโครงเพื่อจัดวางวัตถุแบบเรียงลำดับ เลือกเรียงแบบ ตามแนวตั้ง (Vertical) หรือตามแนวนอน (Horizontal) เป็น Default Layout เมื่อสร้าง Layout XML File ขึ้นใหม่
  2. RelativeLayout คือ เค้าโครงเพื่อจัดวางวัตถุที่สัมพันธ์กัน เชื่อมโยง อ้างอิง อาจอ้างอิงวัตถุอื่น หรืออ้างอิง Parent ก็ได้ การใช้ Layout Editor จะช่วยให้จัดวาง เห็นภาพใน Blueprint ทำได้สะดวกขึ้นแทนการเข้าไปกำหนดใน XML file โดยตรง
  3. ConstraintLayout คือ เค้าโครงแบบเพื่อจัดวางวัตถุแบบใหม่ คล้าย RelativeLayout มาก และ Android สนับสนุนให้ใช้ เป็นเค้าโครงที่เหมาะสำหรับนักพัฒนาที่ไม่ถนัด XML file มี Layout Editor ที่รองรับการจัดวางผ่าน Blueprint และลดจำนวนเค้าโครงที่ซับซ้อนได้
  4. GridLayout คือ เค้าโครงเพื่อจัดวางวัตถุแบบต่อเนื่อง ในช่องที่จัดเตรียมเป็นตะแกรง หรือจะหย่อนวัตถุไปตามตาที่กำหนดได้ ตัวอย่างการใช้ คือ Image Gallery หรือการแสดงรายการ App บนสมาร์ทโฟน ก็แสดงเป็น Grid
  5. TableLayout คือ เค้าโครงเพื่อจัดวางวัตถุ โดยกำหนดเป็น Row กับ Column เหมาะกับการวางข้อมูลจากระบบ Database ที่แบ่งข้อมูลเป็น Record กับ Field ไว้แล้ว แต่จะจัดวางเป็นฟอร์มสำหรับ Input ข้อมูลก็สามารถสั่งขยายช่องด้วย span ได้
  6. CoordinatorLayout คือ เค้าโครงเพื่อจัดวางวัตถุที่แตกต่างรูปแบบในหน้าเดียวกัน อาจมีทั้ง Slide, Panel, Button หรือ Stick และ Animate ก็ทำได้
  7. ViewGroup คือ เป็นกลุ่มของ View ที่ทำหน้าที่จัดวางเค้าโครง มี subclass ทั้งแบบ Direct (19 Layout) และ Indirect (63 Layout) หากต้องการหา Layout ที่ตรงกับความต้องการให้เข้ามาดูรายชื่อ subclass แล้วเข้าไปดู description และ method ได้

</definition>

กำลังเล่าเรื่อง การใช้โปรแกรม Android Studio สู่เพื่อนนักพัฒนา ผ่าน Blog

<process>
กระบวนการในการพัฒนา APP
เพื่อสำรวจการใช้งาน Layout แต่ละแบบ ว่าใช้งานแตกต่างกันอย่างไร
มีขั้นตอน ดังนี้

1. สร้าง Project แบบ Basic Activity ไว้เรียก Layout อื่น
ตั้งชื่อว่า layoutsample แล้วเตรียม menu, string, activity, layout
ในตอนนี้เราจะ include Layout แล้วเลือก include ผ่าน ViewFlipper
ตามที่เล่าใน ตอนที่ 9 ข้อ 3 ว่าเราสร้าง Menu ผ่าน ToolBar ได้
แล้วเพิ่ม include คู่กับ visible หรือ gone หลายรายการ
เพื่อคุมการ select ใน Menu ให้ได้ผลตามต้องการ
ตัวอย่างนี้ขอปรับการเลือกควบคุมสลับ visible กับ gone
เป็นการใช้ ViewFlipper คลุมใน activity_main.xml และ MainActivity.java

1.1 เริ่มจากสร้าง linearlayout.xml เปล่า ขึ้นมาก่อน
เพื่อเตรียมไว้เป็นตัวเลือกที่ 1 เพราะตัวเลือกแรก คือ content_main.xml
ที่มีมากับ Basic Activity แล้วแสดงคำว่า Hello world!

1.2 ปรับ code ใน activity_main.xml
เพื่อเพิ่ม ViewFlipper เข้าควบคุมการ include

มองหา
 <include layout="@layout/content_main" />
 เปลี่ยนเป็น
 <ViewFlipper
 android:id="@+id/view_flipper"
 android:layout_width="fill_parent"
 android:layout_height="fill_parent">
 <include layout="@layout/content_main" />
 <include layout="@layout/linearlayout" />
 </ViewFlipper>

1.3 ปรับ code ใน MainActivity.java
เพื่อเปลี่ยนจากการใช้ if ไปใช้ switch คุมการ setDisplayedChild ที่ต้องการ

มองหา
 if (id == R.id.action_settings) {
 return true;
 }

เปลี่ยนเป็น
 import android.widget.ViewFlipper;
 ViewFlipper vf = (ViewFlipper) this.findViewById(R.id.view_flipper);
 switch (item.getItemId()) {
 case R.id.content:
 vf.setDisplayedChild(0);
 return true;
 case R.id.linearlayout:
 vf.setDisplayedChild(1);
 return true;
 }

1.4 ไปเพิ่ม <item> ใน menu_main.xml และ <string> ใน strings.xml
เพื่อให้มีตัวเลือกสำหรับการคลิ๊กใน menu
เพื่อเลือก case R.id.content และ case R.id.linearlayout
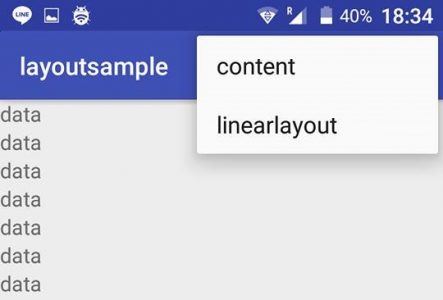
เพราะขณะนี้มี 2 layout ที่พร้อมทำงานใน menu

1.5 ระหว่างสร้าง string พบการปัดบรรทัดที่มีผลกับ layout
โดยตัวอักษรที่ปัดบรรทัด หรือ Line Break ด้วย \n
ปัญหานี้เล่าใน ตอนที่ 8.1 แต่มาพบ \n ในตอนนี้

<string name="datawith2br">a\nb\nc</string>

2. การปรับ orientation ของ LinearLayout เป็น vertical กับ horizontal
เมื่อสร้าง linearlayout.xml พบว่าค่า default ไม่ได้กำหนดว่า orientation เป็นอะไร
แต่ default เป็น horizontal แม้ไม่ได้กำหนดก็ตาม

2.1 ทดสอบเพิ่ม TextView ที่มี @string/data
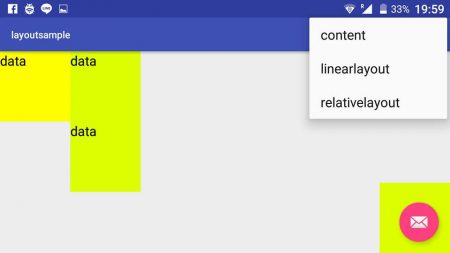
ได้เพิ่มแบบไม่กำหนด id จำนวน 20 tag
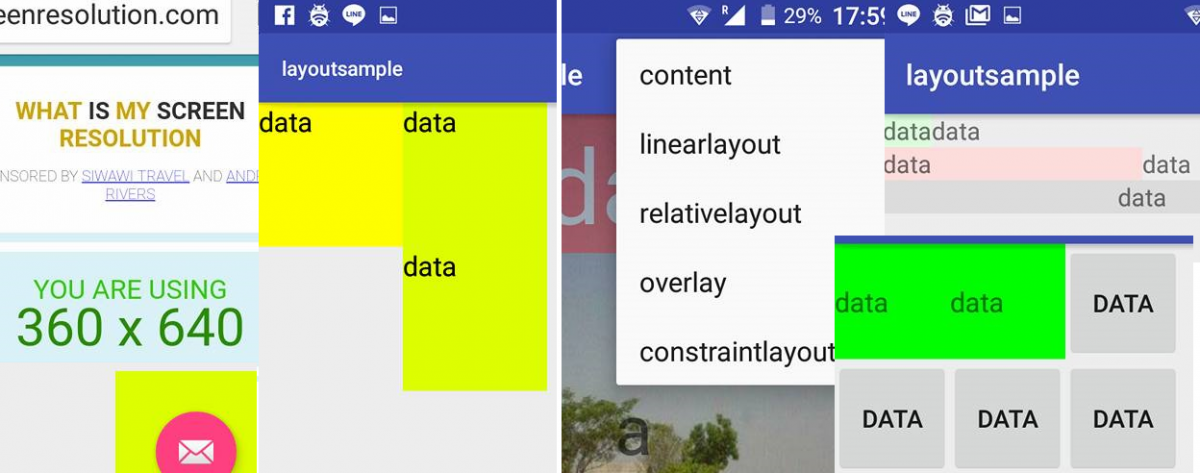
ปัญหาแรก พบว่า ข้อมูลเบียนกันจนแน่นในแถวเดียว เป็นปัญหาเรื่องตำแหน่ง
หากจำนวนข้อมูลน้อยกว่า 20 tag ก็จะแสดงผลได้ปกติ แต่กรณีนี้มากไป
และไม่ได้จัดเรียงแบบ wrap ลงมาบรรทัดต่อไป
นี่เป็นค่า default ของ orientation ที่เป็นแบบ horizontal
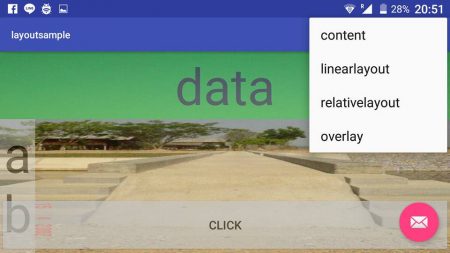
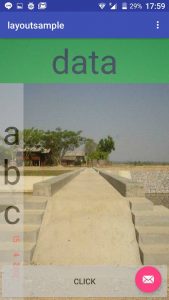
อีกปัญหา พบว่า ทั้งใน emulator และ smart phone
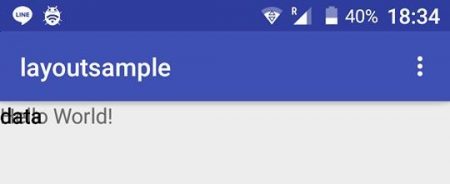
บน emulator จะแสดงคำว่า data ทับ AppbarLayout
บน smartphone จะคำว่า data ถูกทับด้วย AppbarLayout

<TextView
 android:layout_width="wrap_content"
 android:layout_height="wrap_content"
 android:text="@string/data" />

[ปัญหา]
สรุปว่า พบปัญหาการแสดงผลในทั้ง 2 อุปกรณ์
เนื่องจากต้องการให้ตำแหน่งเริ่มต้นแสดงผลต่อจาก Appbarlayout
ไม่ใช่ทับกันไปมา ระหว่าง TextView กับ Appbarlayout แบบนั้น
[วิธีแก้ไข]
เพิ่ม android:layout_marginTop=”?attr/actionBarSize” ใน layout
ทดสอบกับทั้ง linearlayout.xml และ content_main.xml
แม้จะเปลี่ยน wrap_content เป็น match_parent แล้ว ก็ไม่มีปัญหา

2.2 ทดสอบเพิ่ม android:orientation=”vertical”
* ใน layout แบบ ConstraintLayout หรือกำหนด width=”match_parent”
ผล คือ data ทับกันในตำแหน่งเดิม แสดงว่า ไม่รองรับการกำหนดเป็น vertical
* ใน layout แบบ LinearLayout
ผล คือ เรียงต่อกันมาตามแนวนอน บรรทัดละ 1 คำอย่างถูกต้อง
แม้กำหนดเป็น wrap_content ทุกตัวก็ตาม


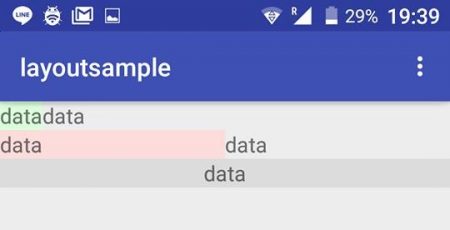
3. การแสดงข้อมูล 3 column โดยใช้ TextView บน LinearLayout
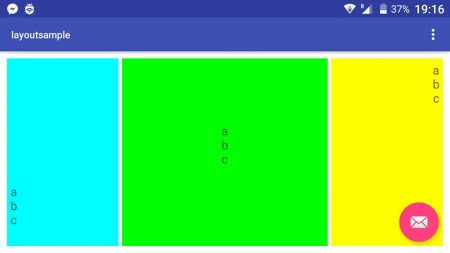
กำหนดให้ แท่งแรกกว้าง 25% (0.25) แท่งที่สอง 50% (0.5) แท่งที่สาม 25% (0.25)
แก้ไขในแฟ้ม linearlayout.xml เดิม
ไปอ่านมาจาก https://devahoy.com/posts/android-layout-linear-layout/

ปรับ properties ที่ใช้ใน TextView ดังนี้

background="#00ff00" คือ สีพื้นเขียว
padding="5dp" คือ ช่องว่างระหว่างตัวอักษรกับขอบใน
gravity="center" คือ อยู่ตรงกลางของ TextView
layout_width="wrap_content" คือ ขนาดเท่าข้อมูล
layout_height="match_parent" คือ ขนาดเต็มจอ
layout_weight="0.50" คือ กว้าง 50%
layout_marginStart="5dp" คือ เว้นว่างทางซ้าย

4. การสร้าง relativelayout.xml
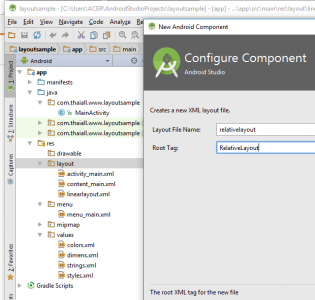
เลือก Layout XML File ที่มี Root Tag = RelativeLayout
แล้วเพิ่มตัวเลือกเข้าไปใน menu จะได้เรียกมาทดสอบได้ง่าย
แก้ให้ครบทุกจุดนะครับ เพราะมีเยอะเลยที่ต้องแก้ให้สอดคล้องกัน
แม้เป็นตัวเลือกที่ 3 แต่ต้องกำหนด vf.setDisplayedChild(2);
อ่านความหมายของ Layout ที่ devahoy.com
เรียบเรียงได้ว่า LinearLayout และ RelativeLayout
ต่างเป็น View Group เหมือน Container มีไว้รวบรวม Child View หรือ Widget
มีสิ่งที่ต่างกันใน 2 Layout คือ การจัดเรียง
ถ้า LinearLayout ก็จัดเรียงแบบ horizontal หรือ vertical
ถ้า RelativeLayout ก็จัดเรียงอย่างมีความสัมพันธ์ ซึ่งกันและกัน
การจัดเรียงค่อนข้างเป็นอิสระ และเชื่อมโยงตามลำดับ ทำให้นึกถึง linked list

ปรับ properties ที่ใช้ใน TextView ดังนี้

id="@+id/tv1" คือ การตั้งชื่อให้ TextView
layout_toEndOf="@+id/tv1" คือ อยู่ต่อท้าย tv1
layout_alignParentStart="true" คือ ตำแหน่งเริ่มซ้ายของจอ
textSize="16sp" คือ ขนาดตัวอักษร 16
layout_below="@+id/tv1" คือ อยู่ข้างล่างต่อจากภาพ tv1
layout_toEndOf="@+id/tv1" คือ เริ่มต่อจากด้านขวาของ tv1
gravity="center|center_vertical" คือ อักษรอยู่กลาง
layout_alignParentEnd="true" คือ ชิดด้านซ้ายของจอภาพ
layout_alignParentBottom="true" คือ ชิดด้านล่างขอจอภาพ

5. การทำภาพ overlay แบบ RelativeLayout
สร้าง Layout ใหม่ชื่อ overlay.xml และ Root Tag = RelativeLayout
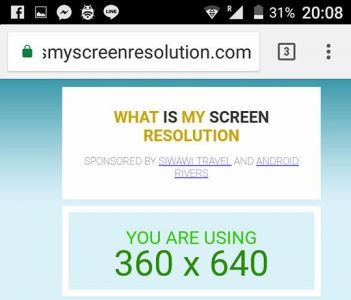
ส่งภาพเข้า drawable ผมเตรียมภาพขนาด 360*640 
เพราะโทรศัพท์ของผมขนาดเท่านี้
https://www.whatismyscreenresolution.com/

ปรับ properties ที่ใช้ใน TextView ดังนี้

android:layout_marginTop="?attr/actionBarSize" คือ ของ RelativeLayout
android:contentDescription="@string/data" คือ รายละเอียดของภาพ 
android:scaleType="fitXY" คือ กำหนดให้ภาพพอดีกับตำแหน่ง X และ Y
app:srcCompat="@drawable/lp01" คือ การใส่ภาพจาก drawable
gravity="center" คือ ข้อความอยู่ตรงกลาง
textSize="60sp" คือ ขนาดตัวอักษร
textColor="#000000" คือ สีตัวอักษร
background="#00ff00" คือสีพื้น
alpha="0.3" คือ การกำหนดระดับความโปร่งแสง
layout_alignParentStart="true" คือ ชิดด้านซ้าย


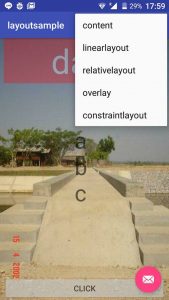
6. copy overlay.xml แล้ว paste constraintlayout.xml
เข้าไปอ่าน blog ของ akeorcist.com เห็นชัดเลยว่า
Android เชียร์ให้ใช้ ConstraintLayout แทน RelativeLayout
เพราะจัดการง่ายผ่าน UI Builder และมีขนาดเล็กกว่า
งานที่เคยทำใน RelativeLayout สามารถแปลงเป็น ConstraintLayout อัตโนมัติ
จึงคัดลอก overlay.xml เป็นวางแฟ้มเป็นชื่อใหม่คือ constraintlayout.xml
เข้า design แล้วคลิ๊กที่ RelativeLayout ใน Component Tree
กด Right Click จะมี Convert RelativeLayout to ConstraintLayout มาให้
แล้วมีให้เลือกทำ Flatten Layout Hierarchy
กรณีของผม ต้องปรับรายละเอียดใน ImageView และ TextView
เพราะ layout เปลี่ยน properties ก็ต้องเปลี่ยน เพี้ยนไปบ้าง

ใน ImageView ก็ต้องทำให้ขอบภาพชิดกับของ parent ดังนี้

app:layout_constraintTop_toTopOf="parent"
app:layout_constraintBottom_toBottomOf="parent"
app:layout_constraintLeft_toLeftOf="parent"
app:layout_constraintRight_toRightOf="parent"

แต่ข้อความใน TextView ถูกเปลี่ยนให้เชื่อมกับส่วนอื่น ทำให้อยู่ตรงกลางของจอ

app:layout_constraintRight_toRightOf="@+id/imageView"
app:layout_constraintLeft_toLeftOf="@+id/imageView"
app:layout_constraintTop_toBottomOf="@+id/textView"
app:layout_constraintBottom_toTopOf="@+id/button"

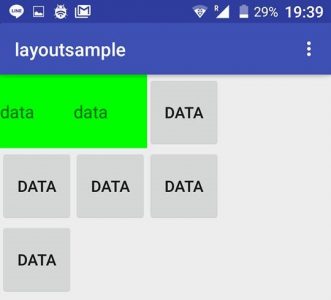
7. การสร้าง gridlayout.xml
พบว่า GridLayout เป็นเค้าโครงคล้ายตาราง ใส่ข้อมูลเป็นช่องตาม row หรือ column
แล้วมี GridView ที่ช่วยให้การใส่ image เป็น gallery ได้ง่าย
รองรับการใส่ข้อมูลจำนวนมาก มีความเป็นอัตโนมัติผ่านการจัด orientation
Default คือ orientation:horizontal คือ เรียงแนวนอนไปทางขวาจนจบแถว
แล้วขึ้นแถวต่อไป
ขณะทดสอบพบว่า SDK ที่ผมใช้ตัวล่างที่ติดตั้งไว้ คือ API 19
แล้วไม่รองรับ layout_weight in LinearLayout. This is supported in API 21.

ตัวอย่างการใส่ TextView เข้าไปใน Row และ Column ที่กำหนด

<TextView
 android:layout_row="0"
 android:layout_column="0"
 android:id="@+id/textView3"
 android:textSize="16sp"
 android:background="#00ff00"
 android:layout_width="80dp"
 android:layout_height="80dp"
 android:text="@string/data" />

ตัวอย่างการใส่ Button เข้าไปอัตโนมัติ ช่องไหนว่างตาม orientation ก็เข้าไปเลย

<Button
 android:id="@+id/button6"
 android:layout_width="80dp"
 android:layout_height="80dp"
 android:text="@string/data" />

8. การสร้าง tablelayout.xml
เป็นการวางเค้าโครงให้รองรับการใส่ข้อมูลเป็น row กับ column
ทำให้นึกถึงการเขียน Table ในภาษา HTML ที่มี tr กับ td
ทำ span เพื่อขยายพื้นที่ของ cell ได้
เมื่อใส่ TextView ลงไปก็เป็นเพียงข้อมูลที่นำมาต่อกันใน 1 cell
แต่ TextView ที่มี android:layout_weight=”1″ จะมีน้ำหนักเป็น cell
มักต้องใส่ในทุก TextView เพื่อประกาศการเป็น cell

ตัวอย่างการเค้าโครงการวาง Tag ของ TableLayout

<TableLayout>
  <TableRow>
     <TextView android:layout_weight="1">
     <TextView android:layout_weight="1">
  </TableRow>
</TableLayout>

</process>

<website_guide>
https://www.whatismyscreenresolution.com/
http://www.akexorcist.com/..new-android-layout.html
https://devahoy.com/..relative-layout-tutorial/
+ http://www.journaldev.com/..viewflipper-example-tutorial
+ http://www.programcreek.com/..&method=setDisplayedChild
+ https://developer.android.com/../view/ViewGroup.html
https://developer.android.com/guide/topics/ui/layout/grid.html
+ https://developer.android.com/../widget/TableLayout.html
</website_guide>

หมายเหตุ 
ถ้าสนใจติดตามเนื้อหาในบล็อกนี้ สามารถ subscribe ด้วย email ที่อยู่ข้างขวา หรือ click here
#AndroidStudio ตอนที่ 9 Layout ของการแจ้งเตือน และการสร้าง Layout at Runtime และเมนู กับการแสดงภาพต่อตาม Vertical

#AndroidStudio ตอนที่ 9 Layout ของการแจ้งเตือน
และการสร้าง Layout at Runtime และเมนู กับการแสดงภาพต่อตาม Vertical

<introduction>
อารัมภบท
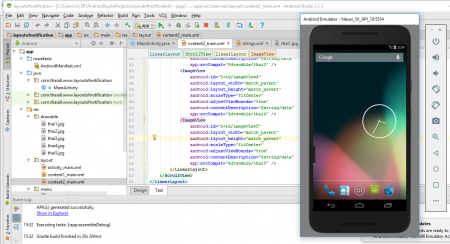
ความตั้งใจครั้งแรก คือ การวาง Layout ของการแจ้งเตือน โดยแสดง ImageView และ TextView คู่กัน เรียงเป็นบรรทัดลงไปแบบ Vertical แต่พอได้ลงไปวาง Layout พบว่า โปรแกรมแนะนำว่าให้ใช้ Drawable ตามที่เคยใช้ใน ตอนที่ 8 ข้อ 8 พอใช้ตามคำแนะนำ ก็พบปัญหา ความตั้งใจจึงเบี่ยงเบนไปเรื่องการทำ Valign=Top ว่าทำอย่างไรให้ภาพอยู่ในตำแหน่ง Top แล้วก็ไปสนใจการใช้ Layout แบบ RelativeLayout จากนั้นก็กลับมาคิดเรื่อง Notification ว่าควรลื่นไหลขณะ Runtime เหมือนที่เห็นใน FB Message
ก็พบว่าการวาง Layout ใน Android ทำได้ 2 แบบ คือ Declare UI elements in XML และ Instantiate layout elements at runtime เมื่อไปค้นดูก็ไปไม่ถึงไหน ได้แค่การสั่งให้สร้าง Layout at Runtime ใหม่ขึ้นมา พร้อมสร้าง TextView และส่งค่าเข้า TextView ที่สร้างขึ้น

ความเดิมตอนที่แล้ว เคยเล่าเรื่องการใช้ Template : Basic Activity ใน ตอนที่ 8 แต่ข้ามเรื่อง Menu ของ Toolbar ใน AppBarLayout ที่มีความสัมพันธ์กับหลายแฟ้ม ครั้งนี้กลับมาสนใจ และเพิ่มไป 3 ตัวเลือก พร้อมกิจกรรมที่ได้ทดสอบมาแล้วข้างต้น ทั้งหมดยังอยู่ใน 1 Main Layout กับ 1 Main Activity เพราะ Android Studio วางโครงสร้างให้ Activity คู่กับ Layout ส่วน Content Layout ในตัวอย่างครั้งนี้ จะถูกเรียกผ่าน Main Layout
ใช้การ include เข้าไป ก็ต้องใช้ setVisibility(View.VISIBLE); ใน Activity กำหนดให้กับ include แต่ละตัว เพราะไม่มีวิธีส่งชื่อ Layout ให้ include โดยตรง

สรุปกระบวนการได้ 5 ขั้นตอน ประกอบด้วย 1) ทำความรู้จัก CoordinatorLayout ที่มีเสน่ห์ มาพร้อม Snackbar 2) การวางภาพคู่กับข้อความ 6 แบบ เลือกใช้ที่ชอบได้เลย 3) ใส่ Activity ให้กับ Menu ใน Toolbar บน AppBarLayout 4) การสร้าง layout at runtime เพื่อ say hello 5) สร้าง Layout สำหรับแสดง ImageView โดยเฉพาะ
</introduction>

กำลังเล่าเรื่อง การใช้โปรแกรม Android Studio สู่เพื่อนนักพัฒนา ผ่าน Blog

<process>
กระบวนการในการพัฒนา APP

เพื่อนำภาพและข้อความนำเสนอต่อกันเรียงลงมาเป็นแถว การจัดการเมนู การสร้าง Layout ช่วง Runtime และการนำภาพมาเรียงต่อกันตาม Vertical
มีขั้นตอน ดังนี้

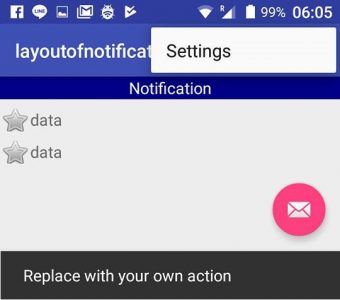
1. ทำความรู้จัก CoordinatorLayout ที่มีเสน่ห์ มาพร้อม Snackbar
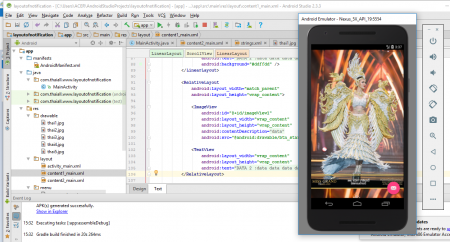
เริ่มต้นก็สร้าง project ใหม่ แล้วเลือก Basic Activity ตั้งชื่อ ว่า layoutofnotification
ยังมี Template อีกมาก ทาง Android แนะนำว่าสามารถ Add Code from a Template คือ เราไม่ต้องเขียน code จาก 0 เค้ามี Template มาให้เลือกตามชอบ เคยมีอยู่ 10 ตอนนี้มี 12 และอาจเพิ่มขึ้น เลือกแล้วก็จะมี file ที่จำเป็น และเรียกใช้งานได้ในระดับหนึ่ง เราเพียงแต่นำมาปรับเพิ่ม พบว่า หน้า activity_main.xml มี Hierarchy ของ Layout ดังนี้
1. CoordinatorLayout เป็น root layout
2. AppBarLayout และภายในมี ToolBar
3. ConstraintLayout ที่ถูก include แฟ้ม content_main.xml
4. FloatingActionButton ลอยอยู่ที่ตำแหน่ง bottom|end
สำหรับ CoordinatorLayout ที่ถูกเลือกใช้นี้
ทำให้เราได้เห็นการใช้ FloatingActionButton ร่วมกับ Snackbar และ AppBarLayout


https://gist.github.com/thaiall/7bfcfeb57ac459b0e664f19337438908


ใช้โปรแกรม Android Studio ไม่ทันไร ถาม Update อีก 150 MB
รอไร .. 
เครื่องผมเหลือเนื้อที่ตั้งเยอะ 


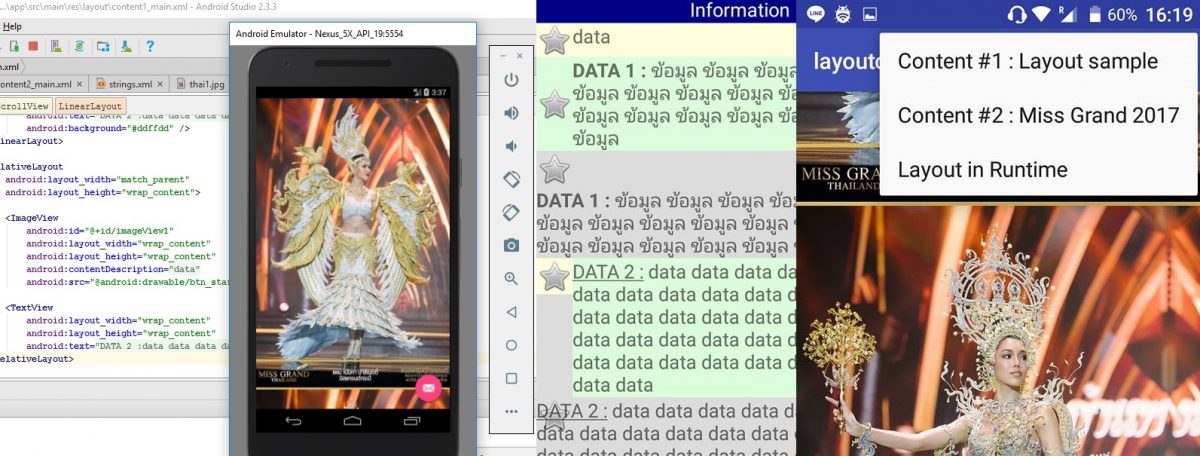
2. การวางภาพคู่กับข้อความ 6 แบบ เลือกใช้ที่ชอบได้เลย
เดิม activity_main.xml จะ include แฟ้ม content_main.xml
แต่ผมลบไปแล้ว ของเดิมมี ConstraintLayout เป็น Root Layout
กับ TextView ที่เขียนว่า Hello World!
แต่ผมต้องการ LinearLayout ที่ทำ ScrollView ได้
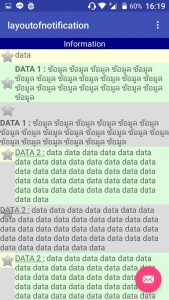
จึงสร้าง content1_main.xml
โดยมี Hierarchy ของ Layout สำหรับ 6 คู่ ดังนี้

 <LinearLayout orientation="vertical">
 <LinearLayout>
 <TextView text="@string/information">
 </LinearLayout>
 <ScrollView>
 <LinearLayout orientation="vertical">
 <LinearLayout orientation="vertical">
 <TextView drawableStart />
 <TextView drawableStart />
 <ImageView />
 <TextView />
 </LinearLayout>
 <LinearLayout orientation="horizontal">
 <ImageView />
 <TextView />
 </LinearLayout>
 <RelativeLayout>
 <ImageView />
 <TextView />
 </RelativeLayout>
 <RelativeLayout>
 <ImageView id="@+id/imageView2" />
 <TextView layout_toEndOf="@+id/imageView2" />
 </RelativeLayout>
 </LinearLayout>
 </ScrollView>
 </LinearLayout>

ถ้าดูผลลัพธ์จากกภาพ ดูโครงสร้าง และเห็น code น่าจะนำไปใช้ต่อได้

https://gist.github.com/thaiall/304e6ddd917dd0350aa57fba72955082

3. ใส่ Activity ให้กับ Menu ใน Toolbar บน AppBarLayout
มีขั้นตอนดังนี้
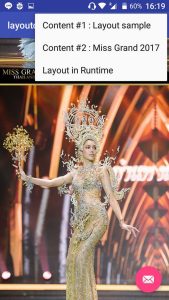
3.1 วางแผนไว้ในใจ ว่าคลิ๊ก 3 จุดที่มุมบนขวา แล้วมีเมนูไหลลงมา
อยากเห็นอะไร ก็ให้เปิด app, res, menu, menu_main.xml
จากนั้นก็เพิ่มตัวเลือกตาม item ที่ต้องการ แต่ title ต้องเปิดแฟ้ม strings.xml พิมพ์ไปพร้อมกัน

<item
 android:id="@+id/content1"
 android:orderInCategory="100"
 android:title="@string/content1"
 app:showAsAction="never" />


https://gist.github.com/thaiall/eb8137794add90145d19daa9d1c2c0d8

3.2 เปิด MainActivity.java ขึ้นมาแก้ไข
มองหา method ชื่อ onOptionsItemSelected(MenuItem item)
เดิมจะมี if (id == R.id.action_settings) ผมก็เปลี่ยนไปใช้ switch จะได้สะดวก
ตัวอย่างนี้ต้องปรับการใช้ include ใน activity_main.xml

switch (item.getItemId()) {
 case R.id.content1:
 findViewById(R.id.content1).setVisibility(View.VISIBLE);
 findViewById(R.id.content2).setVisibility(View.GONE);
 return true;
 case R.id.content2:
 findViewById(R.id.content1).setVisibility(View.GONE);
 findViewById(R.id.content2).setVisibility(View.VISIBLE);
 return true;
 case R.id.layoutRuntime:
 layoutRuntime();
 return true;
 default:
 return super.onOptionsItemSelected(item);
 }


3.3 แก้ไขการ include เพราะสั่งไปว่าจะ visible หรือ gone

มองหา
 <include layout="@layout/content_main"
เปลี่ยนเป็น
 <include
 android:id="@+id/content1"
 layout="@layout/content1_main"
 android:visibility="visible" />
 <include
 android:id="@+id/content2"
 layout="@layout/content2_main"
 android:visibility="gone" />


https://gist.github.com/thaiall/e55bca08d5927c97dd2dec5367771085


4. การสร้าง layout at runtime เพื่อ say hello
เนื่องจากที่ผ่าน 8 ตอนเป็นการใช้โปรแกรม Android Studio
ผ่าน Main_Activity.java เท่านั้น และ layout ก็ไม่ได้มีเพิ่มขึ้นเป็นพิเศษ
ไม่มีการควบคุม Layout ผ่าน Main java เลย
แต่ code สร้าง Layout at runtime สำหรับ
ท่านที่ต้องการ Layout แปลกใหม่ กว่าที่มีไว้ ก็สร้างช่วง Runtime ได้
ได้ตัวอย่างมาจาก
http://www.android-examples.com

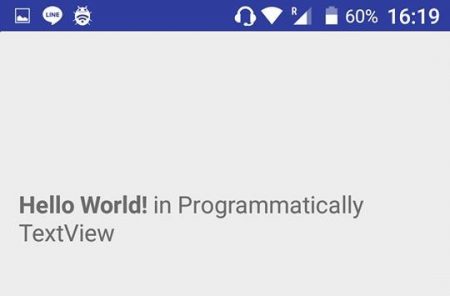
private void layoutRuntime() {
 LinearLayout linearLayout = new LinearLayout(this);
 TextView ProgrammaticallyTextView = new TextView(this);
 ProgrammaticallyTextView.setText(R.string.helloworld);
 ProgrammaticallyTextView.setTextSize(16);
 ProgrammaticallyTextView.setPadding(30, 250, 30, 100);
 linearLayout.addView(ProgrammaticallyTextView);
 this.setContentView(linearLayout, new LinearLayout.LayoutParams(
 LayoutParams.MATCH_PARENT, LayoutParams.MATCH_PARENT));
 }


5. สร้าง Layout สำหรับแสดง ImageView โดยเฉพาะ
ใช้ภาพตัวอย่างจาก http://www.thaiall.com/actress/missgrand2017/
หากมีข่าวประกาศ หนังสือ รายงาน พรบ. หรือภาพสาวงาม จะนำมาเรียงต่อกัน
ให้เพื่อนชมผ่าน app บน Android ก็ส่งเข้าไปเลยครับ
ตอนผมทดสอบบน Smartphone มีปัญหาเรื่องจำนวนภาพเยอะ
ใช้ภาพเยอะ ๆ แล้ว error ส่งผ่าน Command line
เชื่อมผ่านเปิดแอพ WiFi ADB ซึ่งบนนั้นอาจมี Bug น่ะครับ
แต่แฟ้ม app-debug.apk นี้ส่งเข้า emulator ได้ผลปกติ
เรื่องสำคัญ คือ properties ของ ImageView เพื่อให้ลงจอภาพพอดี
โดยเฉพาะ scaleType กับ adjustViewBounds

<LinearLayout orientation="vertical">
 <ScrollView>
 <LinearLayout orientation="vertical">
 <ImageView
 android:id="@+id/imageView1"
 android:layout_width="match_parent"
 android:layout_height="match_parent"
 android:scaleType="fitCenter"
 android:adjustViewBounds="true"
 android:contentDescription="@string/data"
 app:srcCompat="@drawable/thai1" />
 </LinearLayout>
 </ScrollView>
 </LinearLayout>


https://gist.github.com/thaiall/41e86984b4cabe35392e29fc05107f60

</process>

<website_guide>
+ https://developer.android.com/training/basics/firstapp/
+ http://www.techotopia.com/..User_Interface_in_Java_Code
+ https://stackoverflow.com/..without-setcontentviewr-layout-main
+ https://stackoverflow.com/..button-click-in-android
+ https://stackoverflow.com/..when-button-is-pressed
+ https://stackoverflow.com/..layout-in-android (viewstub)
+ https://developer.android.com/../declaring-layout
+ https://www.androidhive.info/..design-snackbar-example/
+ http://www.android-examples.com/..programmatically-example/
+ https://stackoverflow.com/..layout-on-java-code (setVisibility(View.GONE); and <ViewFlipper>)
+ https://developer.android.com/training/appbar/actions.html
+ https://developer.android.com/guide/topics/ui/menus.html
</website_guide>

หมายเหตุ 
ถ้าสนใจติดตามเนื้อหาในบล็อกนี้ สามารถ subscribe ด้วย email ที่อยู่ข้างขวา หรือ click here
#windows ตอนที่ 1 ใช้ Web Platform Installer ติดตั้ง PHP + MySQL บน IIS ง่ายล่ะชีวิต

#windows ตอนที่ 1 การแสดงคำว่า Hello World ใน Windows
จากข้อมูลใน MySQL บน IIS

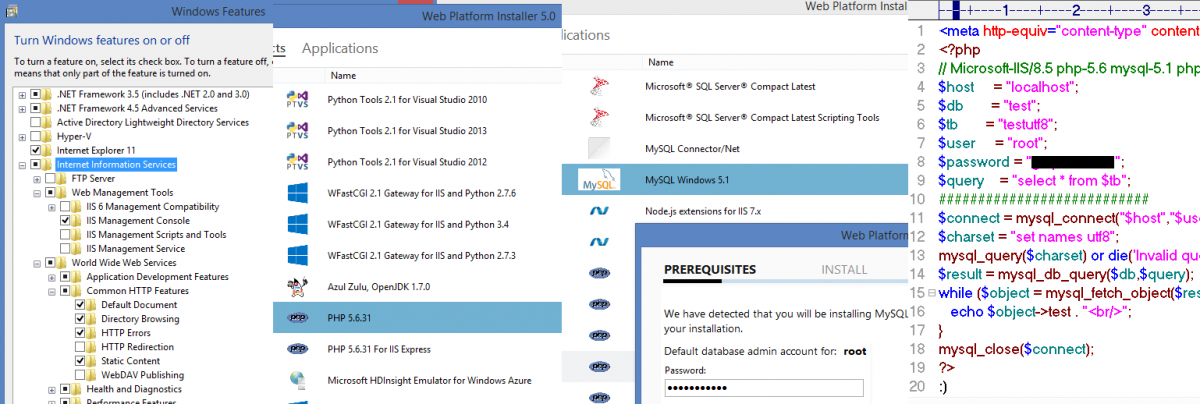
การติดตั้ง IIS 8.5 + Web Platform Installer 5.0 +
PHP5.6.31 + MySQL 5.1 + PHPMyAdmin 4.0.10.20

<introduction>
สวัสดีชาวโลก หรือ Hello World!” ซึ่งผมมีโจทย์ว่า “ต้องการแสดงข้อมูลที่เก็บไว้ใน Database บน Windows ผ่านบริการของ Web Server ต้องทำอย่างไร” ก็มีหลายทางเลือก และต้องใช้กันหลายโปรแกรมเข้ามาช่วยทำให้บริการเหล่านี้เป็นจริืงได้ การทดสอบของผมใช้ Remote Desktop และ VNC ในการเข้า Web Server ก็ได้ความช่วยเหลือจาก คุณเบนซ์ ช่วยดูเรื่องเครือข่าย เปิดให้ผมเข้าจากที่บ้านได้ แล้ว คุณเปรม ก็ช่วยทำให้มี IP จริง เชื่อมกับ Intranet IP ในที่ทำงาน ผ่านการ config ใน Firewall ขอขอบคุณฝ่ายไอทีทั้งสองท่าน น้าาาา

เดี๋ยวนี้ เทคโนโลยีพัฒนาไปเร็วมาก การจะติดตั้ง Web Server (Port 80) และ Database (Port 3306) ก็ไม่ยากที่จะทำแล้ว จะเข้าถึงบริการเหล่านี้ได้ง่าย เพียง click หรือ double click ไม่กี่ที สิ่งสำคัญคือ ผู้สนใจก็เพียงแต่หาอ่าน (read) สิ่งที่ Windows เค้ามีมาให้ (Services) ไม่มีในเครื่อง ก็ไปหา Download แล้วก็ไซร้ (Search) เข้าไปตามความสนใจ ลงลึกไปเรื่อย ๆ ถ้าสนใจซะอย่าง อะไรอะไร ก็ไม่ยาก เพราะอยู่ตรงหน้า หรือหา download ได้อยู่แล้ว

โปรแกรมบน Windows ที่ใช้ ประกอบด้วยดังนี้

  1. IIS 8.5 on Microsoft Windows
  2. Web Platform Installer 5.0
  3. PHP 5.6.31
  4. MySQL 5.1
  5. PHPMyAdmin 4.0.10.20 [4.7.3]
  6. Chrome Browser

</introduction>

<process>
มีขั้นตอนการติดตั้ง และเขียนโปรแกรม ดังนี้

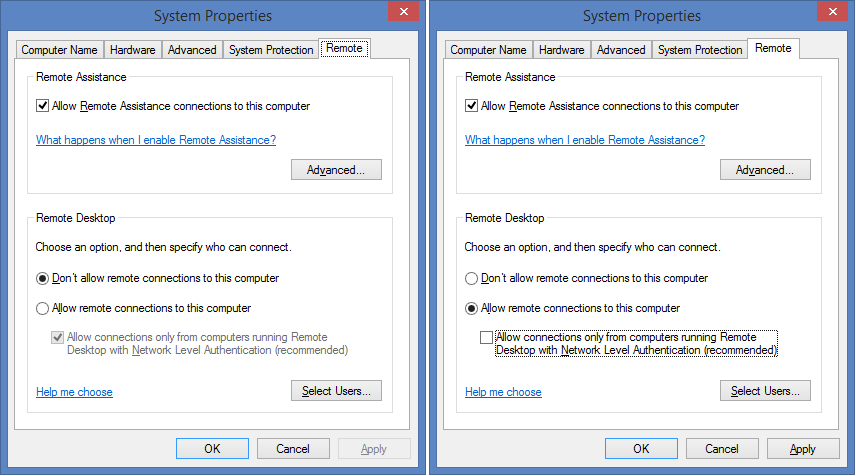
  1. โปรแกรม Remote Desktop เป็นบริการที่มากับ Windows
    ทำให้เราเข้าไปควบคุมจากระยะไกล เป็นที่นิยมกว่าโปรแกรมอื่น (สำหรับผมนะ)
    เพราะโปรแกรมนี้เป็นของ Windows อยู่แล้ว ใช้งานง่าย ไม่ซับซ้อน

    00_remote_desktop.png
    
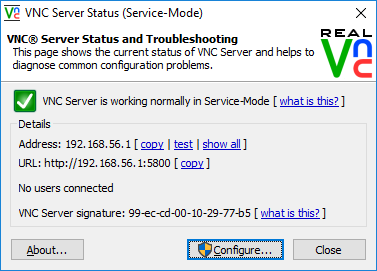
  2. โปรแกรม VNC เป็นบริการที่ คุณเบนซ์ แนะนำ
    ว่าใช้งานแทน Remote Desktop ทำให้เข้าเครื่องที่ทำงาน
    ขณะนั่งอยู่ที่บ้าน (Work at Home) ความสามารถคล้ายกัน แต่ตัวนี้มีรุ่นทดลอง 30 วัน

    00_vnc.png
    
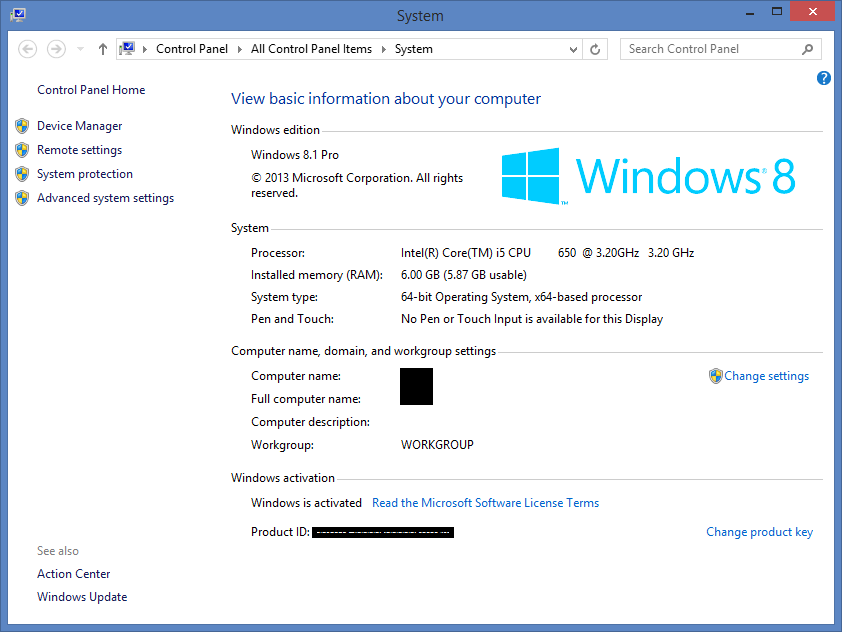
  3. เราตรวจสอบข้อมูลได้ว่าในเครื่องคอมพิวเตอร์ของเรา
    ปัจจุบันใช้ OS : Windows รุ่นอะไร
    มี RAM เท่าไร ดูใน System เมื่อเข้าผ่าน Control Panel
    นับว่าสิ่งที่ผู้ใช้ Windows ทุกคนคุ้นเคย เพราะอะไรอะไร ก็ต้องเข้าแผงควบคุม

    00_win81_64.png
    
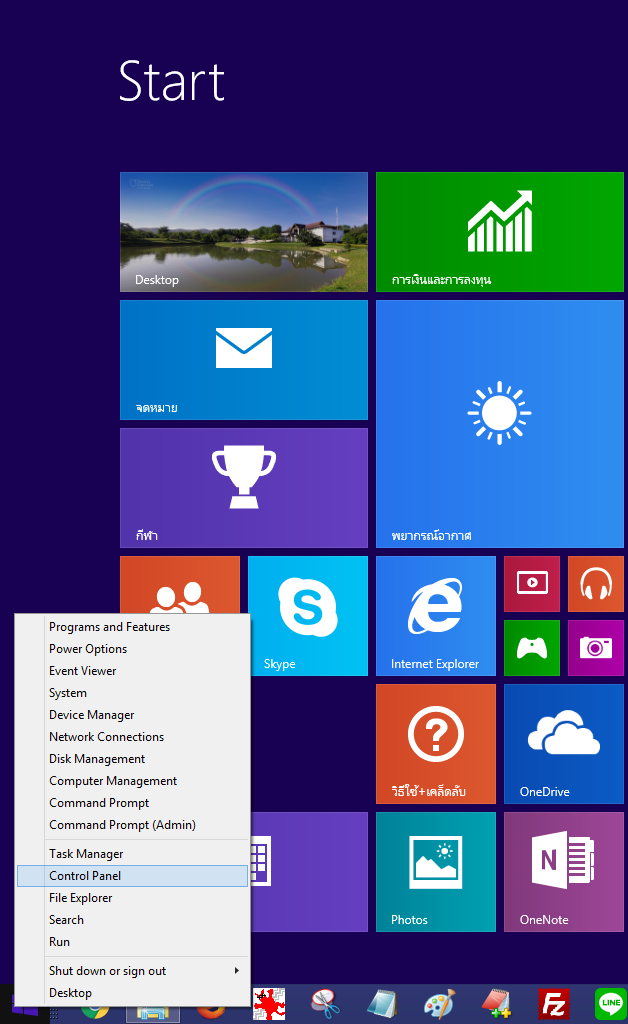
  4. การคลิ๊กที่ปุ่ม Windows หรือปุ่ม Start เดิม
    ถ้า Click ก็จะแสดง Metro UI (User Interface)
    ถ้า Right Click ก็จะแสดงรายการ ที่ต้องใช้บ่อย เริ่มจาก Program and Features

    01_start_by_click.png
    
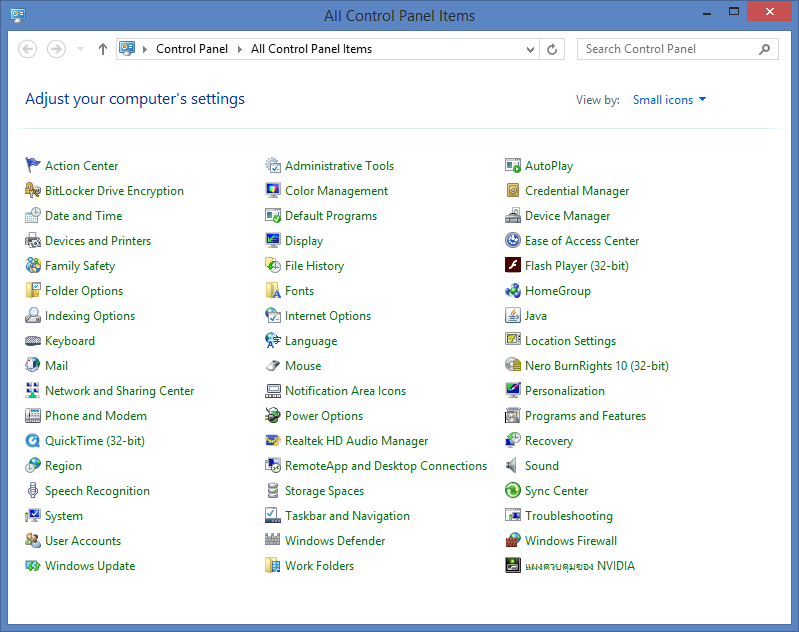
  5. การเข้า Control Panel
    สามารถเข้าผ่าน Right click ที่ปุ่ม Windows หรือ Windows-X แล้วมองขึ้นไป
    หรือพิมพ์ Control Panel ในช่อง Run หลังกด Windows-R

    02_control_panel.png
    
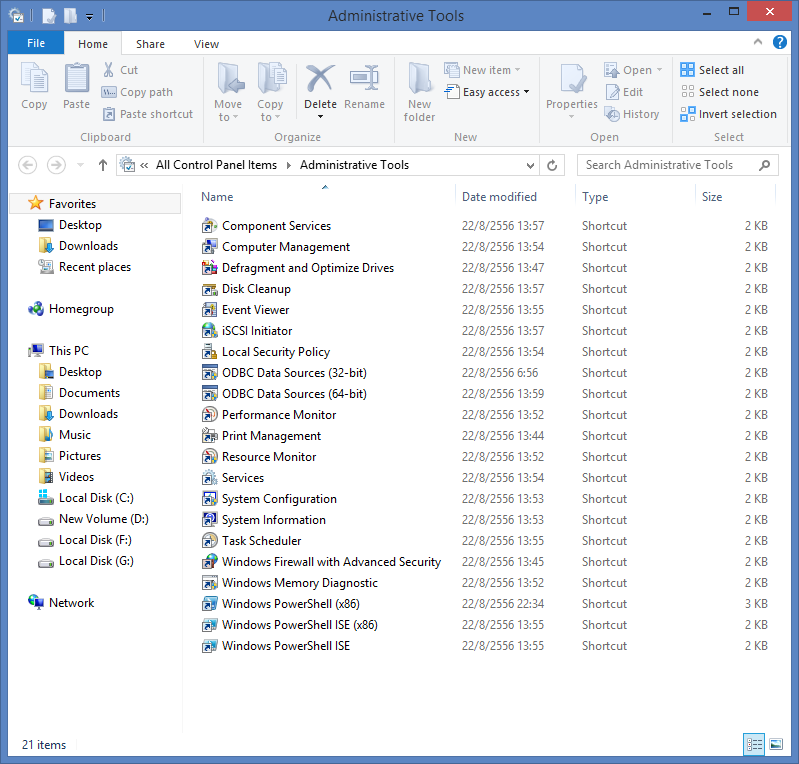
  6. เครื่องมือบริหาร ก็จะมีอะไรให้บริหารมากมาย
    ผมทราบมาว่าในนี้ต้องมี IIS คือ Web Server ของ Windows
    แต่ไม่พบ ก็ไม่แปลก เพราะเค้าไม่ได้ติดตั้งมาให้แต่แรก
    จึงต้องไปหามาลงแล้ว มีแหล่งเก็บของ Windows ที่มี แต่ยังไม่ได้ลง

    03_administrative_tools.png
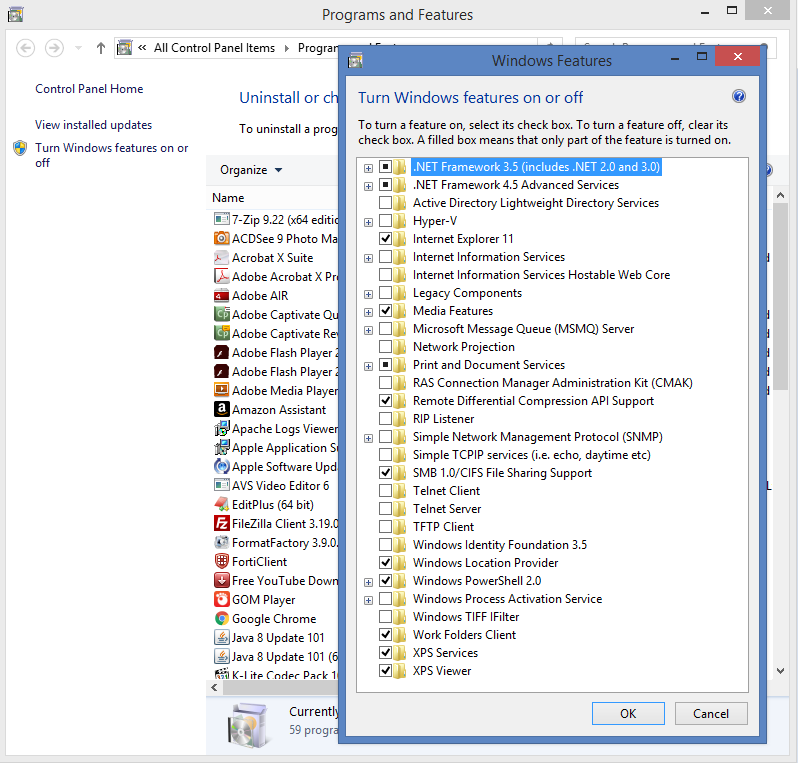
  7. ใน Control Panel จะมี Program and Features
    และด้านซ้ายจะพบ Turn Windows Features on or off
    ให้คลิ๊กเข้าไป เพื่อเปิด Feature IIS ให้ทำงาน

    04_program_and_features.png
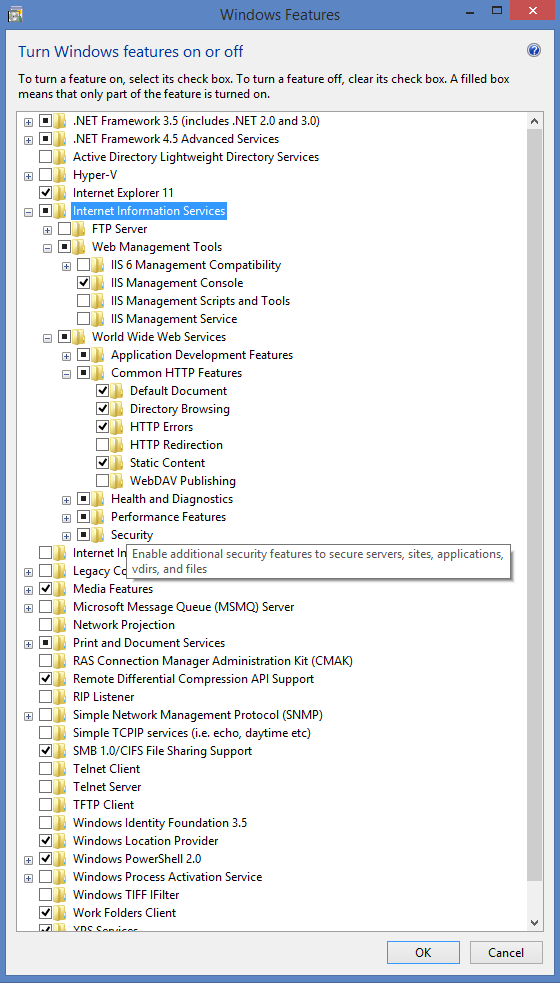
  8. ไม่เห็นคำว่า IIS แต่เห็น Internet Information Services
    ก็คลิ๊ก Check เพื่อบอกว่าขอให้ติดตั้ง IIS ให้ด้วย
    ก็จะมีรายละเอียดโปรแกรมอีกมา ที่เราจะได้มากับ IIS หรือไม่ได้มาด้วย
    ถ้าไม่คลิ๊กบริการย่อย เค้าก็ติดตั้งเฉพาะ Web Server ซึ่งเป็นบริการที่ผมมองหา
    แต่บริการ FTP Server จะไม่มาด้วย อยากได้ต้องคลิ๊ก Check นะครับ
    เห็นใช่ไหมว่า FTP Server ยังไม่ถูกคลิ๊ก

    05_windows_feature_iis.png
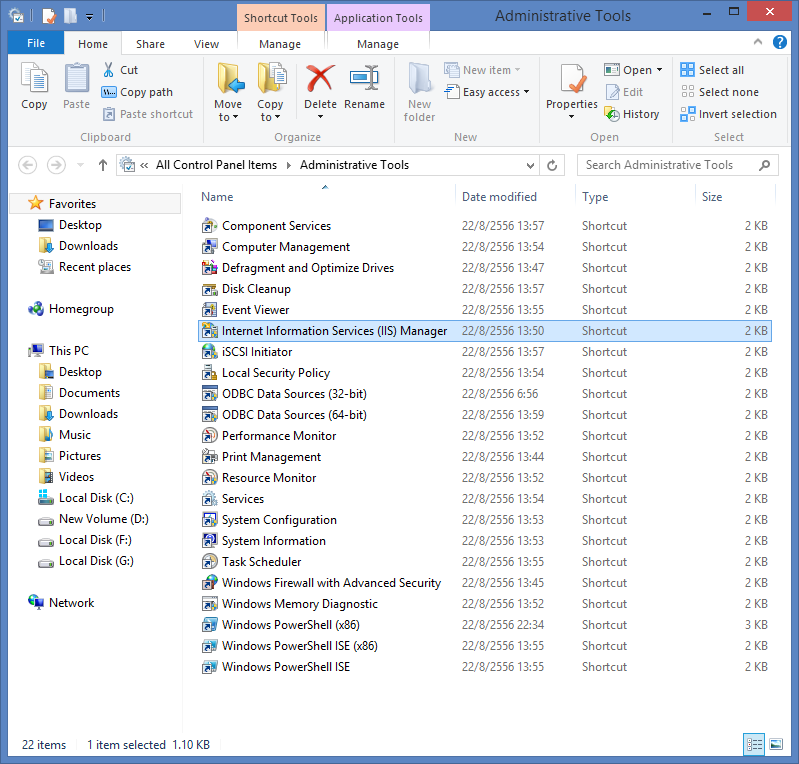
  9. เมื่อติดตั้งโปรแกรม IIS เสร็จแล้ว
    เมื่อเข้า Administrative Tools อีกครั้ง
    จะพบกับ Internet Information Services (IIS) Manager

    06_administrative_tools_iis.png
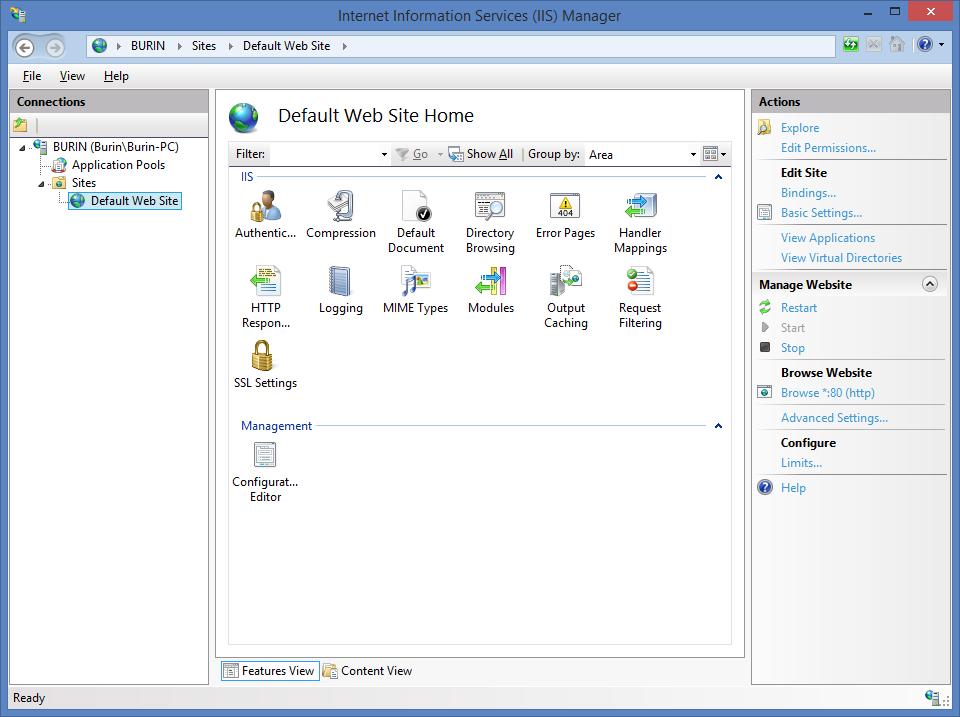
  10. เมื่อเข้าไปคลิ๊กถึง Default Web Site
    จะพบว่าบริการถูก Start คือ พร้อมให้บริการ เป็น Web Server

    07_iis_start.png
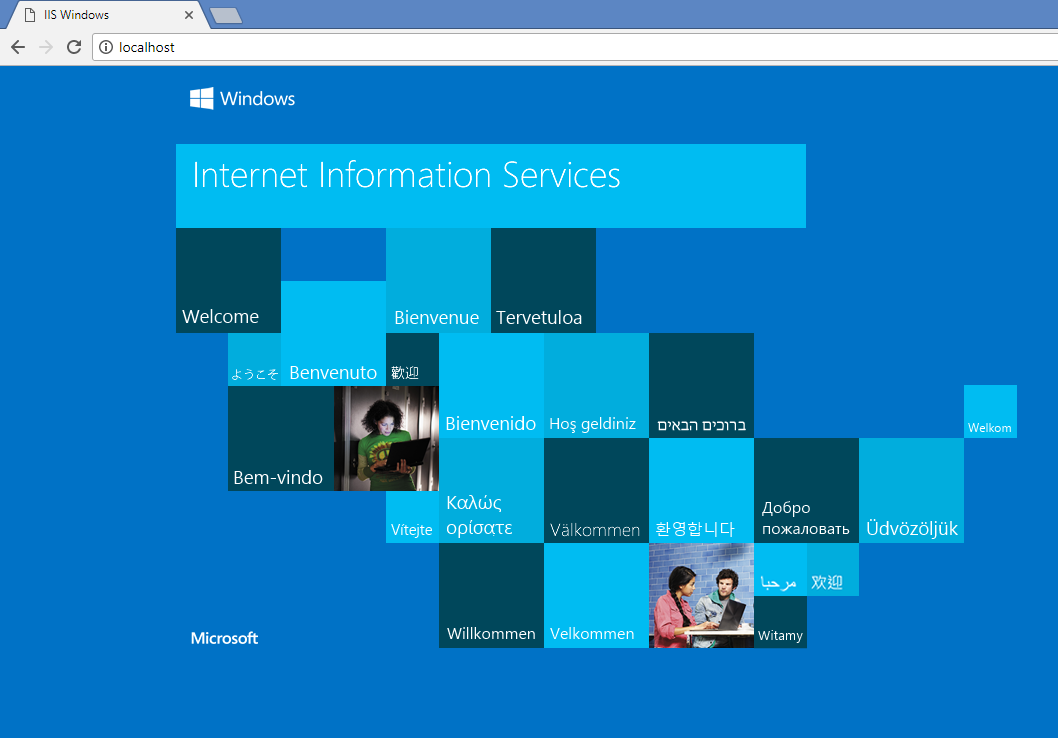
  11. กลับไปที่ Desktop หา Web Browser
    แล้วเปิด http://localhost

    08_localhost.png
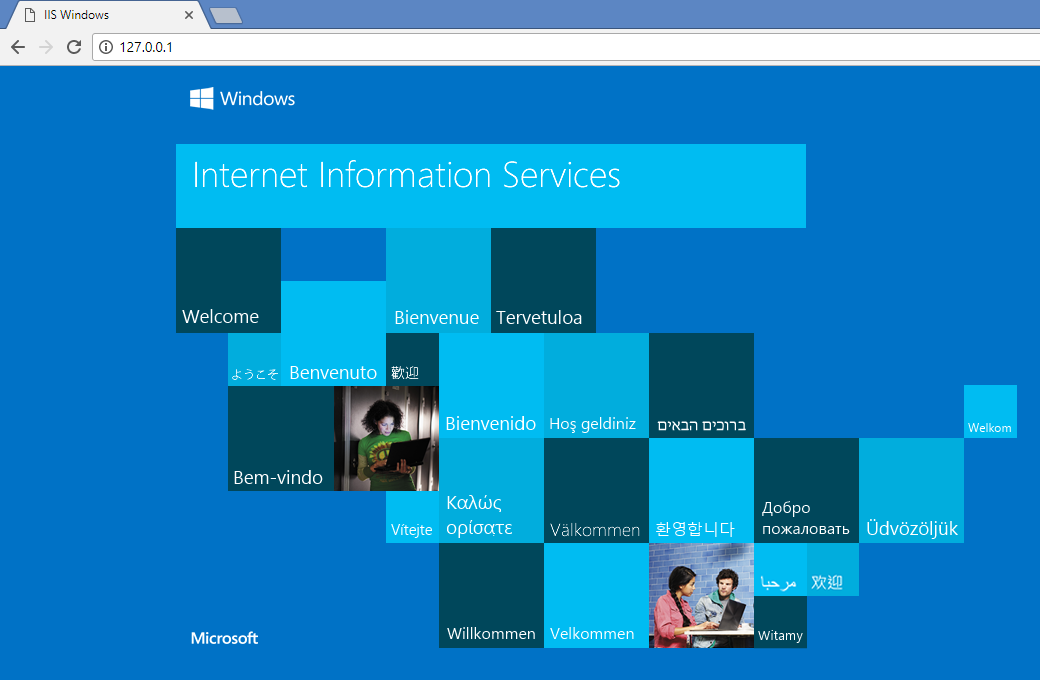
  12. ในเครื่องคอมพิวเตอร์ของเราน่าจะลง Web Browser ไว้หลายตัว
    ชื่อเรียกเครื่องก็มีหลายแบบ อาจเรียกว่า localhost
    เป็น local ip ก็ 127.0.0.1 หรือ ip จริงของเครื่องก็ได้ หรือชื่อ host ก็ได้อีก
    ลองเรียกว่า http://127.0.0.1 ก็ได้ครับ

    09_127001.png
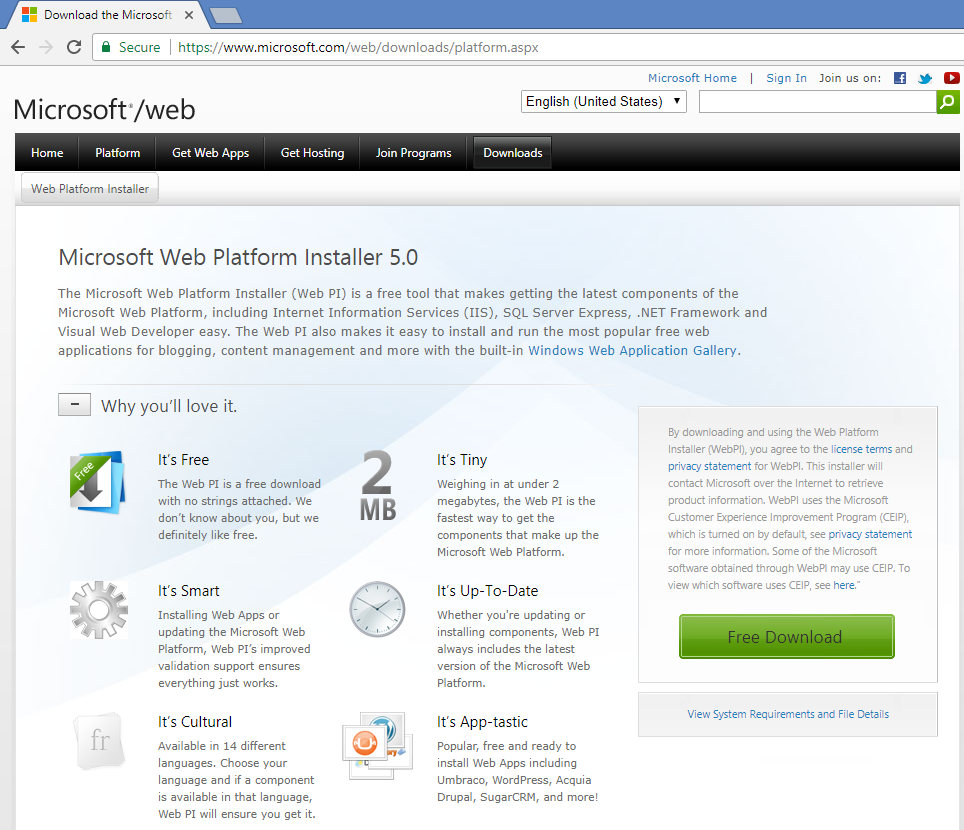
  13. ถ้าใช้ Winddows อยู่แล้ว Microsoft มีโปรแกรม Web Platform Installer
    แต่เตรียมโปรแกรมไว้มากทีเดียว ทำให้เราสั่งติดตั้งโปรแกรมในรายการ
    แล้วใช้งานได้ทันที ไม่ต้องไปทำ configuration เอง แบบ manual
    เริ่มต้นก็ไปดาวน์โหลดมาติดตั้งในเครื่องของเราก่อน ฟรีครับ

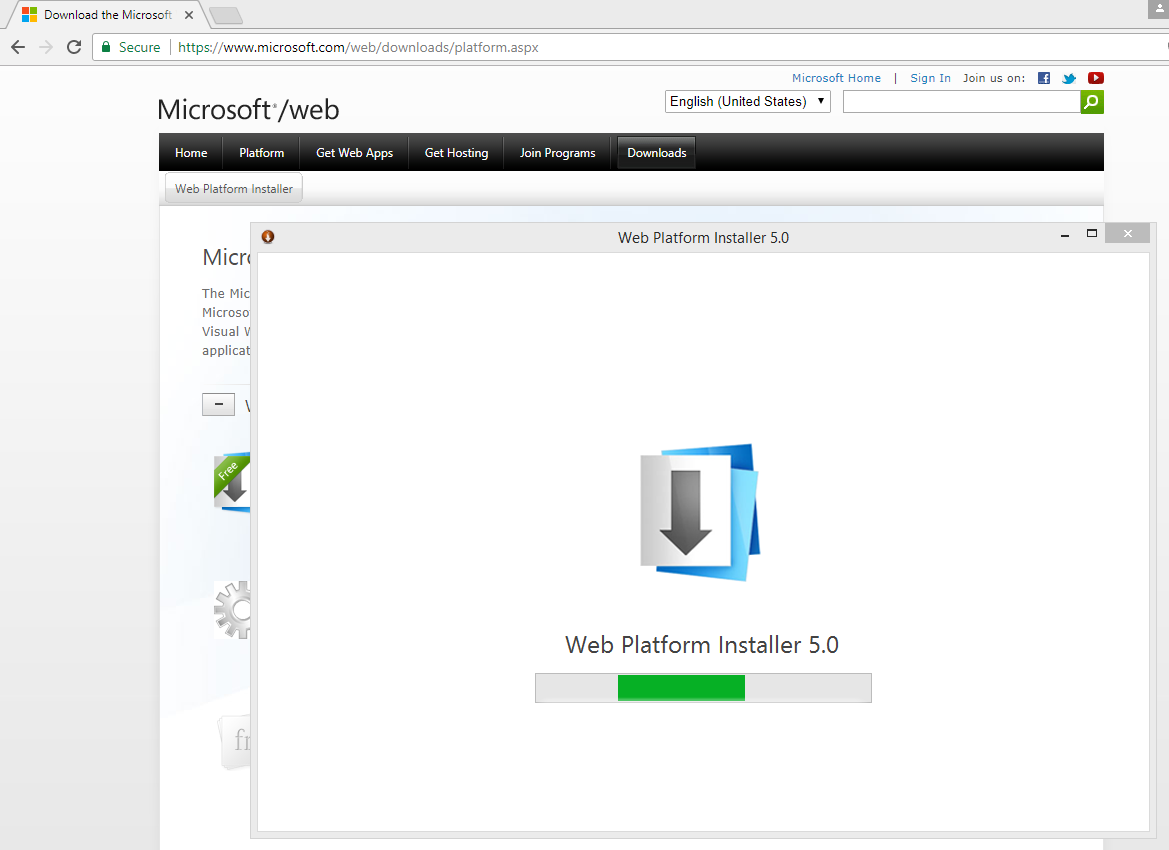
    10_web_platform_installer.png
  14. ขณะดาวน์โหลด หรือติดตั้งก็รอแป๊ปนึง
    โปรแกรมไม่ใหญ่มาก แต่จะไปช้าอีกครั้งตอนติดตั้ง
    โปรแกรมย่อยที่เราเลือกในภายหลัง

    11_install_web_platform_5.png
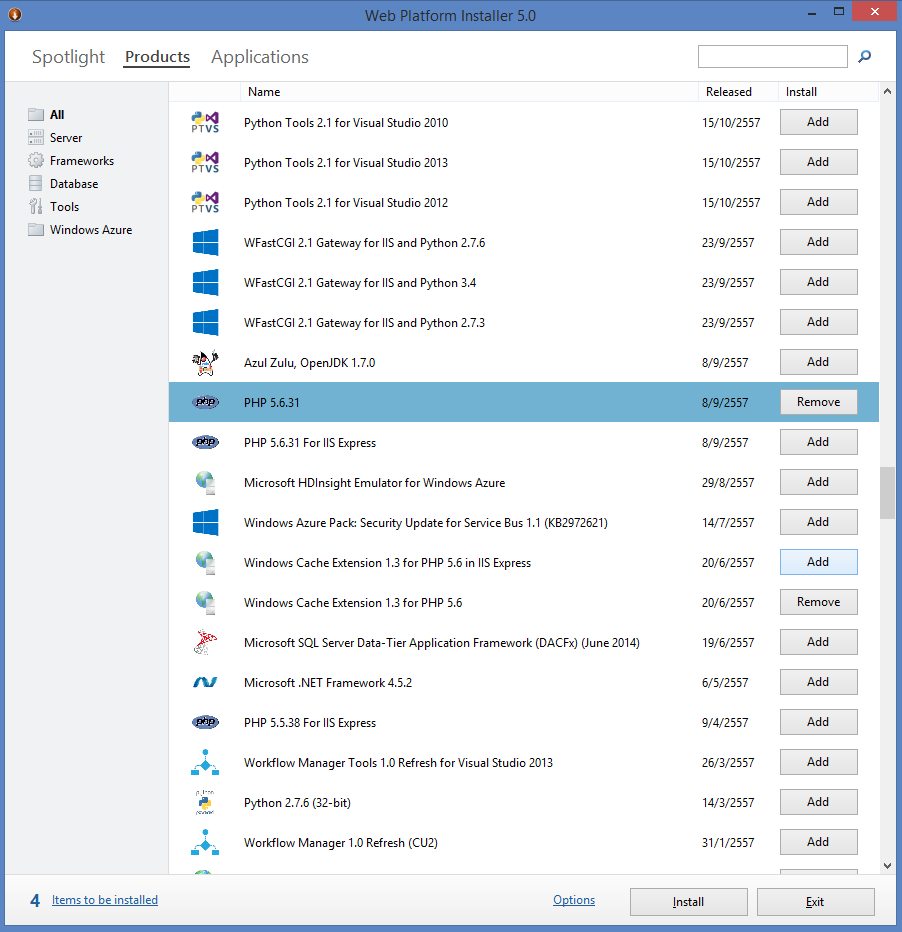
  15. มองหาคำว่า Products ด้านบน
    แล้วก็เลื่อนหาโปรแกรมที่เราสนใจ กรณีนี้ ผมสนใจภาษา PHP
    ซึ่งเป็น Server Sided Script ทำงานร่วมกับ IIS
    เมื่อเจอ PHP 5.6.31 ก็คลิ๊ก Add และ Install ด้านล่าง

    12_install_php5631.png
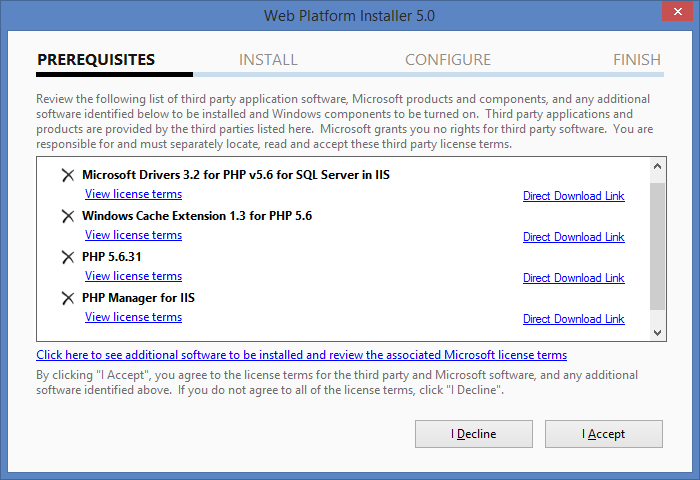
  16. แม้จะเลือก PHP มาตัวเดียว แต่ระบบตรวจสอบว่าต้องลงโปรแกรมใดเพิ่ม
    เค้าเรียก Prerequisites เหมือนตอนเรียนหนังสือ
    จะลงวิชา Project ของปี 4 ต้องลงวิชาของปี 1 ก่อน เป็น pre กันอยู่

    13_download_php5631.png
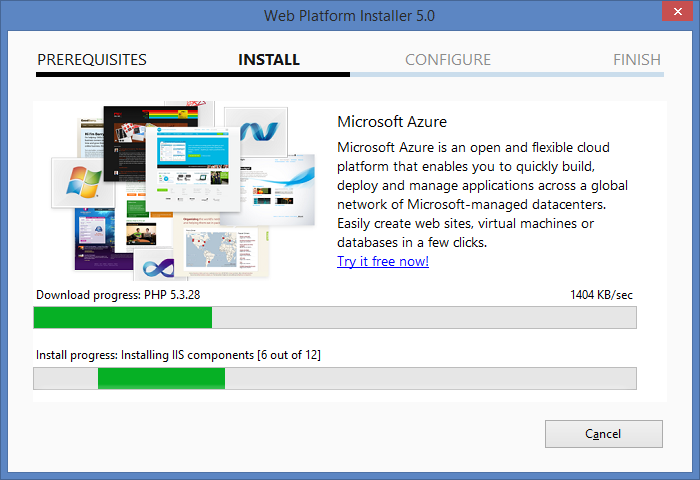
  17. จากนั้นก็รอ มี 2 progress bar คือ Download กับ Install
    โปรแกรมไม่ใหญ่ก็รอแป๊ปเดียว ขึ้นกับความเร็วเน็ตด้วย

    14_download_and_install_php5631.png
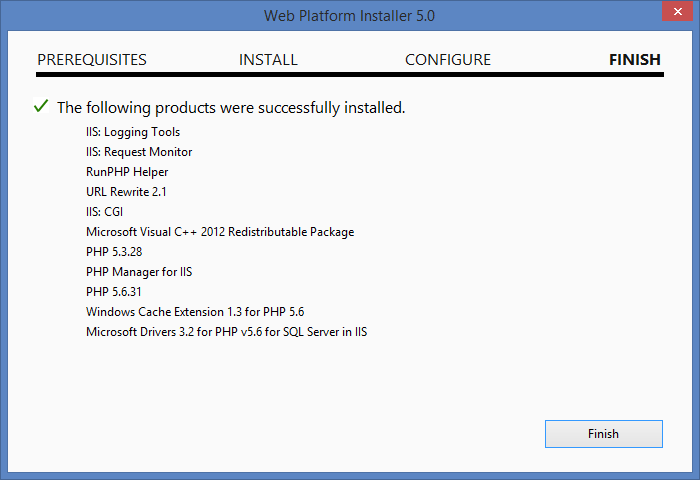
  18. พอลงโปรแกรมเสร็จแล้ว
    ก็จะมีรายงานว่าลงโปรแกรมอะไรไปแล้วบ้าง
    อย่างที่เห็นผมเลือก PHP 5.6.31 ตัวเดียว แต่ชวนเพื่อนมาเพียบเลย

    15_iis_php_finish.png
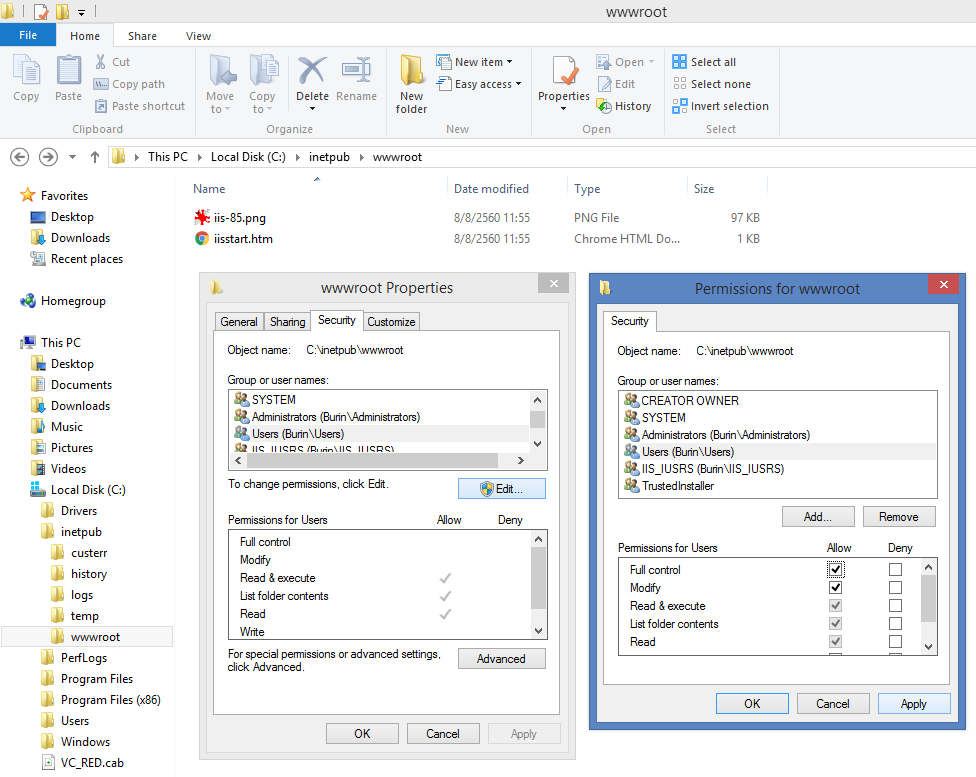
  19. โปรแกรม IIS มี Root Directory อยู่ที่ C:\Inetpub\wwwroot
    จะเขียนอะไรลงไป ก็เปิดให้เพื่อนมา Download หรือเข้าถึงได้
    แต่ Winddows 8 อาจกำหนด Permission  ว่า User ห้ามเขียน
    แล้วเราก็เป็น User หนึ่ง (บางกรณีเราก็เป็นเพียง User ของเครื่อง)
    ต้องเข้าไปแก้ Security ให้ User เป็นแบบ Full Control

    16_folder_permission.png
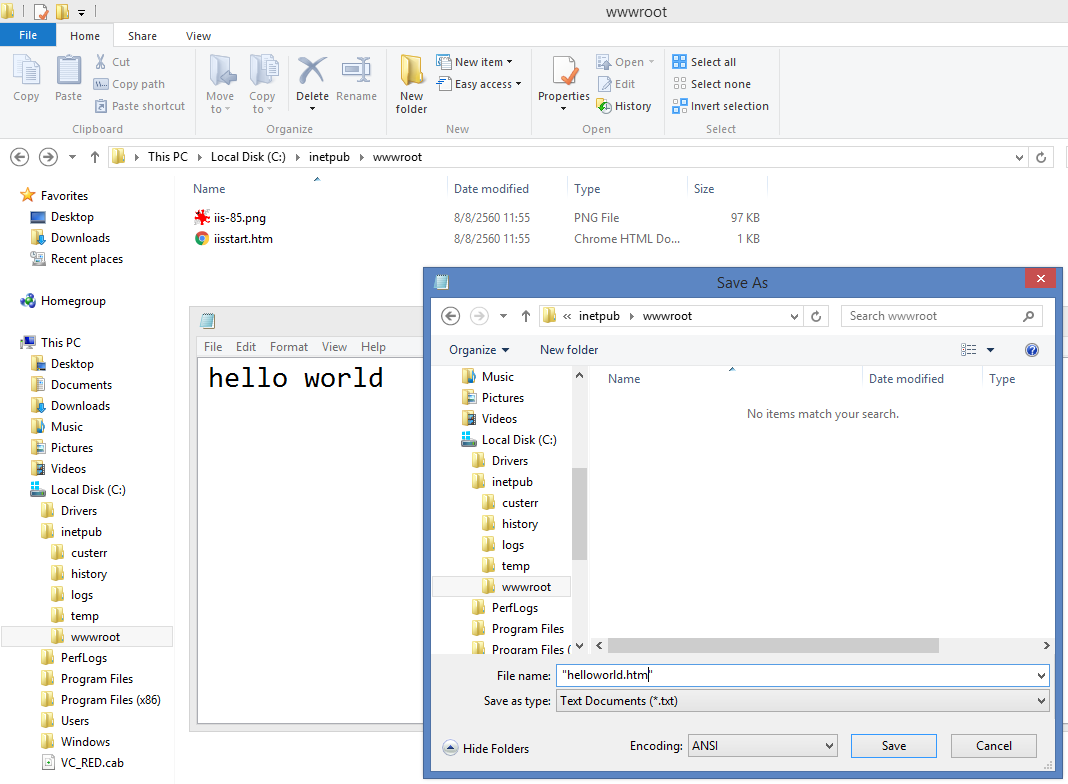
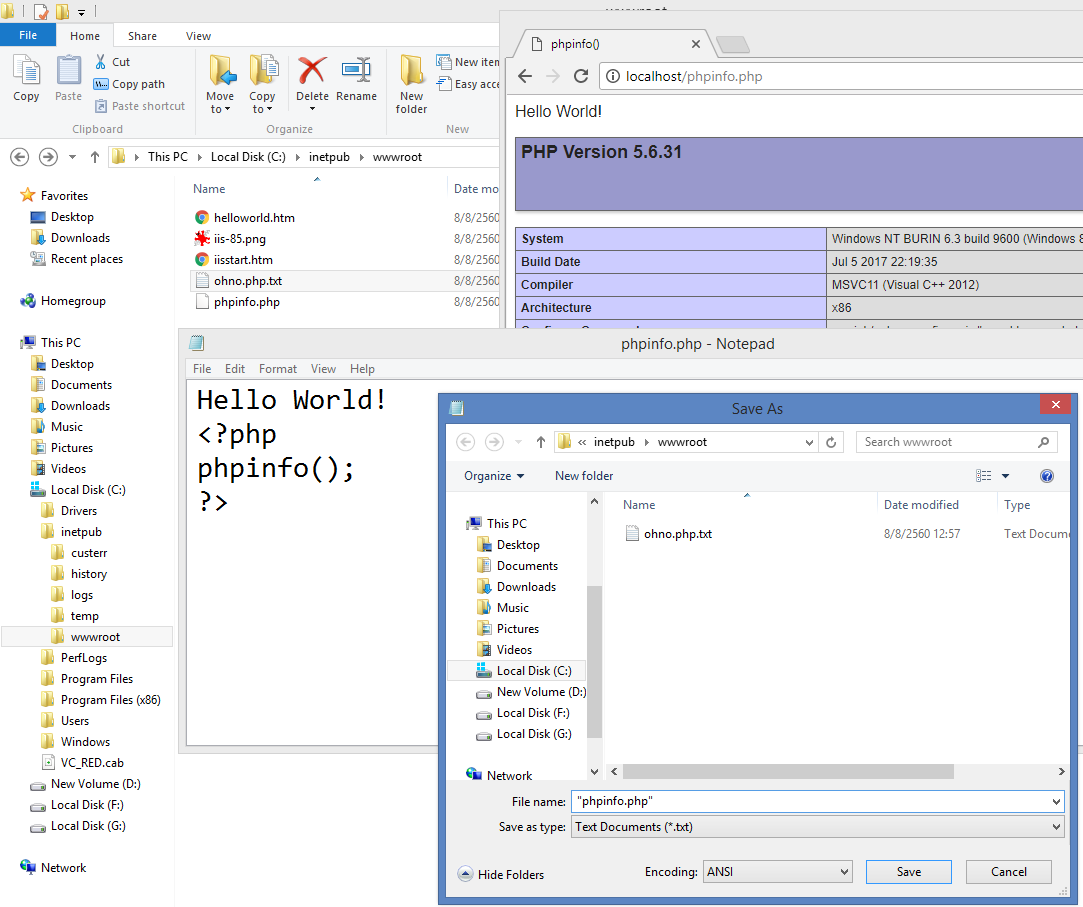
  20. เปิดโปรแกรม Notepad แล้วพิมพ์ hello world
    เพราะคิดจะทำให้ใคร ๆ เข้าเครื่องของเรา และเห็นข้อมูลที่เราสร้างไว้

    17_notepad.png
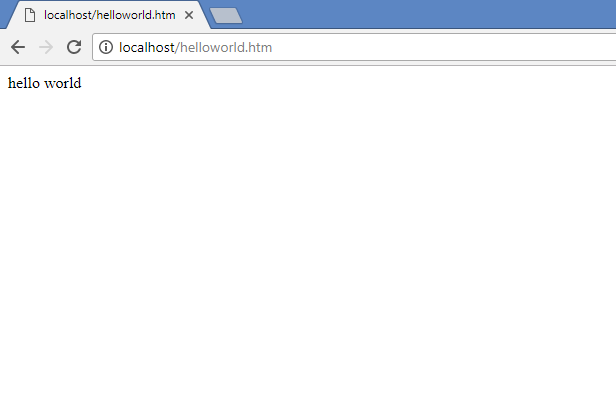
  21. สร้างแฟ้มชื่อ helloworld.php
    แล้วทดสอบเปิดด้วย Web Browser ในเครื่องของเรา
    ยังไม่ต้องไปลองที่ไหนไกลนัก

    18_local_hello.png
  22. ลองเรียกใช้ function phpinfo() เพื่อแสดงข้อมูลของเครื่อง
    ที่ฟังก์ชันนี้พอจะแสดงออกมาได้ ก็เยอะครับ
    แล้ว save as เป็น “phpinfo.php”

    19_notepad_phpinfo_helloworld.png
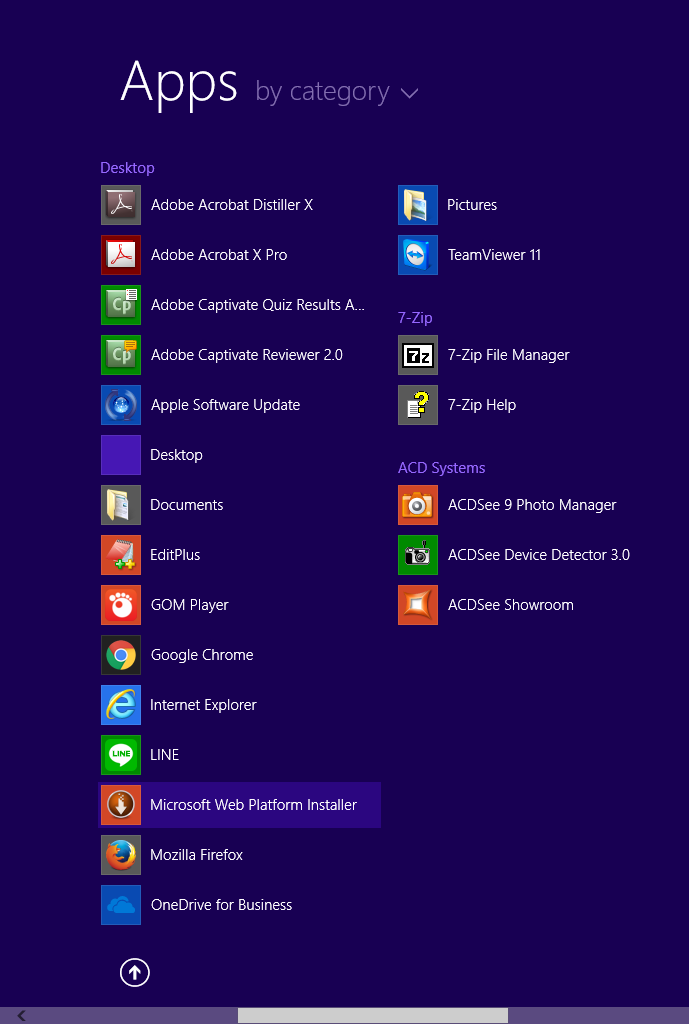
  23. หากเรียบร้อยแล้ว ผมอยากมี Database ไว้ใช้
    ก็เข้า Microsoft Web Platform Installer ผ่าน Metro UI
    ด้วยการคลิ๊กที่ปุ่ม Windows แล้วมองหาโปรแกรมนี้

    20_metro_screen.png
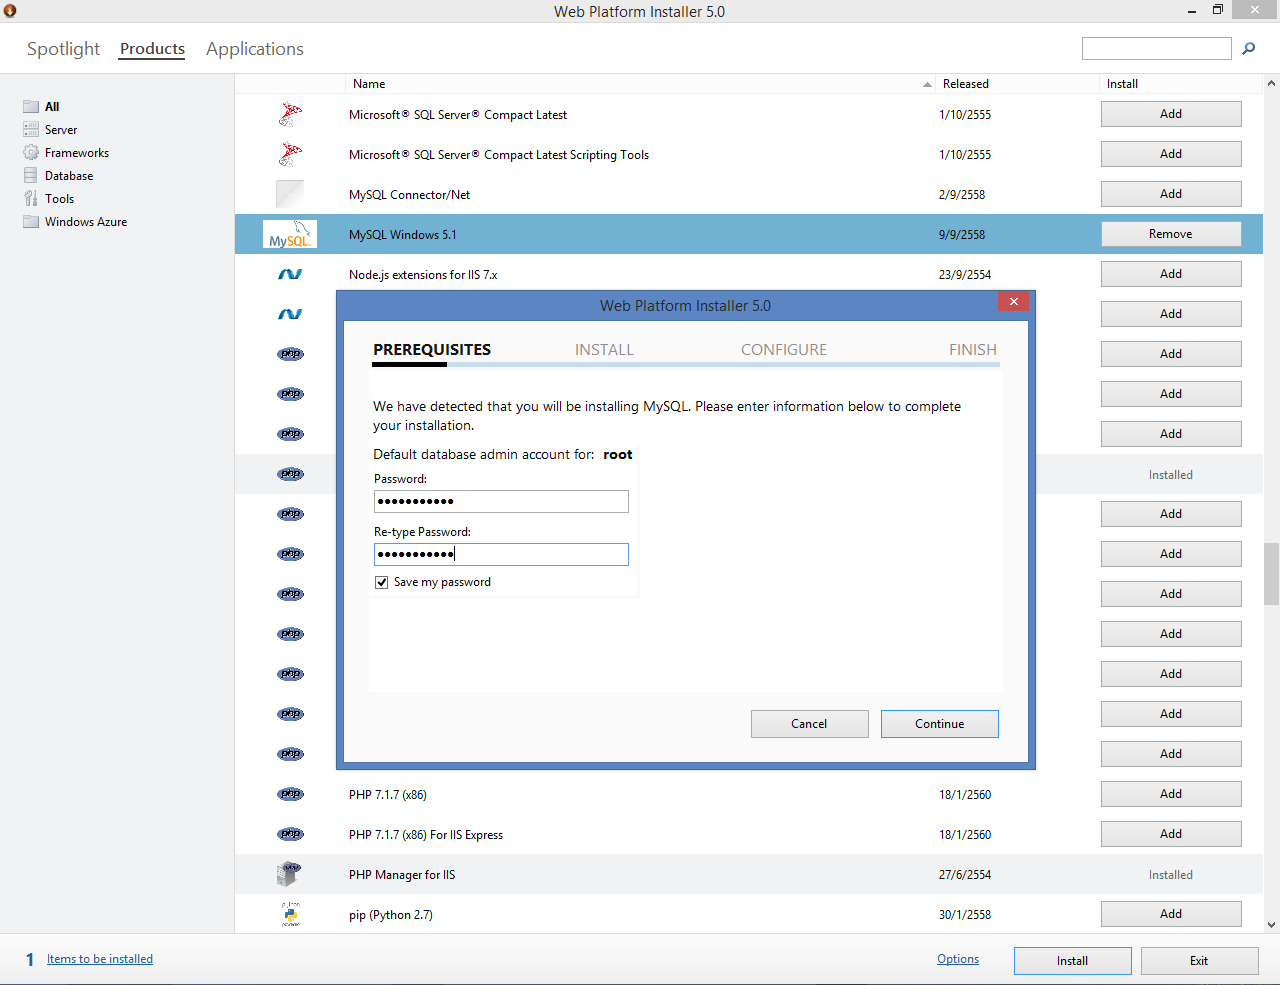
  24. พบ MySQL Windows 5.1 ผมก็เลือก Add และ Install
    โปรแกรมจะถามให้เราใส่รหัสผ่านของ root
    ก็พิมพ์เข้าไปครับ เช่น “Song:letitbe” หรือ อะไรที่ชอบ

    21_mysql_51.png
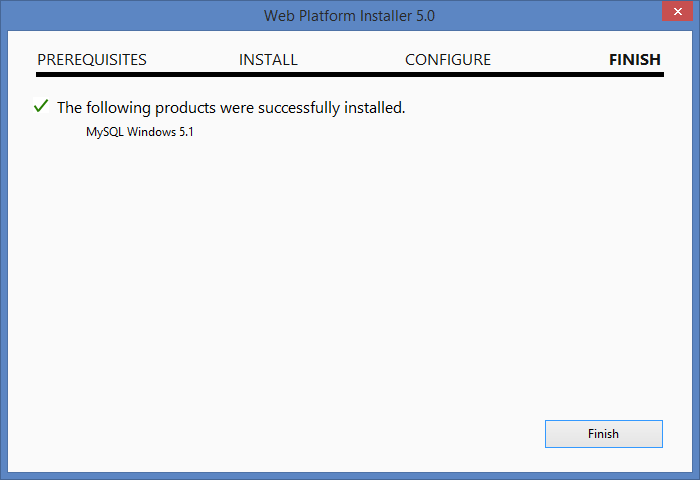
  25. หลังติดตั้งเสร็จก็จะรายงานว่า were successfully installed
    MySQL จะไม่ถูกติดตั้งลอย ๆ แต่เชื่อมกับ IIS และ PHP เรียกใช้กันได้เลย
    เพราะเป็นหน้าที่ของ Installer ที่ทำหน้าที่ config ให้อัตโนมัติ

    22_mysql_finish.png
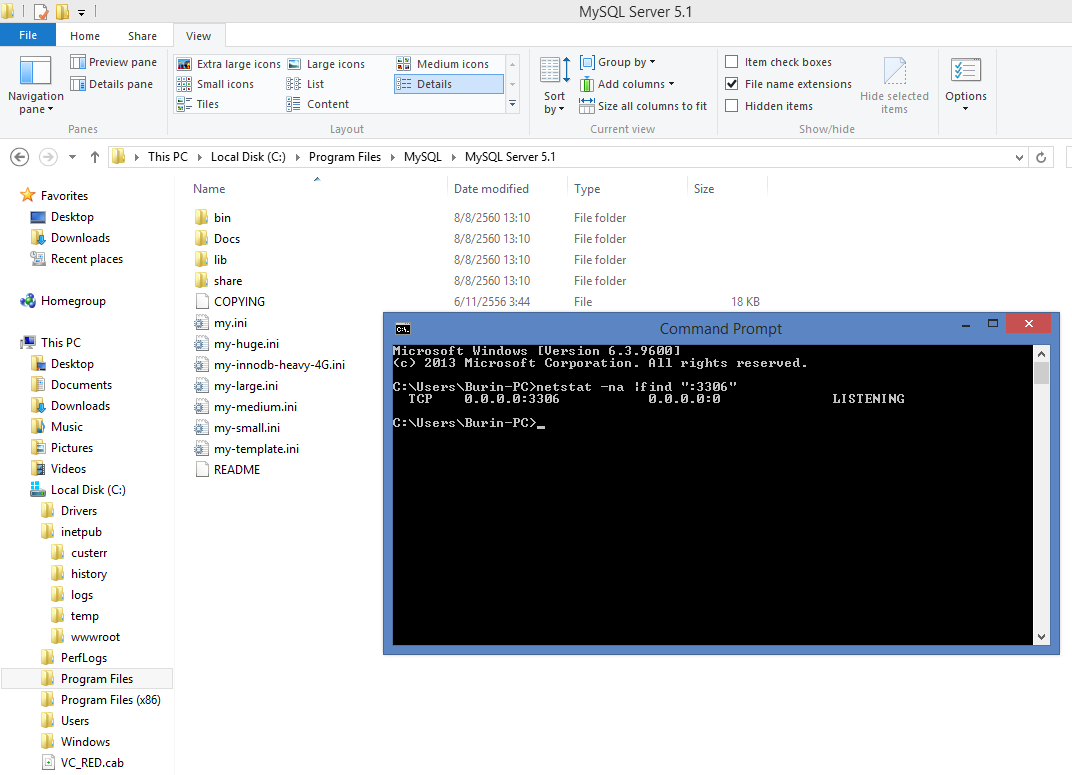
  26. MySQL จะเปิดบริการผ่าน port 3306
    ลองใช้ DOS ตรวจการเปิด port ด้วย
    DOS>netstat -na | find “:3306”

    23_netstat_3306.png
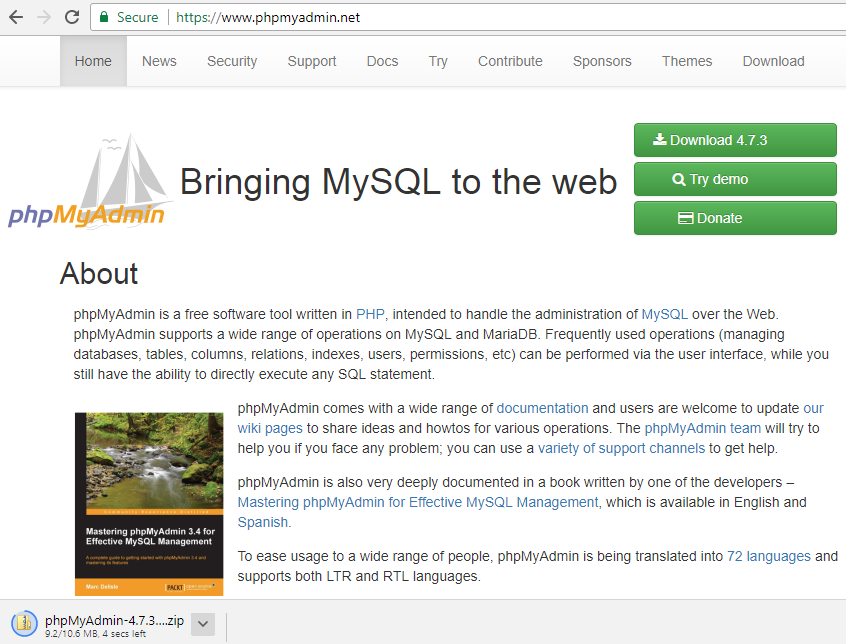
  27. การบริหาร MySQL ผมมักใช้ phpmyadmin
    ใน xampp หรือ appserv เค้าก็ลงมาให้เลย แต่มองหาใน installer ไม่พบ
    จึงต้องหาดาวน์โหลดมาลงเองผ่านเว็บไซต์ของ phpmyadmin.net
    ได้ phpmyadmin รุ่น 4.7.3 ไม่ได้อ่านรายละเอียด
    เห็นเป็นรุ่นใหม่ ผมก็ Download มาเลย

    24_download_phpmyadmin.png
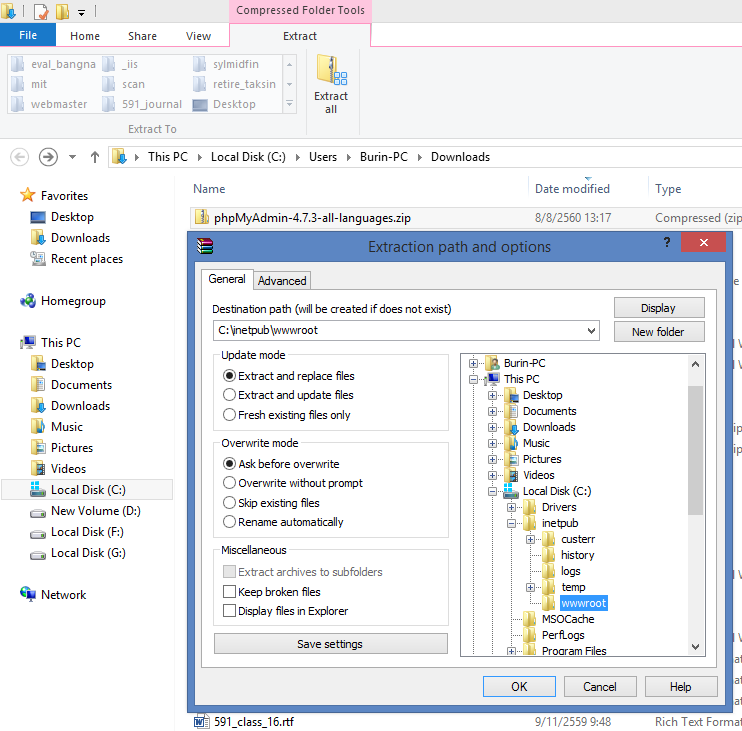
  28. ทำการ unzip ลองห้อง c:\inetpub\wwwroot
    แล้วคาดว่าจะเรียกใช้งานผ่าน Web Server ได้ทันที

    25_phpmyadmin_unzip.png
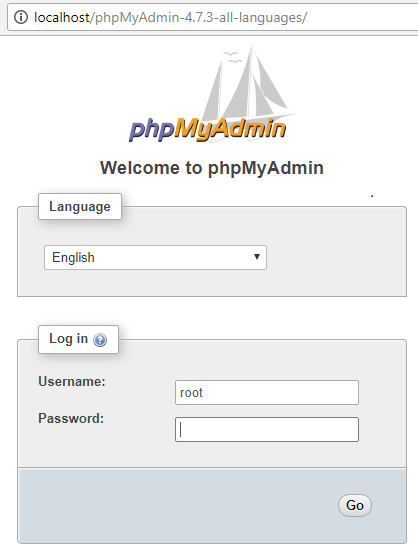
  29. ลองเปิดจากในเครื่อง มีหน้าจอเปิดรอรับ User และ Password
    ตามที่เคยตั้งว่า User = root Password = Song:letitbe หรือะไรที่ชอบ
    เปิดในเครื่องตนเอง เปิดจากเครื่องอื่นเรียก http://localhost ไม่ได้นะ

    26_phpmyadmin_login.png
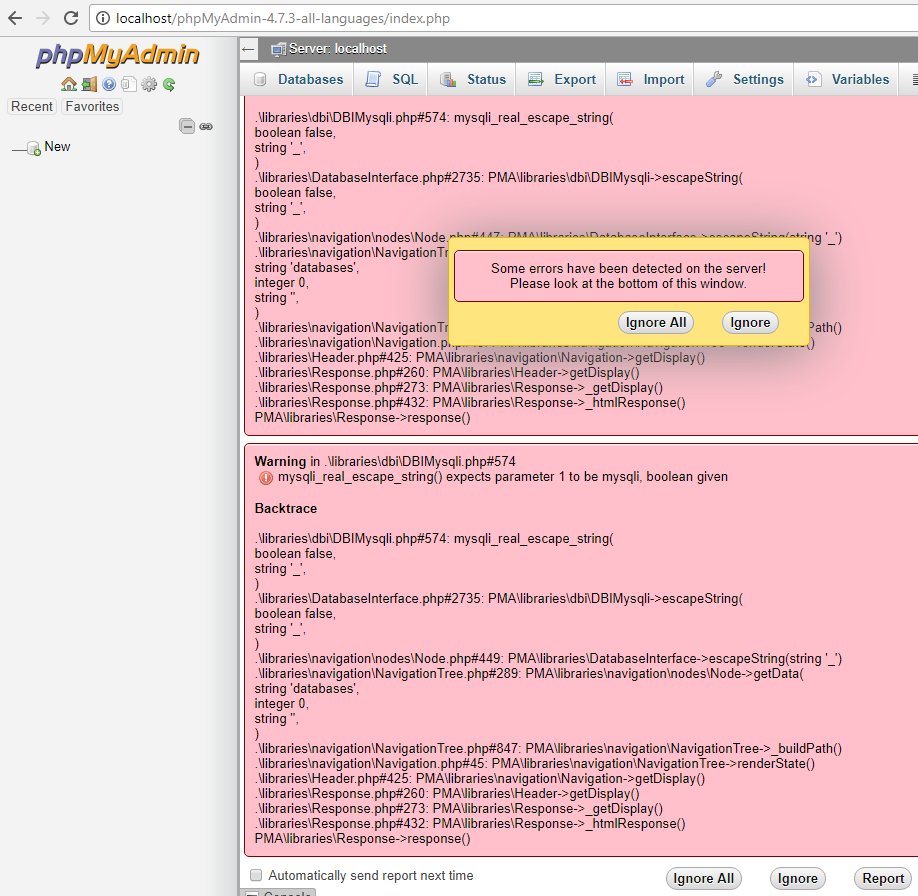
  30. ชมพูเต็มจอเลย เข้า google ใช้เลข 574 ไปช่วยหาสาเหตุ ก็ไม่พบ
    มีความเป็นไปได้หลายเรื่องที่เกิดปัญหา
    สิ่งที่ฉุกขึ้นมาในความคิดคือ รุ่นของ phpmyadmin ไม่ลงรอยกับที่อยู่ในเครื่อง
    ไปอ่านเงื่อนไขก็จริงครับ phpmyadmin 4.7.3 ต้องใช้กับ mysql 5.5
    แต่ของผมใช้รุ่น MySQL 5.1 เอง

    27_phpmyadmin_473_error.png
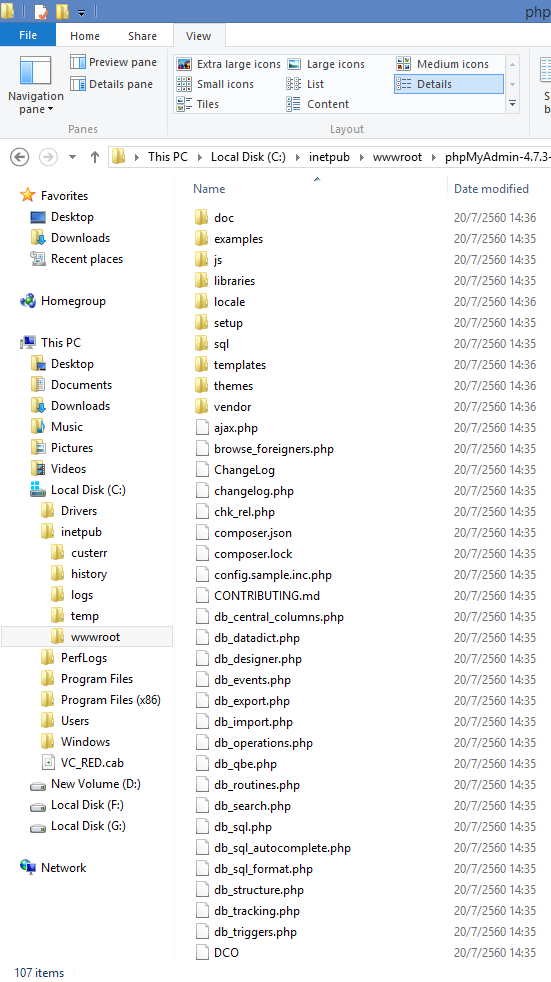
  31. ไปสำหรวจในห้อง phpmyadmin พบแฟ้มเพียบเลย
    ในอดีตต้องมาแก้ไข config เดี๋ยวนี้ไม่ต้องล่ะครับ
    การแก้ไขก็ไม่ยากเลย ไปหา phpmyadmin รุ่นเก่า แล้วลบห้องนี้ทิ้ง

    28_phpmyadmin_folder.png
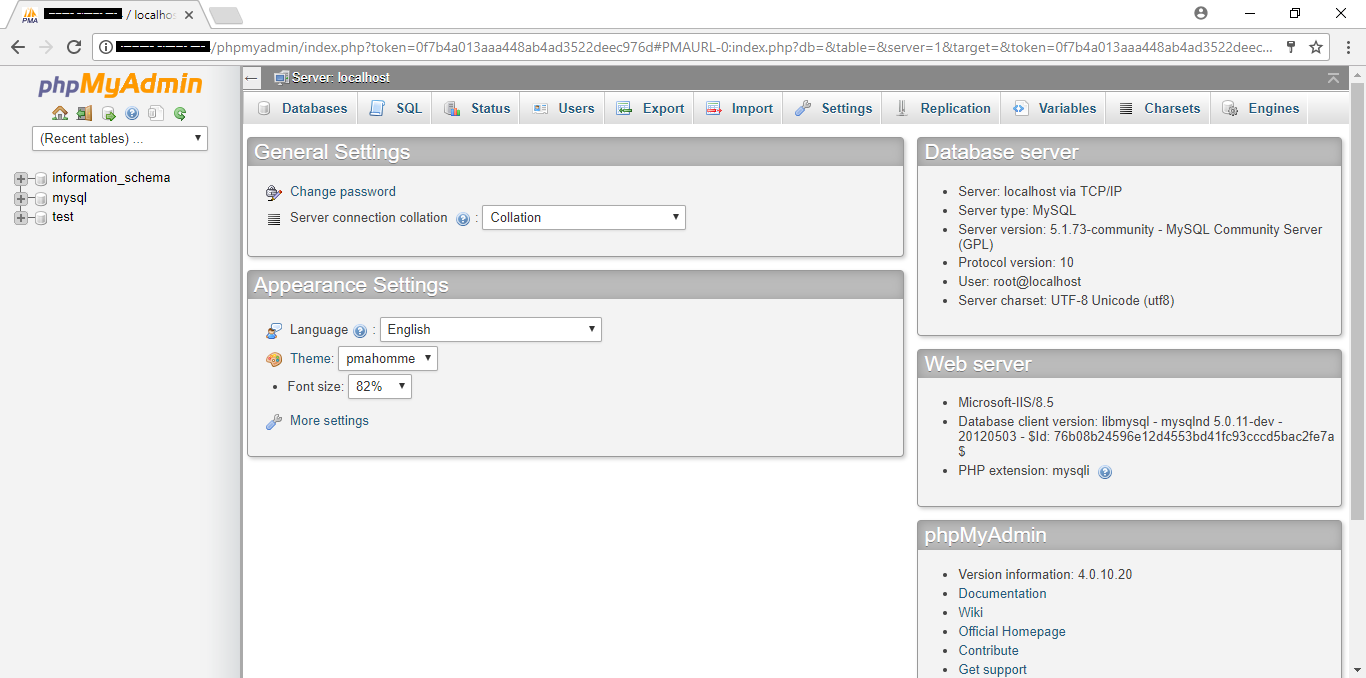
  32. หลังติดตั้ง phpmyadmin 4.0.10.20 แล้ว
    ผมเรียกจากเครื่องที่บ้านผ่าน IP Address เพราะเครื่องที่ลงโปรแกรมอยู่ที่ทำงาน
    ก็ใช้งานได้ปกติ ไม่ใช่เรียกผ่าน localhost หรือ 127.0.0.1 นะครับ

    29_phpmyadmin_40.png
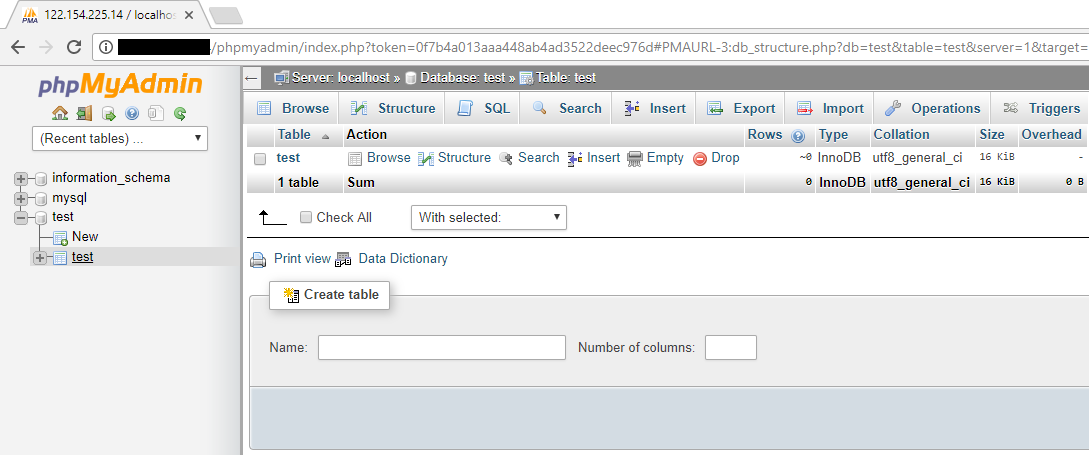
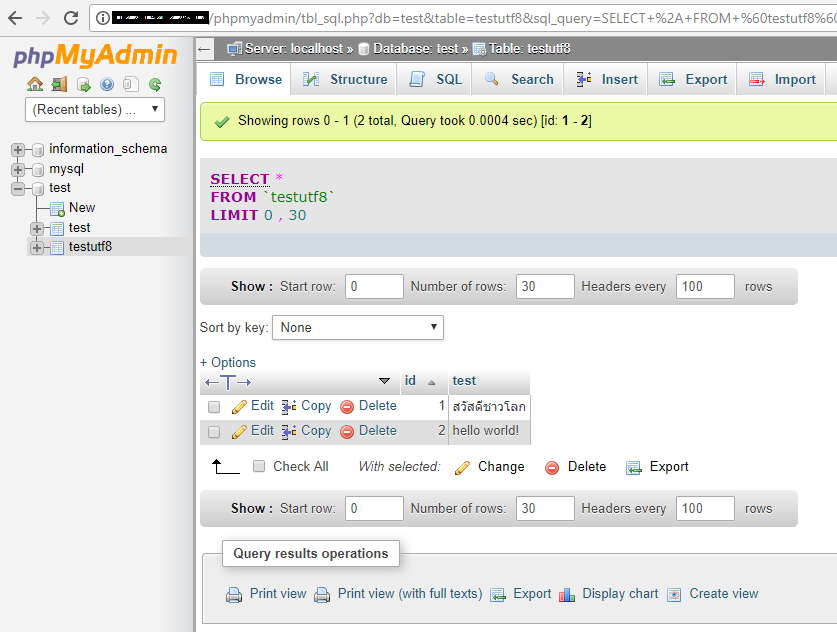
  33. เริ่มงานจากการสร้างตาราง (Table) ในฐานข้อมูล Test
    มี 1 Field ชื่อว่า Test เป็นแบบ Integer

    30_phpmyadmin_create_table.png
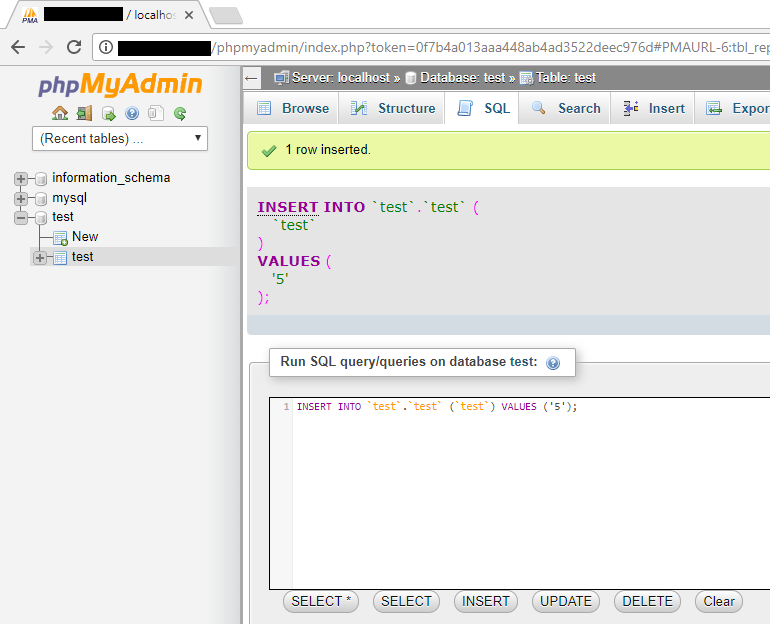
  34. ใส่ข้อมูลที่เป็นตัวเลขเข้าไป 1 ระเบียน
    มีค่าเท่ากับ 5

    31_phpmyadmin_insert_5.png
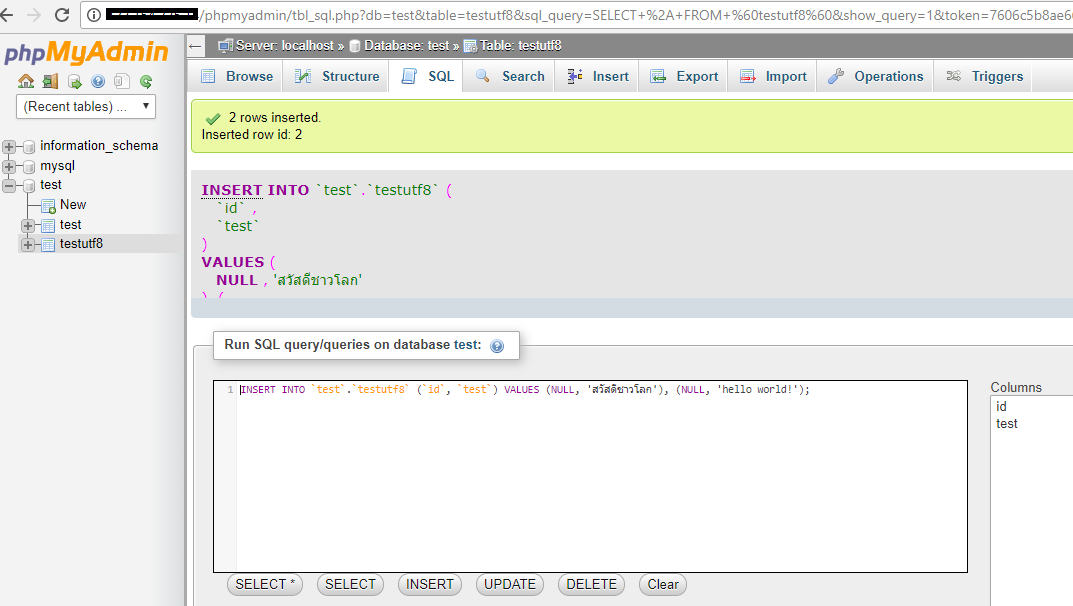
  35. หากจะให้สมบูรณ์ต้องมีอย่างน้อย 2 Fields
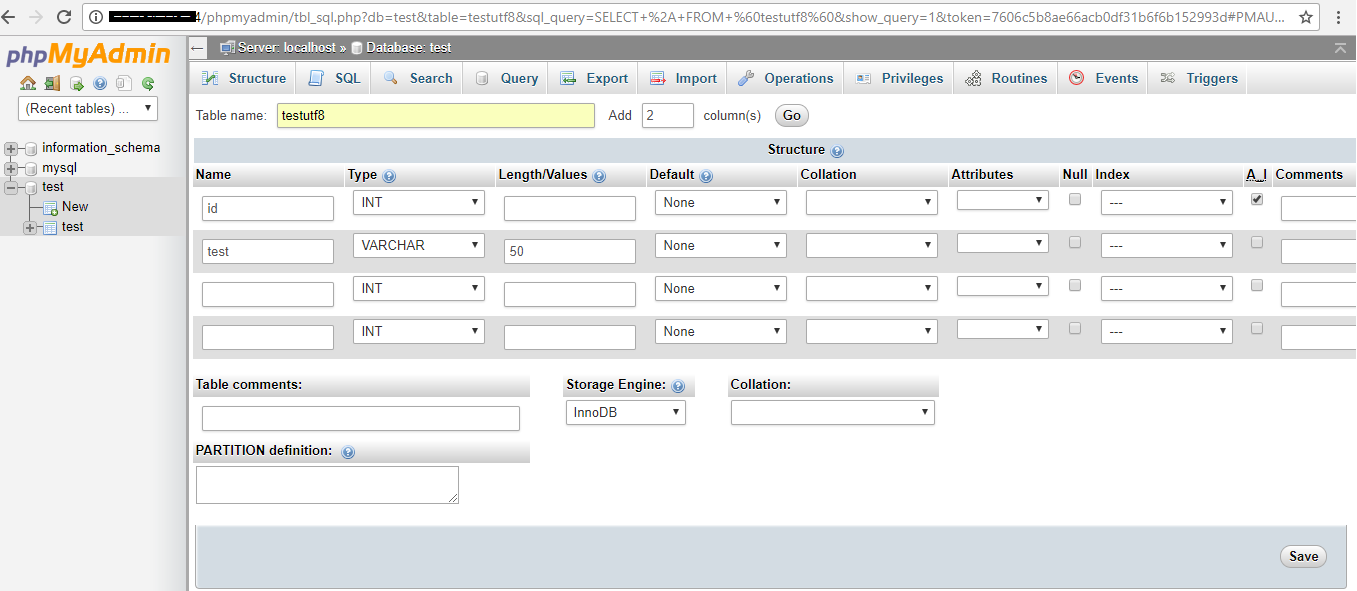
    ตัวอย่างนี้สร้าง ID เป็น Auto_Increment และ Test เป็น Varchar ขนาด 50 ตัวอักษร

    32_phpmyadmin_varcha_2_fields.png
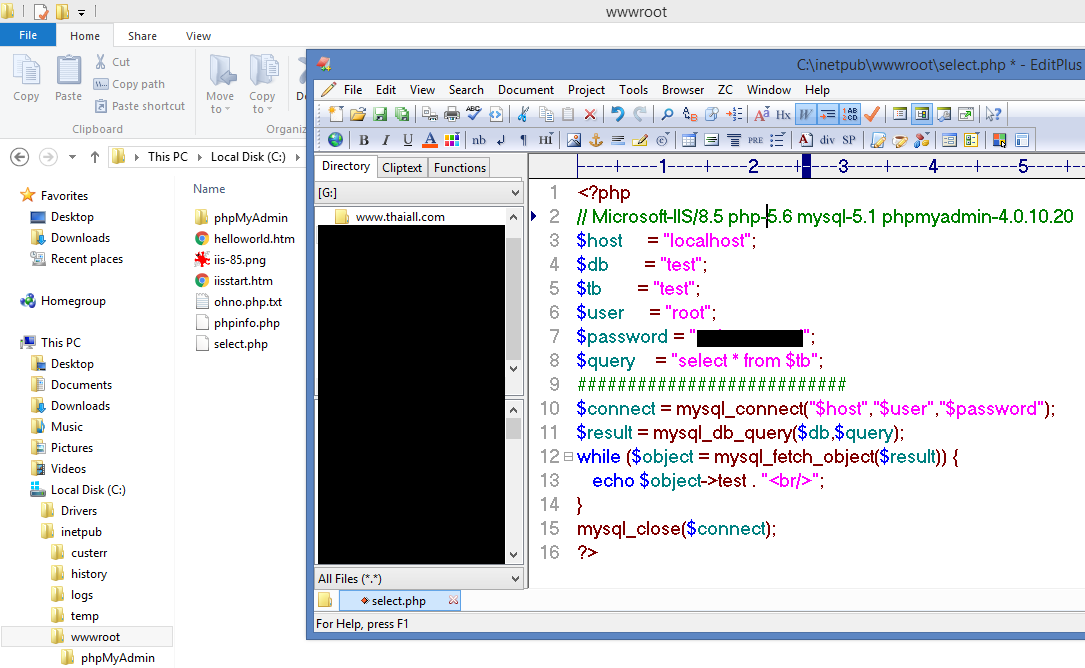
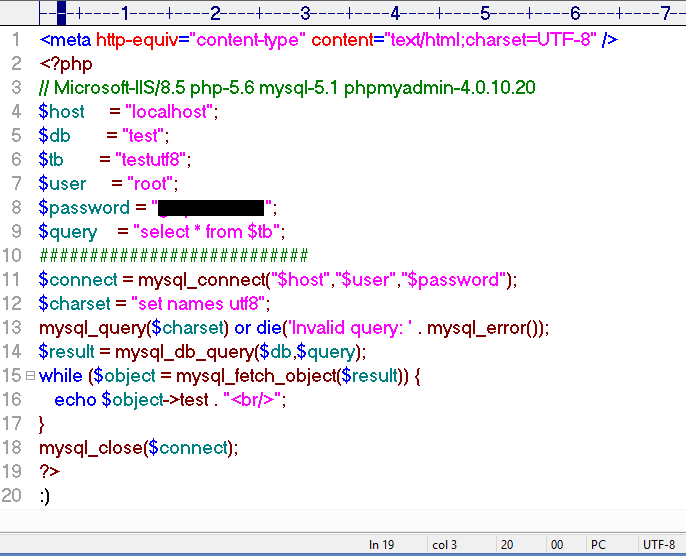
  36. เขียนโปรแกรมด้วยภาษา PHP เพื่อเรียกข้อมูลจากตาราง Test มาแสดง
    โปรแกรมนี้เขียนแบบง่าย ๆ ไม่ซับซ้อน
    ผมแชร์เป็น ต.ย.23 ใน http://www.thaiall.com/php

    33_select_in_wwwroot.png
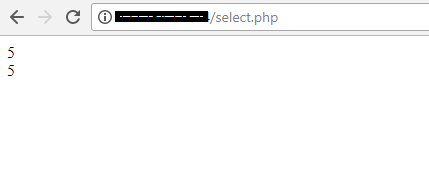
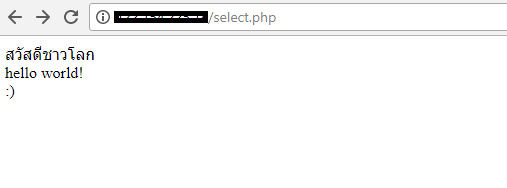
  37. ผลลัพธ์กรณีเรียกข้อมูลที่มี 1 Field แต่มี 2 Records
    ผ่าน IP Address จริงจากที่บ้าน เข้าที่ทำงาน

    34_select_in_browser.png
  38. ทำการ Insert ข้อมูลเข้าตารางที่มี 2 ระเบียน
    เป็นคำว่า สวัสดีชาวโลก กับ Hello world!

    35_phpmyadmin_insert.png
  39. ข้อมูลเก็บแบบ UTF-8 สามารถอ่านได้ปกติ
    จากใน phpmyadmin ไม่พบปัญหาภาษาไทย
    เดี๋ยวนี้ใคร ๆ ก็ใช้ UTF-8

    36_phpmyadmin_browse.png
  40. เขียนโปรแกรม และเตรียม code ให้รับกับ UTF-8
    ทั้ง charset หรือ set names หรือ encoding ของ source code

    37_select_with_utf8.png
  41. ผลลัพธ์ก็ได้เห็นคำว่า สวัสดีชาวโลก สมดังมุ่งหมาย
    นี่ก็เป็นทั้งหมดที่อยากเล่าให้ฟังครับ .. ชาวโลก

    38_helloworld_in_browser.png

</process>