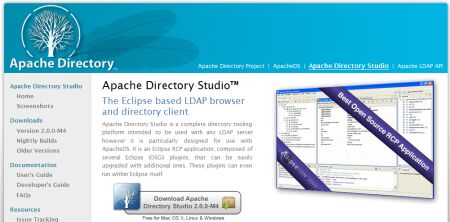
หนังสือ ผมรวยด้วยการเขียนโปรแกรมขายได้ยังไง

book
book

หนังสือ “ผมรวยด้วยการเขียนโปรแกรมขายได้ยังไง
โดย ยุทธนา ท้าวนอก


ผมได้หนังสือเล่มนี้ เมื่อวันเสาร์ที่ 29 ธ.ค.55 ตอนไปส่งครอบครัวแถวห้างเสรี แล้วไปเดินโต๋เต๋ในร้าน se-ed หนังสือเล่มนี้เป็นเล่มแรกที่หยิบออกจากชั้นมาดู เห็นว่าหลายบทน่าสนใจก็หยิบไปจ่ายตัง (295 บาท) เลย เป็นครั้งแรกที่ใช้เวลาในร้านหนังสือน้อย และตัดสินใจเร็วกว่าทุกครั้ง  คาดว่า 3 นาที
ประโยคสำคัญ ที่ทำให้ผมตัิดสินใจซื้อ คือ ผลงานของผู้เขียนชนะเลิศระดับประเทศ 2 ครั้ง ในการประกวด “Thailand ICT Awards” ซึ่งสะท้อนอะไรบ้างอย่าง จึงทำให้ผมไม่ลังเลที่จะมีหนังสือเล่มนี้ในบ้านอีกเล่ม

http://www.cargooptimizer.com/OSC/Softbiz.php?language=th

หนังสือพ็อกเกตบุ๊คความหนา 400 หน้า ที่ถ่ายทอดเรื่องราวความเป็นมาของผู้ก่อตั้งกิจการ Dreamsofts Optimization ltd. part. กิจการซอฟต์แวร์ของไทยที่ก้าวไกลออกไปทั่วโลก ด้วยจำนวนลูกค้าที่มากกว่า 500 รายทั่วโลก ประสบการณ์สิบปีเต็มในการบริหารกิจการซอฟต์แวร์จนประสบความสำเร็จถูกนำมาบรรจงถ่ายทอดลงในหนังสือเล่มนี้แล้ว

ใช้เวลาเขียนถึง 1 ปีเต็ม (ม.ค. – ธ.ค. 55) เพื่อให้ได้ผลงานที่มีเนื้อหากระชับและครบถ้วนที่สุด


บทที่ 1. บทนำ

จาก คนที่มีความรู้เรื่องการเขียนโปรแกรมอันน้อยนิดจนกลายมาเป็นเจ้าของกิจการ ซอฟต์แวร์ที่สามารถขายผลงานได้ทั่วโลก มีรางวัลชนะเลิศระดับประเทศ 2 รางวัลเป็นเครื่องยืนยันคุณภาพ ซึ่งกว่าผมจะมาถึงจุดนี้ได้มีองค์ประกอบหลายๆอย่างที่เป็นส่วนช่วยเสริมและ ผลักดันให้ผมประสบความสำเร็จได้ แต่จุดเปลี่ยนหลักๆที่ทำให้ผมมาถึงจุดนี้ได้คือการเปลี่ยนตัวเองจาก โปรแกรมเมอร์มาเป็นนักธุรกิจซอฟต์แวร์

รู้จักกันก่อน
มาทำความเข้าใจเกี่ยวกับซอฟต์แวร์กันอีกนิด
จากโปรแกรมเมอร์มาเป็นนักพัฒนาซอฟต์แวร์และกลายมาเป็นนักธุรกิจ
ไม่ต้องเขียนโปรแกรมเก่งมาก แต่ต้องรู้จักคำว่าจุดขาย
กว่าจะเป็น Dreamsofts
เรียนตอนไหนก็ได้ จบมาก็ต้องหางานทำอยู่ดี
กลับมาเรียนดีกว่า พอแล้วงานมันหนัก

ขายได้ตั้งสามพันห้า
ได้หน้าแต่ไม่ได้เงิน
วันนี้ที่รอคอย

ลูกค้าของ Dreamsofts
ผลของ Dreamsofts

โปรแกรมคำนวณการจัดเรียงสินค้าใส่คอนเทนเนอร์
โปรแกรมคำนวณการตัดชิ้นงาน 1 และ 2 มิติ
โปรแกรมออกแบบบรรจุภัณฑ์แบบ 3 มิติ
โปรแกรมสร้างภาพโมเสค
เกมหวย[หนทางรวยหรือจน]

มาตกลงกันก่อนไปต่อ


บทที่ 2. การพัฒนาโปรแกรมให้มีคุณภาพ

ผมจะมาเล่าการคัดเลือกโปรแกรมที่มีจุดขายเพื่อนำมาพัฒนา รวมถึงขั้นตอนในการพัฒนา เพื่อที่คุณจะได้รู้จักการพัฒนาผลิตภัณฑ์ซอฟต์แวร์ที่มีคุณภาพ

พัฒนาโปรแกรมอะไรดี?

เลือกโปรแกรมที่เราเข้าใจระบบและสามารถพัฒนาได้
เลือกเป้าหมายของโปรแกรมในเชิงธุรกิจ
จุดขายของโปรแกรม
โปรแกรมที่มีกลุ่มเป้าหมายใหญ่ที่สุด

ขั้นตอนการพัฒนาโปรแกรม

1. ศึกษาความเป็นไปได้ในการพัฒนาโปรแกรม
2. วิเคราะห์ระบบเพื่อกำหนดความสามารถของผลิตภัณฑ์
3. ออกแบบระบบเพื่อใช้ในการพัฒนา
4. พัฒนาโปรแกรม
5. ทดสอบและประเมินผล
6. ทำการผลิต
7. แจกจ่ายและสนับสนุน


บทที่ 3. ส่วนประกอบเสริมโปรแกรม

ถ้าคุณคิดว่าการทำธุรกิจซอฟต์แวร์มีเพียงการพัฒนาให้โปรแกรมทำงานได้เท่านั้นแล้วล่ะก็ คุณคิดผิดแล้วล่ะครับ เพราะยังมีส่วนประกอบเสริมอื่นๆ ที่จะทำให้ซอฟต์แวร์ของเรา ดูมีคุณภาพและขายได้ เรามาดูกันซิว่ามีอะไรบ้าง

ตัวโปรแกรม

ข้อมูลโปรแกรม
มาตรฐานที่โปรแกรมควรจะต้องมี
รุ่นของโปรแกรม

การป้องกันการละเมิดลิขสิทธิ์

ดีคอมไพล์
ดีบั๊ก
ผลิตภัณฑ์สำหรับป้องกันการละเมิดลิขสิทธิ์

ส่วนเสริมโปรแกรม

เนื้อหาที่ควรมีในส่วนเสริมโปรแกรม
ไฟล์ช่วยเหลือ

ไฟล์ติดตั้ง (Installation File)

โปรแกรมที่ใช้สร้างไฟล์ติดตั้ง
บรรจุภัณฑ์
สื่อจัดเก็บไฟล์ทั้งหมด
กล่องใส่แผ่น
กล่องใส่สินค้า


บทที่ 4. การตั้งราคาขาย

โปรแกรม ที่ทำงานได้อย่างสมบูรณ์อาจจะไม่ใช่เหตุผลหลักที่ทำให้โปรแกรมนั้นขายได้ ราคาของโปรแกรมเป็นอีกเหตุผลหนึ่งที่ผู้ซื้อใช้พิจารณา เราจะมาศึกษาถึงการตั้งราคาขายที่จะทำให้โปรแกรมของเราขายได้ง่ายและมีกำไร มากที่สุด

ตั้งราคาขายยังไงไม่ให้ขาดทุน

ต้นทุนสินค้า
วิธีตั้งราคาขาย
แยกย่อยรุ่นสินค้า
ค่าใช้จ่ายเสริม

ภาษี

ภาษีมูลค่าเพิ่ม
ภาษีหัก ณ ที่จ่าย

วิธีการชำระเงิน
การตั้งราคาสำหรับต่างประเทศ


บทที่ 5. เว็บไซต์สำหรับขายซอฟต์แวร์

สินค้า ดีก็ต้องมีหน้าร้านเพื่อวางจำหน่าย การมีเว็บไซต์ก็เปรียบเสมือนมีหน้าร้านสำหรับธุรกิจซอฟต์แวร์ คุณคิดว่าเว็บไซต์สำหรับขายซอฟต์แวร์ควรจะมีอะไรอยู่ในนั้นบ้าง ผมจะมาบอกถึงการตั้งชื่อเว็บไซต์ รายละเอียดภายในเว็บไซต์รวมไปจนถึงส่วนเสริมในการทำให้เว็บไซต์ของเราเป็น เว็บไซต์ที่เหมาะกับการขายซอฟต์แวร์จริงๆ

การพัฒนาเว็บไซต์
โดเมนเนม

ประเภทของโดเมนเนม
การจดโดเมนเนม
คำแนะนำเกี่ยวกับโดเมนเนม

โฮสต์

ข้อมูลสำคัญเกี่ยวกับโฮสต์
การเช่าโฮสต์
เว็บฝากไฟล์

การส่งเว็บไซต์เข้าสู่โฮสต์

ข้อมูลสำคัญเกี่ยวกับโฮสต์
การเช่าโฮสต์
เว็บฝากไฟล์

สิ่งที่ควรมีในเว็บไซต์

รองรับหลายภาษา
ระบบสมาชิก
รายละเอียดสินค้า
ดาวน์โหลด
ราคา
วิธีการสั่งซื้อ
วิธีการจัดส่ง
ส่วนส่งเสริมการขาย
ลูกค้าอ้างอิง
คำรับรองจากผู้ใช้งาน
รางวัล
ประชาสัมพันธ์
คำถามที่ถามบ่อย
สนับสนุนการใช้งาน
ข้อมูลการติดต่อ
ความน่าเชื่อถือ
ส่วนเสริมในเว็บไซต์


บทที่ 6. จำหน่ายซอฟต์แวร์สำหรับต่างประเทศ

ถ้า ซอฟต์แวร์ของคุณมีความเหมาะสมที่จะจำหน่ายออกสู่ต่างประเทศได้ คุณอาจจะยังไม่รู้ว่าจะเริ่มต้นที่ตรงไหนดี ผมมีขั้นตอนและประสบการณ์อันมีค่าเกี่ยวกับการจำหน่ายซอฟต์แวร์ให้กับต่าง ประเทศมาเล่าให้คุณผู้อ่านได้นำไปเป็นแนวทางในการปฏิบัติได้

ข้อควรรู้เกี่ยวกับซอฟต์แวร์สำหรับต่างประเทศ
วิธีการชำระเงิน

บัตรเครดิต
โอนเงินระหว่างประเทศ
PayPal
ผู้ให้บริการรับและส่งเงินระหว่างประเทศ

วิธีการจัดส่ง

การจัดส่งสินค้าแบบออนไลน์
การจัดส่งสินค้าแบบออฟไลน์

บริการตัวกลางในการขายซอฟต์แวร์
share-it! เครื่องมือชั้นดีในการขายซอฟต์แวร์

การสมัครเพื่อใช้บริการของ share-it!
การยอมรับข้อตกลงการเป็นผู้ขายของ share-it!
การแจ้งข้อมูลบัญชีธนาคารสำหรับรับเงินจาก share-it!
การเพิ่มข้อมูลสินค้าเข้าสู่ระบบ
รายการส่งเสริมการขายโดยใช้ coupon code
เครือข่ายการตลาดของ share-it!
ผู้ช่วยขายผ่านระบบ Affiliate ของ share-it!


บทที่ 7. คุณรู้ไหม? ลูกค้าของคุณคือใคร

สินค้าดีก็มีแล้ว หน้าร้านก็มีแล้ว เหลือแต่การเรียกลูกค้าเข้ามาในร้าน แล้วลูกค้าของเราคือใครล่ะพวกเขาเหล่านั้นอยู่ที่ไหนกันบ้าง? เราจะหาข้อมูลของพวกเขาได้อย่างไร? และเมื่อได้ข้อมูลมาแล้วมีวิธีการติดต่อลูกค้าอย่างไรบ้าง? มาพบคำตอบของคำถามเหล่านี้ในบทนี้กัน

สินค้าของเรามีประโยชน์อย่างไร
ใครคือลูกค้าของเรา?
เราจะหาข้อมูลลูกค้าจากที่ไหน?
เราสามารถติดต่อลูกค้าได้ทางใดบ้าง

การติดต่อทางตรง
การติดต่อทางอ้อม


บทที่ 8. มาเรียกลูกค้าเข้าเว็บไซต์กันเถอะ

เมื่อเรารู้จักข้อมูลการติดต่อของลูกค้าและสถานที่ๆลูกค้ารวมตัวกันอยู่มากแล้ว เราจะมีวิธีการเรียกให้เขามาเข้าเว็บไซต์ของเราอย่างไร? มาพบคำตอบของคำถามเหล่านี้ในบทนี้กัน

ส่งโปรแกรมเข้าเว็บดาวน์โหลดซอฟต์แวร์
PAD สิ่งมหัศจรรย์สำหรับการตลาดซอฟต์แวร์

PAD คืออะไร?
การสร้าง PAD
เว็บไซต์ที่รองรับ PAD
การส่งข้อมูลเข้าเว็บไซต์ดาวน์โหลดโปรแกรมด้วย PAD
ข้อมูลเพิ่มเติมเกี่ยวกับ PAD

การใช้เสิร์ชเอนจิ้นในการตลาด

การส่งข้อมูลเว็บไซต์เข้าเสิร์ชเอนจิ้น
ลงโฆษณากับเสิร์ชเอนจิ้น
ทำการปรับปรุงเว็บไซต์ด้วย SEO

ส่งโปรแกรมเข้าเว็บท่าและเว็บไซต์สำหรับขายสินค้า
การแลกลิงก์

บทที่ 9. การส่งเสริมการขาย

เมื่อเราเรียกลูกค้าให้เข้ามายังเว็บไซต์ของเราได้แล้ว เราจะมีวิธีการใดที่จะทำให้ลูกค้าตัดสินใจซื้อโปรแกรมของเราได้เร็วที่สุด? การส่งเสริมการขายเป็นคำตอบของคำถามนี้ครับ

ข้อเสนอพิเศษ

การลดราคา
การแลกซื้อ
การแจกสินค้า
การแถม
การขายพ่วง
ส่วนลดตามจำนวน

ข้อจำกัดของข้อเสนอพิเศษ

จำนวนสิทธิ์
ระยะเวลาในการได้รับสิทธิ์
ประเภทของลูกค้าที่ได้รับสิทธิ์

รายการส่งเสริมการขาย
คำแนะนำเรื่องการส่งเสริมการขาย

บทที่ 10 ความรู้ในการทำระบบควบคุมลิขสิทธิ์เบื้องต้น

คุณอาจจะยินดีมากๆ ที่โปรแกรมของคุณเป็นที่นิยมจนได้รับการกล่าวขานไปทั่ว แต่พอมาดูยอดขายแล้วกลับพบสิ่งที่ตรงกันข้าม เกิดอะไรขึ้น? มันน่าจะทำเงินให้คุณมากกว่านี้สิ และแล้วคุณก็พบว่าโปรแกรมที่คุณขายไปหนึ่ง แต่กับมีผู้ร่วมใช้งานเป็นร้อย วิธีป้องกันขั้นพื้นฐานสำหรับปัญหานี้เป็นสิ่งที่คุณควรจะรู้และผมกำลังจะบอกครับ

การควบคุมสิทธิ์การใช้งานซอฟต์แวร์
หลักการควบคุมลิขสิทธิ์การใช้งานขั้นพื้นฐาน

รหัสประจำเครื่องคอมพิวเตอร์ (Machine code)
ข้อมูลการใช้งาน
รหัสปลดล็อค (License code)
การทำงานของระบบควบคุมลิขสิทธิ์
ระบบการลงทะเบียน
การบังคับปิด

การทำให้ระบบควบคุมลิขสิทธิ์ของเราซับซ้อนยิ่งขึ้น

การบีบอัดข้อมูล
การเข้ารหัสข้อมูล
การเพิ่มรหัสตรวจสอบ
การเขียนและอ่านข้อมูลในสถานที่ปลอดภัย

ระบบนี้ต่อกรกับใครได้บ้าง
คำแนะนำอื่นๆ เกี่ยวกับการควบคุมลิขสิทธิ์

ข้อจำกัดของรุ่นทดลองใช้
ทำระบบโอนย้ายสิทธิ์การใช้งานดีไหม
จำนวนครั้งในการขอปลดล็อก
ทำระบบปลดล็อกบนเว็บไซต์กันไหม
ทำระบบปลดล็อกด้วย Hardlock ใช้เองกันไหม

เหนือฟ้ายังมีฟ้า เหนือฟ้าอีกทีคืออะไร?


บทที่ 11. ความรู้เพิ่มเติมในธุรกิจซอฟต์แวร์

เรื่อง ราวในบทนี้คือ สิ่งที่จะต้องทำเมื่อเป็นนักธุรกิจซอฟต์แวร์ ปัญหาต่างๆ ที่จะพบและ วิธีแก้ไขปัญหาเหล่านั้น พร้อมคำแนะนำ รวมทั้งเคล็ดลับต่างๆ ที่จะเป็นส่วนเสริมสำคัญให้คุณประสบความสำเร็จในการทำธุรกิจซอฟต์แวร์

ขั้นตอนการทำธุรกิจซอฟต์แวร์มีอะไรบ้าง ?

ขั้นตอนที่ 1 คิดสินค้าที่แปลกใหม่ มีจุดขาย และเราสามารถพัฒนาได้
ขั้นตอนที่ 2 ตั้งชื่อกิจการและชื่อโดเมน
ขั้นตอนที่ 3 บัญชีธนาคาร โทรศัพท์และแฟกซ์
ขั้นตอนที่ 4 พัฒนาผลิตภัณฑ์และพัฒนาเว็บไซต์
ขั้นตอนที่ 5 ทำการตลาดให้กับสินค้าและเว็บไซต์ของเรา
ขั้นตอนที่ 6 บริหารกิจการของเรา

เคล็ดลับการประสบความสำเร็จ

คำแนะนำที่ 1 คุณภาพของสินค้าต้องมาก่อน
คำแนะนำที่ 2 ส่วนเสริมผลิตภัณฑ์ต้องมีให้ครบถ้วน
คำแนะนำที่ 3 ราคาสินค้าต้องมีความเหมาะสม
คำแนะนำที่ 4 การตลาดต้องมีตลอดเวลา
คำแนะนำที่ 5 การส่งเสริมการขายต้องมีบางโอกาส
คำแนะนำที่ 6 ทำให้ลูกค้าเกิดความเชื่อถือ
คำแนะนำที่ 7 อย่าทิ้งลูกค้าเดิม
คำแนะนำที่ 8 ตอบสนองด้วยความรวดเร็ว
คำแนะนำที่ 9 ปัญหามีไว้ป้องกัน

วงจรชีวิตผลิตภัณฑ์

เกิดมาหน้าตาสดใส
บาดเจ็บจากการทำงานต้องรักษาเยียวยา
คุณภาพดีก็มีอายุยืน
โปรแกรมไม้ใกล้ฝั่ง
ตายซะเถอะ
เกิดใหม่ไฉไลกว่าเดิม
ตายไปสองแต่เกิดมาใหม่แค่หนึ่ง
ขายไปด้วยกันดีกว่า

คำแนะนำเพื่อเพิ่มความมั่นใจในการทำธุรกิจซอฟต์แวร์

วางแผนให้ดีก่อนสร้างเว็บไซต์ ?
ขจัดปัญหาคนเข้าเว็บมาก แต่ขายไม่ได้
อะไรที่พิมพ์บ่อยๆสร้างเทมเพลตไว้เลย
Mail signature คือหน้าตาของผู้ส่ง
จงสร้างและพัฒนาระบบการทำงานของคุณเอง
ทำคนเดียวแล้วลูกค้าเชื่อถือเหรอ ?
มีงานต้องทำหลายอย่างพร้อมกัน ทำอย่างไรดี ?
ซอฟต์แวร์กับทรัพย์สินทางปัญญา
ต้องซื้อเครื่องมือที่มีลิขสิทธิ์มาใช้หรือไม่
ระบบ OEM สำหรับตัวแทนจำหน่าย
ทำอย่างไรกับผลิตภัณฑ์ที่ไม่ประสบความสำเร็จ
หน่วยงานที่เกี่ยวข้องกับซอฟต์แวร์

จงสร้างโอกาสในการประสบความสำเร็จให้กับตัวเอง

ปรับโปรแกรมวิเคราะห์ swot ให้มี 15 ช่อง

วิเคราะห์ swot
วิเคราะห์ swot
18 ส.ค.55 ได้รับอีเมลจาก อ.พรรณี ท่านเคยมาเป็นผู้ประเมินคุณภาพที่มหาวิทยาลัย ส่ง comment ผ่าน web form เข้ามาทักว่า ระบบจัดทำวิเคราะห์ swot : so st wo wt เมื่อกรอกข้อมูลบางส่วนแล้วมีปัญหา ผมคาดว่าท่านกำลังทำแผนยุทธศาสตร์ เพราะ swot เป็นเครื่องมือหนึ่งในการช่วยวิเคราะห์ แล้วกราฟช่วยแสดงความสัมพันธ์ของ swot ที่มีตัวเลขซับซ้อน ก็จำเป็นต้องถูกนำมา plot graph เมื่อทดสอบตาม comment ก็ไม่พบปัญหา จึงคาดว่าอาจเป็นที่เครื่องท่าน หรือเน็ต หรือลักษณะข้อมูล แล้วผมก็ถือเป็นโอกาสนี้ปรับโปรแกรม ประกอบกับเคยมีเพื่อนชาวไทยขอให้เพิ่มช่อง เกิน 10 ช่อง ผมจึงปรับโปรแกรมให้มี 15 ช่อง และเพิ่มตัวอย่างแบบ full sample คือ ใส่ข้อมูลไปให้ครบทุกช่อง เวลากรอกข้อมูลก็ดูเป็นตัวอย่างได้เลย โดยเพิ่มฟอร์ม 2 form และย้ายฟอร์มขึ้นมาบนสุดของเว็บเพจ

รวมทิป ของ PHP

ftp test
ftp test

tip หมายถึง ข้อแนะนำ เกร็ดความรู้

– มีการเขียนทิป หรือหลักการ ของ php ไว้ไม่น้อย เขียนกันต่างบ้าง เหมือนกันบ้าง ล้วนระดมมาจากความรู้ และประสบการณ์
แล้วนำมาเรียบเรียงกันใหม่ .. ผมว่าอ่านดีครับ
– สังเกตเห็นว่า ปัจจุบันมีการเขียนกันไว้ใน blog แสดงว่า ความรู้ มักอยู่ใน blog ดังนั้นในกระบวนการ KM จึงมากใช้เป็นเครื่องมือในขั้นตอนหนึ่งของการจัดการความรู้
– สิ่งหนึ่งที่ทุกคนเหมือนกัน ถึงได้เขียนกันออกมา คือ อยากแบ่งปันความรู้ที่ได้จากการรวบรวม เรียบเรียง หรือผลทดสอบ นั่นเอง

http://www.thaiall.com/php/

http://mashable.com/2010/10/21/php-tips-for-beginners/

http://www.phpbuilder.com/columns/vaska20050722.php3

http://www.htmlgoodies.com/beyond/php/article.php/3907521/Top-10-PHP-Tips-for-Developers.htm

http://net.tutsplus.com/tutorials/php/quick-tip-7-super-handy-php-functions-for-beginners/

http://www.wmtips.com/php/tips-optimizing-php-code.htm

http://www.webdesigndev.com/programming/15-top-php-coding-tutorials-tips-and-tricks

http://coding.smashingmagazine.com/2008/11/18/10-advanced-php-tips-to-improve-your-progamming/
http://programming-4-u.blogspot.com/2012/05/10-php-tips-to-improve-your-programming.html

http://www.phpbuilder.com/columns/vaska20050812.php3

http://net.tutsplus.com/tutorials/php/10-principles-of-the-php-masters/

http://hungred.com/useful-information/php-micro-optimization-tips/

http://www.nerdparadise.com/tech/php/10tips/

การเพิ่ม hostname ใน localhost

hosts ใน etc เพื่อแก้ไข local hostname

หากต้องการสร้าง host name ขึ้นมาใน Windows 7

เช่น burin.hello.com

แล้วเรียกใช้ http://burin.hello.com
ชี้ไปที่ 127.0.0.1
สามารถแก้ไขในเครื่องของตนเองให้รู้จักชื่อที่สร้างขี้น
ทำโดยแก้ไขแฟ้ม hosts ใน c:/windows/system32/drivers/etc
เมื่อแก้ไขแล้ว save as เป็นแฟ้มใหม่
แล้วลบแฟ้ม hosts เดิม
แล้วเปลี่ยนชื่อแฟ้มใหม่เป็น hosts
เพียงเท่านี้ก็ ping หรือเปิดเว็บได้แล้วครับ

config of quiz in moodle 1.9

config of quiz in moodle 1.9
11 ก.ค.55 มีโอกาสเตรียม quiz ที่ทำใน moodle เครื่องหนึ่งใช้ moodle 1.9 แล้ว backup นำไป restore ในอีกเครื่องหนึ่งที่ใช้ moodle 2.2 เพราะถ้าทำที่ server ตัวเดียว หากหายไปก็จะยุ่ง โดยบทเรียนครั้งนี้มีดังนี้
บันทึกค่า configuration สำหรับการสร้าง quiz ว่ากำหนดแบบใด ให้นักศึกษาทำครั้งเดียว และไม่มีเฉลยออกมาในเวลานั้น เพราะถ้าใช้ค่า default จะเปิดให้นักศึกษาทำได้หลายครั้ง ซึ่งเป็นการฝึกปฏิบัติ โดยกำหนดให้ shuffle แต่ไม่ Adaptive และ Attempt ซ้ำไม่ได้ และใช้คะแนนจาก First Attempt ส่วน review ก็แสดงเฉพาะคะแนนหลังทำเสร็จ
ตัวแรกอยู่ที่ http://www.thaiall.com/moodle เพื่อน ๆ เข้าไปเรียนรู้ได้ครับ

การเปิดบริการ iis7 บน windows 7

open asp & asp.net on iis7

การเปิดบริการ iis7 บน windows 7 ผ่าน Control Panel, Programs and Features  , Turn Windows features on or off ถ้าเลือกเปิดบริการเฉพาะ Internet Information Services จะไม่บริการ ASP หรือ ASP.NET ถ้าต้องการบริการภาษา script  ก็ต้องเข้าไปเปิดบริการใน Internet Information Services, World Wide Web Services,  Application Development Features เพื่อให้รองรับแฟ้ม .asp หรือ .aspx  ในห้อง c:\inetpub\wwwroot

ถ้าต้องการเปลี่ยนห้อง

ก็ต้องเข้า Control Panel, Administrative Tools, Internet Information Services (IIS) Manager, Sites, Default Web Site, Basic Settings

อัพโหลดผู้ใช้เข้า moodle 2.2.1

moodle user upload
moodle user upload

การอัพโหลด รายชื่อผู้ใช้เข้าระบบอีเลินนิ่งของ moodle มีเงื่อนไข ดังนี้ 1) บรรทัดละ 1 คน 2) ทุกบรรทัดมีหนึ่งระเบียน แต่ละระเบียน แบ่งแยกด้วย , หรือเครื่องหมายแล่งแยกอื่น 3) ระเบียนแรกให้เป็นชื่อเขตข้อมูล 4) ชื่อเขตข้อมูล คือ username, password, firstname, lastname, email

ผมมีข้อมูลเป็นอีเมล และต้องการใช้ email เป็นรหัสสำหรับ login เช่น xxx@yyy.com แล้วต้องการเฉพาะ xxx จึงใช้ฟังก์ชันด้านล่างนี้

=LOWER(MID(E2,1,FIND(“@”,E2)-1))

ในโปรแกรม excel เพื่อให้ได้แฟ้ม csv

ผลทดสอบส่ง  597 คน เข้าระบบ เรียบร้อยดีครับ

การติดตั้ง drupal 7.8

drupal
drupal

ขั้นตอนการติดตั้ง drupal ซึ่งทดสอบใน thaiabc.com มีดังนี้
1. create database = drupal ใน mysql
2. download script แล้ววางไว้ในห้อง drupal ของ root
3. เปิด http://127.0.0.1/drupal/install.php
4. เลือก standard, english
Set up database
Database name = drupal
Database username = root
Database password = ว่างไว้
5. ดำเนินการจนติดตั้งสำเร็จ
6. http://127.0.0.1/drupal
7. Create new account
username = test
8. เข้าระบบในฐานะ admin ด้วย
Username = thaiabc
Password = abc2008
9. menu, People,
click edit of “test” user
Password = test2008
Status = active
10. menu, Modules
Blog = Enabled
11. add blog or menu

ขั้นตอนการติดตั้ง moodle 1.9.12 และ senayan3

โปรแกรม senayan3
โปรแกรม senayan3

บันทึกขั้นตอน จากกิจกรรมปรับปรุงรุ่นของโปรแกรมแก้วสารพัดนึกใน thaiabc.com เป็นรุ่น 8.0 โดยเพิ่ม moodle1.9.12 จากที่มี moodle1.5 ทำให้มี e-learning ใช้ 2 รุ่นและเปรียบเทียบกันได้ เหตุผลที่เลือก 1.9 เพราะที่  thaiall.com/moodle ใช้รุ่นนี้มาปีกว่าแล้ว แต่ไม่ใช้รุ่น 2.0 ขึ้นไป ด้วยเหตุว่า backup ในรุ่น 2.0 จะนำไป restore ใน 1.9 ไม่ได้ ถ้านำ backup ของ 1.9 ไป restore ใน 2.0 นั้นทำได้ และจากการทดสอบ restore  course จาก thaiall.com/moodle ในเครื่องใหม่นี้ พบว่านำมาใช้ได้ตามปกติ

ขั้นตอนการติดตั้ง moodle 1.9.12

1. เปิดบริการ apache2.0.52 และ mysql5.5.16
ตอนเปิดบริการในเครื่องที่ติดตั้ง skype อาจพบปัญหา port 80 ชนกันได้ครับ
2. เตรียม scripts ในห้อง /moodle19
3. สร้างห้อง /moodledoc19 เตรียมรับข้อมูลจากผู้ใช้
4. เริ่มติดตั้งด้วยการเรียก /moodle19/install.php
5. ต้องแก้ไข register_globals=Off ใน php.ini แล้วก็ restart apache
ถ้าไม่รู้ว่า php.ini อยู่ห้องใดก็เรียก function phpinfo()
6. พบขั้นตอนการติดตั้งดังนี้
– Checking your PHP settings
– Please conform the locations of this Moodle installation
Web Address = http://127.0.0.1/moodle19
Data Directory = C:\thaiabc\moodledata
– Now you need to configure the database
Type = MySQL
Host Server = localhost
Database = moodle19 (Create DB automatically)
User = root
Password = ว่างไว้
– Checking your environment
– Download language pack
– Configuration completed
– Copyright notice
– Current release information Moodle 1.9.12 (Build: 20110510)
– Setting up database : Database was successfully upgraded
– Setup administrator account.
Username = admin
password = Password#2555
– New settings – Front Page settings
Self registration = Email-based self-registration
7. ผลการเรียก http://127.0.0.1/moodle19 พบว่าปกติ
8. สร้างวิชา และ upload แฟ้มภาพ และเรียกใช้แฟ้มภาพ ไม่พบปัญหา

ขั้นตอนการ Restore course ของ moodle 1.9.12
1. เข้าไปในวิชาที่สร้างไว้แล้ว
2. เลือก Restore
3. เลือกแฟ้มที่ Backup ไว้จาก server อีกตัวหนึ่ง
4. เมื่อถามว่า Restore to
– Current course, deleting it first
– Current course, ading data to it
– new course
5. ทดสอบทั้ง 3 แบบ พบว่าใช้งานได้ปกติ
6. ถ้าทดสอบ new course ก็จะได้วิชาใหม่อีก 1 วิชา ไม่ทับวิชาเดิม

ขั้นตอนการติดตั้ง senayan3
1. เปิดโปรแกรม phpmyadmin
2. สร้าง db : senayan3 แล้วเข้าไปใน db นี้
3. สั่งประมวลผล sql 2 แฟ้มในห้อง /senayan3/sql/install
4. เริ่มจาก import แฟ้ม senayan.sql ตามด้วย  sample_data.sql
5. แก้ไข sysconfig.inc.php
define(‘DB_NAME’, ‘senayan3’);
define(‘DB_USERNAME’, ‘root’);
define(‘DB_PASSWORD’, ”);
6. เข้าระบบด้วย
user: admin
password: admin
7. ทดสอบที่ http://127.0.0.1/senayan3 พบว่าใช้งานได้ปกติ
8. แก้ไขตัวแปรใน sysconfig.inc.php อีก 2 ตัวแปร
$sysconf[‘mysqldump’] = ‘c:/thaiabc/mysql/data’;
$sysconf[‘temp_dir’] = ‘c:/tmp’;

http://www.thaiall.com/blog/burin/3955/
http://slims.web.id/web/
http://sourceforge.net/projects/senayanlib/
http://www.senayan.kru-ple.com/

SENAYAN 3.0 stable
Core Senayan Developer :
Hendro Wicaksono – hendrowicaksono@yahoo.com
Arie Nugraha – dicarve@yahoo.com
Below are the instructions for new installation of SENAYAN :
1. Put senayan3-stable3 folder in web document root
2. create senayan database in mysql
3. Open your phpMyAdmin or mysql client utility (or other mysql manager softwares) and
run sql/install/senayan.sql inside your SENAYAN application database.
4. Re-check your database configurations and others configuration in sysconfig.inc.php.
5. If you have your own custom template, Adjust detail_template.php file or just overwrite it
with detail_template.php from default template directory

Web Site Development Process – The life-cycle steps

กระบวนการพัฒนาเว็บไซต์
Web Site Development Process – The life-cycle steps
by Benny Alexander

Like the traditional software development, the process of web site development can also be divided into different life cycle steps. This can help to format the team effectively, and the standards and procedures can be adopted to achieve maximum quality. This article explains the steps of development which can be possibly arranged as a process of web engineering. This is just a guideline to help you, to know, how a process can be done. The steps may vary from application to application. Write me your suggestions and comments on this article to enquiry@macronimous.com.
A system development process can follow a number of standard or company specific frameworks, methodologies, modeling tools and languages. Software development life cycle normally comes with some standards which can fulfill the needs of any development team. Like software, web sites can also be developed with certain methods with some changes and additions with the existing software development process. Let us see the steps involve in any web site development.
1. Analysis:
Once a customer is started discussing his requirements, the team gets into it, towards the preliminary requirement analysis. As the web site is going to be a part of a system, It needs a complete analysis as, how the web site or the web based application is going to help the present system and how the site is going to help the business. Moreover the analysis should cover all the aspects especially on how the web site is going to join the existing system. The first important thing is finding the targeted audience. Then, All the present hardware, software, people and data should be considered during the time of analysis. For example, if a company XYZ corp is in need of a web site to have its human resource details online, the analysis team may try to utilize the existing data about the employees from the present database. The analysis should be done in the way, that it may not be too time consuming or with very less informative. The team should be able to come up with the complete cost- benefit analysis and as the plan for the project will be an output of analysis, it should be realistic. To achieve this the analyst should consult the designers, developers and testers to come up with a realistic plan.
Input:Interviews with the clients, Mails and supporting docs by the client, Discussions Notes, Online chat, recorded telephone conversations,Model sites/applications etc.,
Output: 1. Work plan, 2. Cost involved, 3. Team requirements, 4. Hardware-software requirements, 5. Supporting documents and 6. the approval.
2. Specification Building:
Preliminary specifications are drawn up by covering up each and every element of the requirement. For example if the product is a web site then the modules of the site including general layout, site navigation and dynamic parts of the site should be included in the spec. Larger projects will require further levels of consultation to assess additional business and technical requirements. After reviewing and approving the preliminary document, a written proposal is prepared, outlining the scope of the project including responsibilities, timelines and costs.
Input: Reports from the analysis team.
Output: Complete requirement specifications to the individuals and the customer/customer’s representative.
3. Design and development:
After building the specification, work on the web site is scheduled upon receipt of the signed proposal, a deposit, and any written content materials and graphics you wish to include. Here normally the layouts and navigation will be designed as a prototype.
Some customers may be interested only in a full functional prototype. In this case we may need to show them the interactivity of the application or site. But in most of the cases customer may be interested in viewing two or three design with all images and navigation.
There can be a lot of suggestions and changes from the customer side, and all the changes should be freezed before moving into the next phase. The revisions could be redisplayed via the web for the customer to view.
As needed, customer comments, feedback and approvals can be communicated by
e-mail, fax and telephone.
Throughout the design phase the team should develop test plans and procedures for quality assurance. It is necessary to obtain client approval on design and project plans.
In parallel the Database team will sit and understand the requirements and develop the database with all the data structures and sample data will also be prepared.
Input: Requirement specification.
Output: Site design with templates, Images and prototype.
4. Content writing:
This phase is necessary mainly for the web sites. There are professional content developers who can write industry specific and relevant content for the site. Content writers to add their text can utilize the design templates. The grammatical and spelling check should be over in this phase.
Input: Designed template.
Output: Site with formatted content.
5. Coding:
Now its programmers turn to add his code without disturbing the design. Unlike traditional design the developer must know the interface and the code should not disturb the look and feel of the site or application. So the developer should understand the design and navigation. If the site is dynamic then the code should utilize the template. The developer may need to interact with the designer, in order to understand the design. The designer may need to develop some graphic buttons when ever the developer is in need, especially while using some form buttons. If a team of developers is working they should use a CVS to control their sources. Coding team should generate necessary testing plans as well as technical documentation. For example Java users can use JavaDoc to develop their documents to understand their code flow. The end-user documentation can also be prepared by the coding team, which can be used by a technical writer who can understand them, writes helps and manuals later.
Input: The site with forms and the requirement specification.
Output : Database driven functions with the site, Coding documents.
6. Testing:
Unlike software, web based applications need intensive testing, as the applications will always function as a multi-user system with bandwidth limitations. Some of the testing which should be done are, Integration testing, Stress testing, Scalablity testing, load testing, resolution testing and cross-browser compatibility testing. Both automated testing and manual testing should be done without fail. For example its needed to test fast loading graphics and to calculate their loading time, as they are very important for any web site. There are certain testing tools as well as some online testing tools which can help the testers to test their applications. For example ASP developers can use Microsoft’s Web Application Test Tool to test the ASP applications, which is a free tool available from the Microsoft site to download.
After doing all the testing a live testing is necessary for web sites and web based applications. After uploading the site there should be a complete testing(E.g.. Links test)
Input: The site, Requirement specifications, supporting documents, technical specifications and technical documents.
Output: Completed application/site, testing reports, error logs, frequent interaction with the developers and designers.
7. Promotion:
This phase is applicable only for web sites. Promotion needs preparation of meta tags, constant analysis and submitting the URL to the search engines and directories. There is a details article in this site on site promotion, click here to read it. The site promotion is normally an ongoing process as the strategies of search engine may change quite often. Submitting a site URLs once in 2 months can be an ideal submission policy. If the customer is willing, then paid click and paid submissions can also be done with additional cost.
Input: Site with content, Client mails mentioning the competitors.
Output: Site submission with necessary meta tag preparation.
8. Maintenance and Updating:
Web sites will need quite frequent updations to keep them very fresh. In that case we need to do analysis again, and all the other life cycle steps will repeat. Bug fixes can be done during the time of maintenance. Once your web site is operational, ongoing promotion, technical maintenance, content management & updating, site visit activity reports, staff training and mentoring is needed on a regular basis depend on the complexity of your web site and the needs within your organization.
Input: Site/Application, content/functions to be updated, re-Analysis reports.
Output: Updated application, supporting documents to other life cycle steps and teams.
The above-mentioned steps alone are not strict to web application or web site development. Some steps may not applicable for certain tasks. Its depend on the cost and time involved and the necessity. Sometimes if it is a intranet site, then there will be no site promotion. But even if you are a small development firm, if you adopt certain planning along with this web engineering steps in mind, it will definitely reflects in the Quality of the outcome.